How can you express something you are passionate about?
That was the main question with this project. This was our final project for our junior year. For the Explorations Project, all of the juniors had to explore their own passions and improve upon a particular skill set that addresses the 21st Century Skills. What I wanted to do for explorations was to learn how to use Source Filmmaker, otherwise known as SFM. SFM is a 3d video capture and editing software that runs everything that is on the Source engine.  I wanted to learn how to use SFM for a long time, and that was what I did. I wanted to start off small, and just make posters using SFM. I went on to use SFM again for the Zenith project (the final project for seniors), and made an animated video. For this project, I settled with just getting into SFM and learning what it had to offer, such as the character models, the maps, the cameras, the lighting, the bone tools, and more. With what I learned, I addressed multiple 21st Century Skills, such as visual literacy, creativity, self-direction, and risk taking.
Making an SFM Poster
The process for making posters in SFM is not very easy. Depending on what you want your poster to look like, the difficulty of making it will vary. If you just want a single person on your screen with minimal lighting, it’s easier than if you want multiple characters in one shot with particle effects and multiple objects. I will describe in detail how to make a poster from start to finish. If you want an extremely simplified set of instructions, refer to my infographic that is further down the page.
The first thing you want to do is to load a map for the poster to be on by going to File -> Load map, or pressing Ctrl+L. From there, there is a large list of maps to pick from, most of which are from Team Fortress 2, as well as a few very basic maps that you can do specific tests on, like a map that’s just a dark room, which is good for practicing lighting. Having prior knowledge about the maps that are available will help a lot when deciding which one you want to use. If none of these maps are any good for you, there are plenty of maps you can download from the Steam Workshop. To move around the map, you click and hold on the screen, and use the WASD keys to move. Drag your mouse to change direction. Hold the Shift key to move faster. Use the Z and X keys to move the camera up and down.
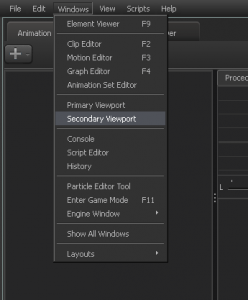 The next step is to set up the scene. There are multiple settings I used to make the poster-building process easier. One thing I did was to turn on a secondary viewpoint. I did this so I can set up a camera that will take the shot, and have a Work camera that I can move around the scene in without affecting the final result. The camera in the second viewpoint is what ends up being rendered at the end.
 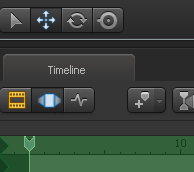 Another thing that I did, and should be done, is to switch to the motion editor. On the bottom of the screen, there is a timeline, and right under that tab that says “Timeline”, there are 3 different editors: the clip editor, the motion editor, and the graph editor. I used the motion editor the entire time during this project. I’m not 100% sure what the other editors are used for, but they were definitely not for what I needed. If you want, you can set up the rendering camera now, but you can always change it later on.
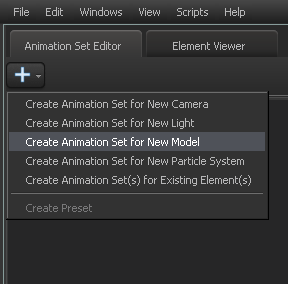 The next thing you want to do is to pick a character you want to use. I wanted to use the TF2 Scout, so I go to the plus button that is under the Animation Set Editor, and I pick “Create Animation Set for New Model.” Once you enter the model selector, you will notice that there are thousands of different models that come from different Source games, but I knew what I wanted, and I found what I needed. If
 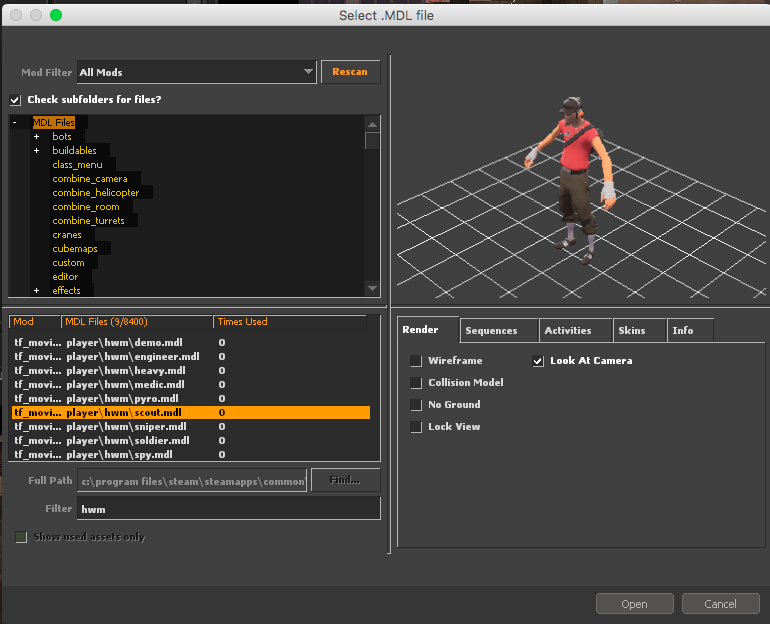 you are going to use the TF2 models, I highly recommend using the HWM models. The reason for this is that there are multiple models for the same character available, but the HWM version is better. This is because that the model itself looks a bit better than the in-game model, and with the HWM model, you are able to take off certain clothing pieces and replace them with other cosmetics to your heart’s content. You are not able to do this with the in-game model.
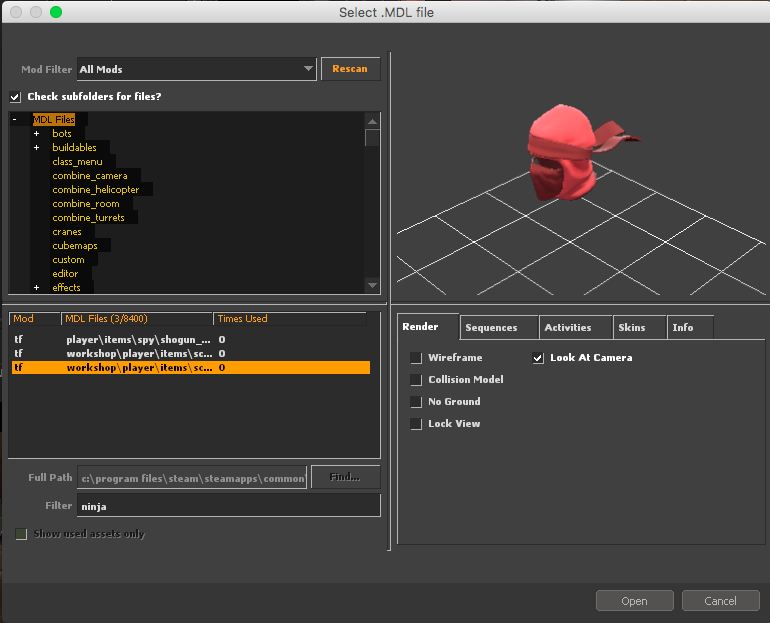 From here, I decided to put cosmetics on my character and give him a weapon as well. If you want to add any cosmetic or weapon models, you once again have to create an animation set for a new model. Once you are back at the list, you can look for the cosmetic pieces you want. Again, having prior knowledge of the models that are available will help a lot. When I was looking through the list, I noticed that the name of the model doesn’t always match the name of the item from the game that it comes from. Since I was looking for primarily TF2 items, I used this list to find the exact name of the model I was looking for. Once you have the cosmetics you want, you can disable certain cl
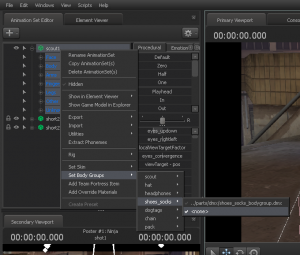 othing pieces that the default model already has on. In order to do this, you have to right-click the animation set for the character, then go to Set Body Groups. From there, you might have multiple options for what clothing pieces to turn off. You can pick one of these items, and select the “<none>” option so they disappear. Once you’ve done that, now comes putting the new clothing pieces on the character. When you expand the animation set for the cosmetic, you will notice a lot of bones that can be altered. What you have to do now is to go back to the animation set for the character, and expand the folders to reveal their bones as well. Now, look for all of the bones that the character and the cosmetic have in common. Once you have done that, you have to click and drag each bone from the character onto the corresponding bone in the item and drop the bone there.
 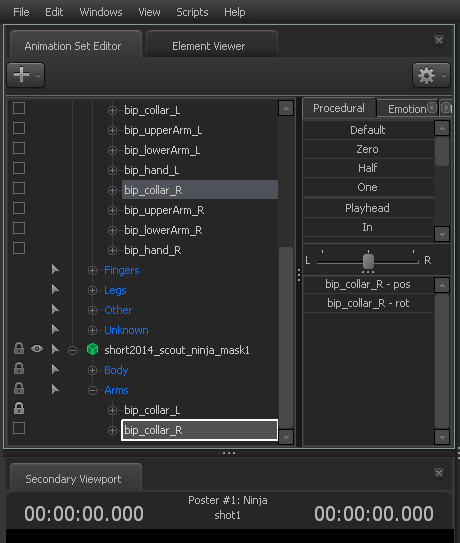 You will notice that this locks the file. What we just did was that we linked the bone from the cosmetic to the character for future use. Another way to do this (which I discovered several months after this project) is to just click and drag the character model onto the cosmetic, which will lock all of the corresponding bones at once. One you finished linking all of the bones, go to the procedural tab that is to the right of the list of animation sets, and find the Zero bar. Now, you have to select all of the newly linked bones, click the left edge of the Zero bar, and drag it all the way to the right of the bar. This moves the cosmetic right into place so that the character is now wearing the cosmetic. You can repeat this as many times as you want for each cosmetic. If you want to give the character a specific weapon, the weapons have their own weapon bone that corresponds with the character. Repeat the process used for the cosmetic with the weapon. Do be aware that some characters will have their weapon bone on only one hand, and it angles the weapon a specific way. If you want to change the way the character holds the weapon (for example, I wanted my character to hold the weapon upside down, and on the hand that the weapon bone wasn’t on), you can still perform the process, but then you will have to unlock the bones afterward and adjust the position of the weapon yourself. You will still have to reposition the fingers manually either way. There is an easier method of adding these things, which is by right-clicking the character file and selecting “Add Team Fortress Item” and selecting the item you want, but this can only be done with cosmetics and weapons that are already in the files from downloading SFM. Anything added from the workshop will still have to be put on your character manually.
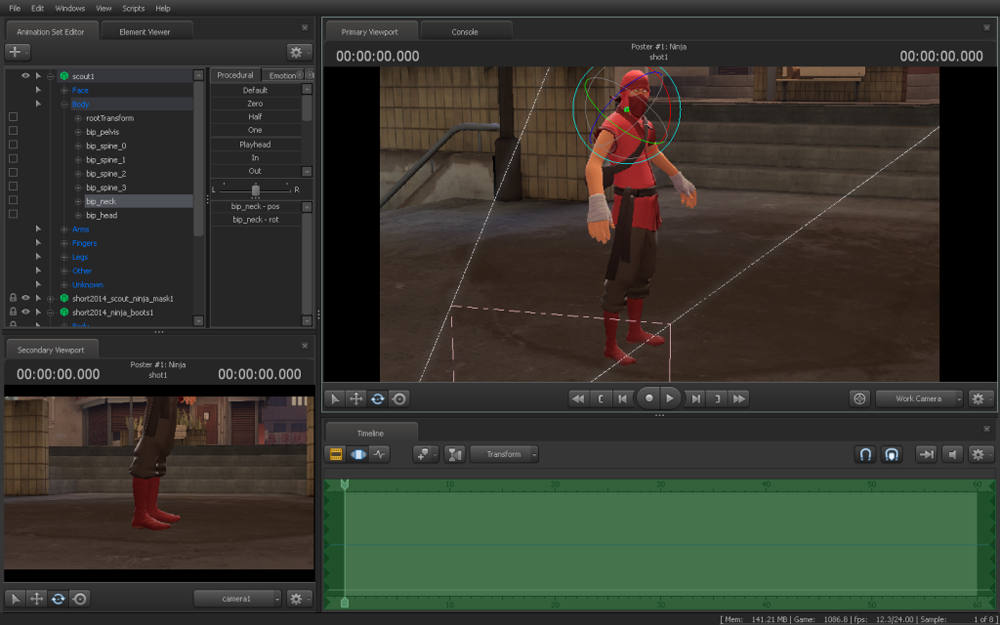
Now it is time to start positioning the character. Just remember that not every bone is divided off in the best way. There are a lot of bones in the “unknown” section that can control some important parts of the body as well. All of the body parts are going to have several bones that are linked with those parts. For example, if you want to adjust the arm, you can adjust the position of the collarbone, the upper arm, the lower arm, and the hand. If you want to adjust the torso and the head, the spine is split up into 3 sections, as well as the neck and the head, so you can adjust all of those. The easiest way I found to do this is to just click the parts in the bone list, and pick one of the multiple tools used to adjust them. 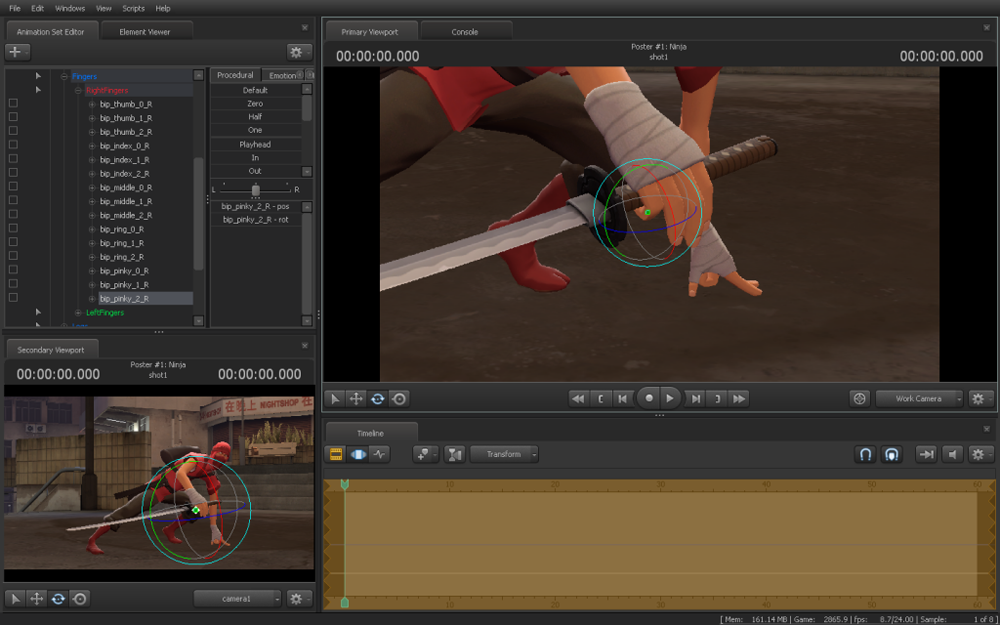 On the bottom left corner of the viewpoints, you are given a bunch of 3d manipulator tools that can change the position of the bone. One of the tools allows you to rotate a bone in the x, y, or z-direction. The outer ring allows you to rotate the bone left or right depending on the direction your camera is facing. Another tool allows you to move bones in an x, y, or z-direction. Holding the middle square allows to just move it in any direction.
 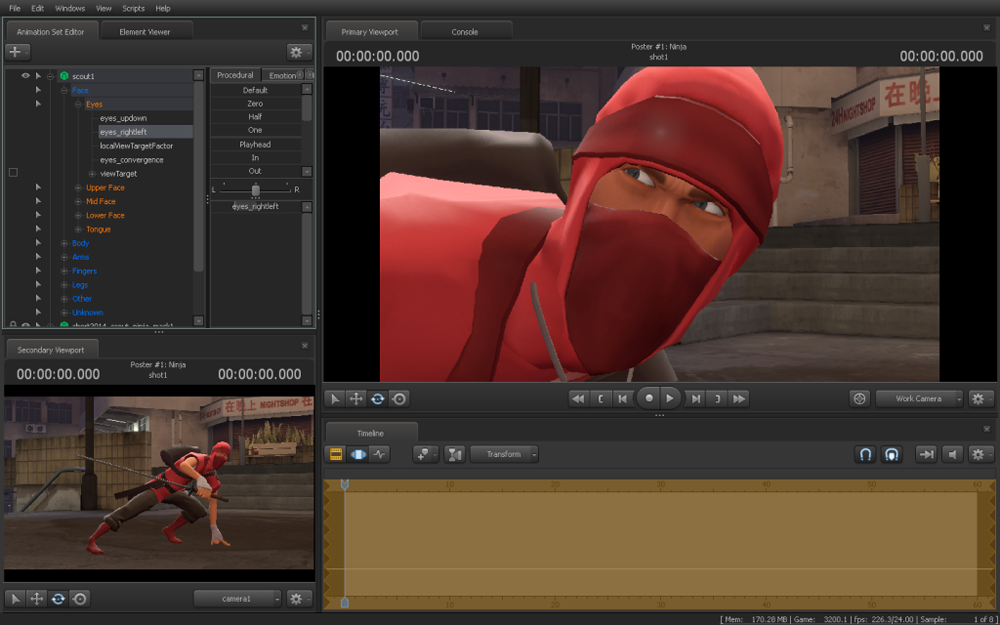 There are other tools that act similar to the previous 2 tools I mentioned, and good use of all 3 tools can allow for some really nice posters. Personally, I only used 2 of the tools for my posters, but you can do whatever you want with these tools. If you want, you can go and change the facial expressions as well. If you go to the “Face” region, you can change basically every part of the face, from the eyebrows to the position of the nose to where the eyes are looking. If you look next to the “Procedural” tab, there is an “Emotion” tab right next to it. This contains a lot of preset facial expressions, so you don’t have to change every part of the face to change expressions all the time.
Now we are approaching the final steps of the poster. Now that you know how you want the character to look, now is the best time to adjust the main camera. I recommend making an animation set for the camera as well so that it doesn’t accidentally get lost. Click the arrow that is next to “camera1,” and make a new animation set for it. 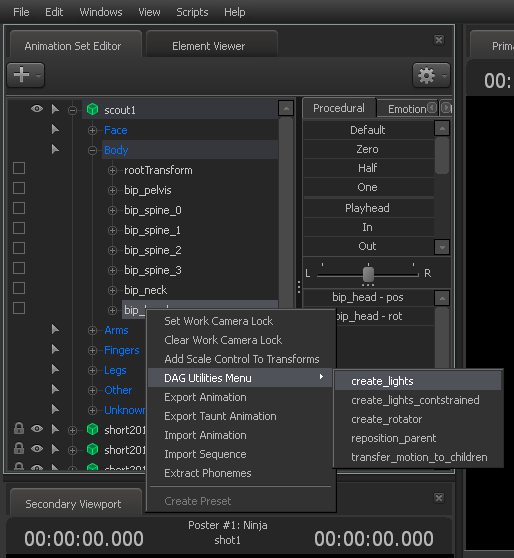 If you are using only one camera, or multiple cameras, you can rename the camera if you want to. Now you can start adjusting the camera. If you click and drag the screen while holding the R key, you can rotate the camera, giving you the nice angle that you want. You can change the aperture, give the camera a focal distance, change the tone of the map, and many more things that change the look of the scene. From here, I wanted to add lights to the character. One way to add lights is to go to the bone list and right click the “bip_head” bone (you can do the same process with other bones, but this won’t work for every bone). Go to where it says “DAG Utilities Menu,” and click “create_lights.”
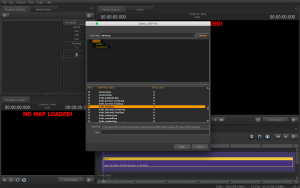
 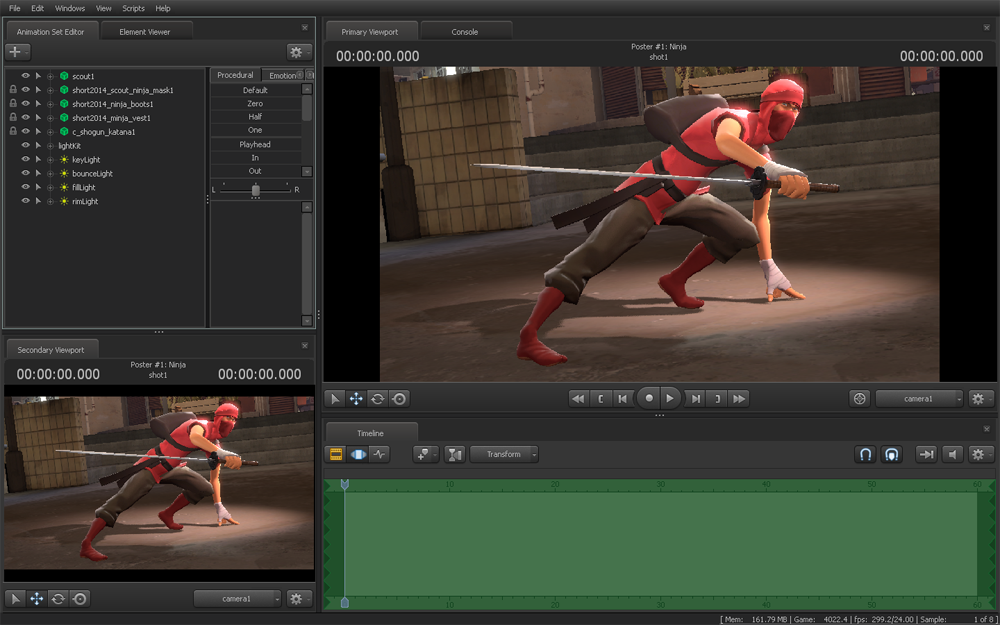 From here, there are multiple lights that are made that center on the bone you select. Another way to spawn a light source is to go to the plus tab and make an animation set for a new light. You can adjust each of these lights, and they affect the outcome differently. You can change the direction they point, the intensity of the light, the radius of the light, and more. If you want to take a look at a more in-depth lighting tutorial, go to this link. There are still more things you can add to give the scene more spectacle. If you want to add some particle effects, like some flames or beams of light, you can do that as well. The process for adding particle effects is similar to adding models, but it’s done on a different path. The first thing you need to do is to go to the plus sign and click on “Create Animation Set for New Particle System.”
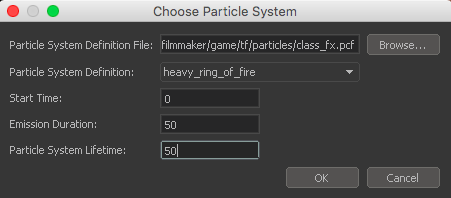 After that, you will see a small window asking you to pick a Particle System Definition File. Click on “Browse…,” and you are taken to a massive list of particle folders. Pick one, and you are given a massive list of particles in the folder. There is a lot to choose from. If you know which particles you want, having a list like this one can help you locate the exact one you need. I recommend changing the emission duration and the particle system lifetime to having a lot of seconds. I say this because particles are played on a set animated loop, and they won’t show up if you are at the beginning of the timeline. Once you are done setting it up, hit the play button, and let it run for a few seconds. Pause it at the right time to get the look from the particle you want, as it does move around. Chances are that you won’t be able to see the particle, even if you hit play. If this happens, here’s what you should do.
 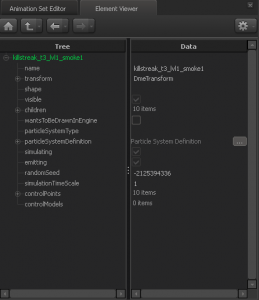 First, right-click the particle in the animation set menu, and click “Instance Particle System.” You should always do this with particles. If you don’t, you won’t be able to edit the particle. The next thing you should do is to right click, go to “Show in Element Viewer,” and select “Particle System.” You are then thrown into the Element Viewer. Now, you need to click the box with the 3 dots next to “Particle System Definition.” Once you are in the definition, look for the initializer subfolder, and find “Remap Control Point to Vector.”
 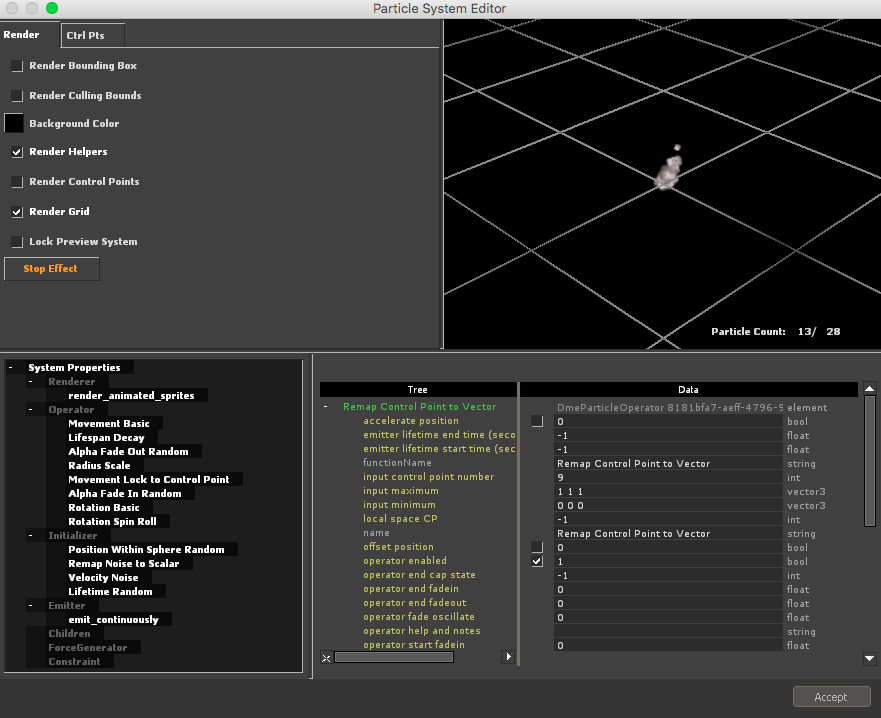 If that isn’t there, then you can probably already see the particle. If it is there, delete it. Now, you can see the particle. If you want to change the color of the particle, look around the system properties for some RGB scales to change. Maybe system properties itself has the scale. Maybe its in one of the subfolders. It might differ for different particles, and some particles have multiple RGB scales. Play around with it, and find something you like. Once you do that, hit Accept, and go back to the primary viewpoint. From here, move the particle, angle it the way you want, hit play for a few seconds, and find something you like. If there is no Particle System Definition, and you still can’t see the particle, then I don’t know how to help you.
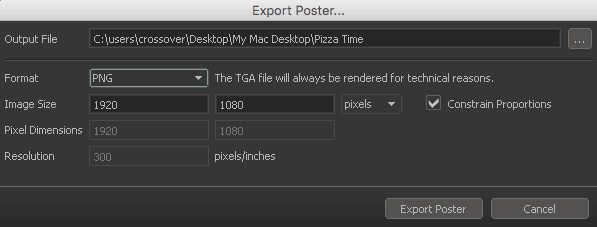 Now, it is time to render. Be sure to save your product, and go to File -> Export -> Poster. From here, select where you want to save the file, and pick what you want to save the file as. It will always automatically export as a .tga file anyway, so just pick .png or .jpg so you get both. It never hurts. Once you export, it will render a bit, and then you got yourself a finished poster. If you want, you can always do some post editing on some other photo editing program, but at least you can now pat yourself on the back for finishing the hard part.
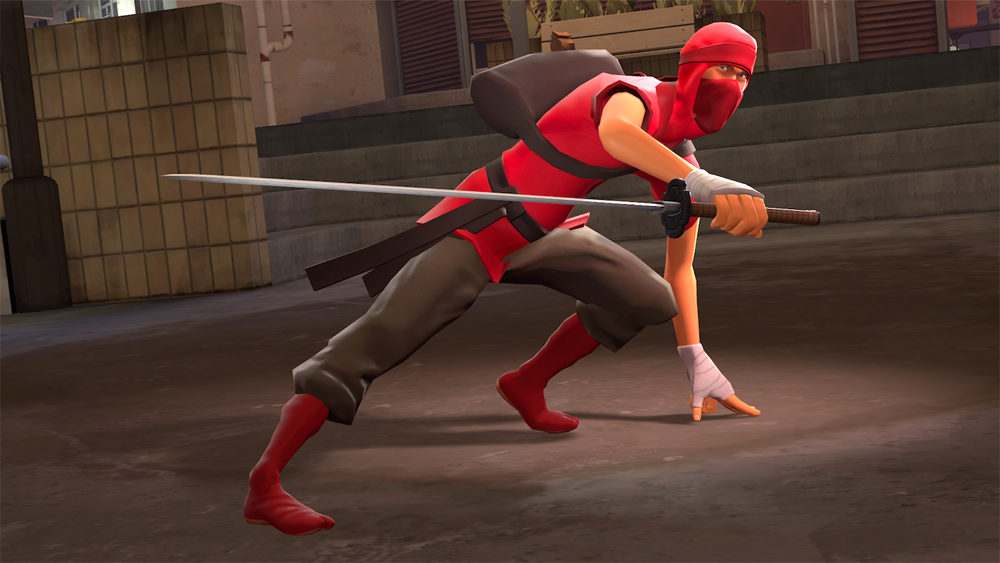
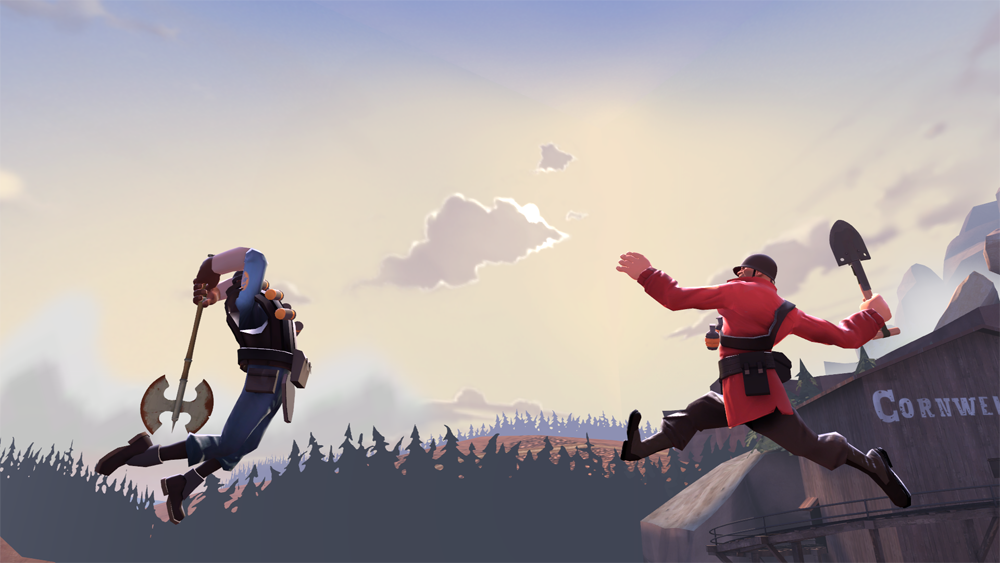
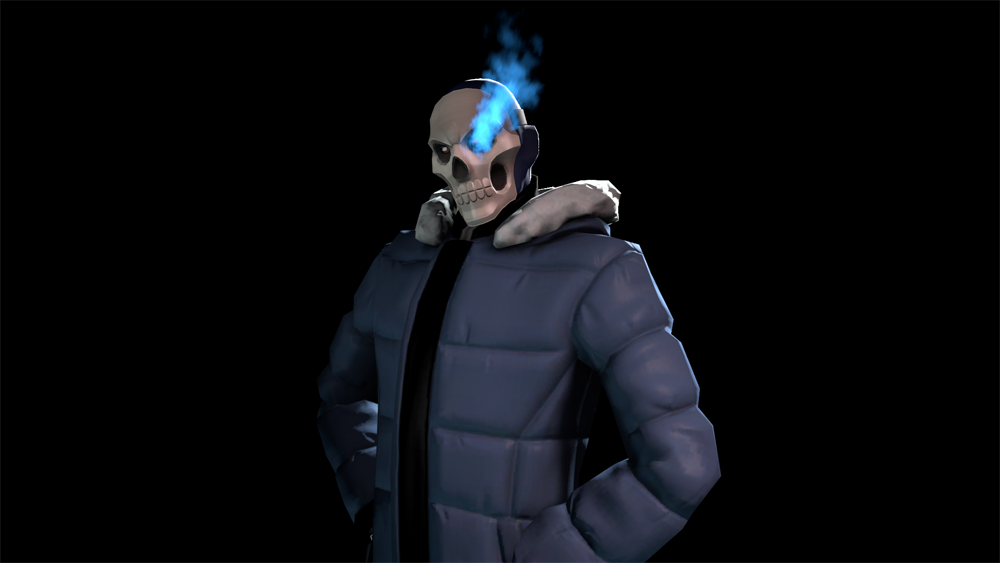
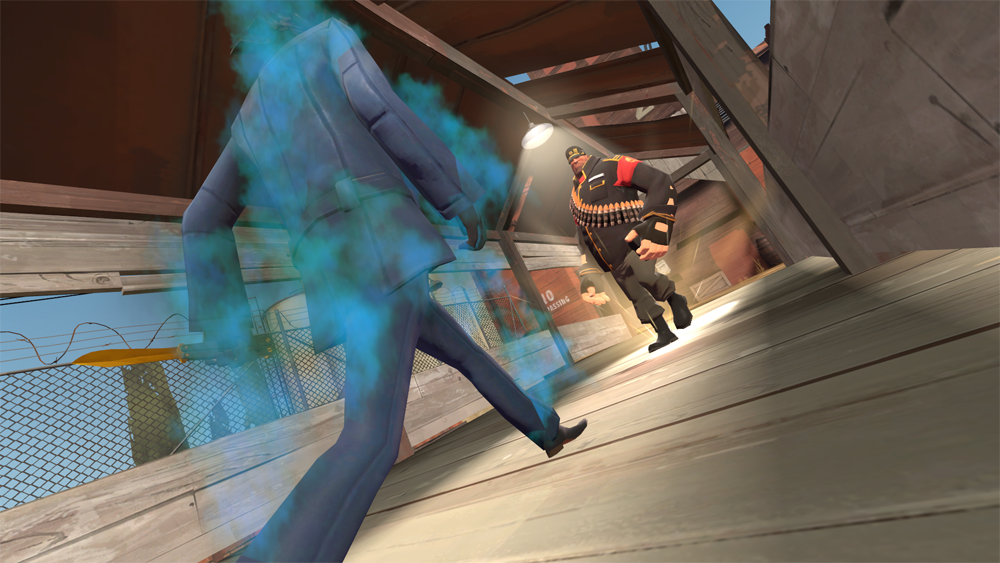
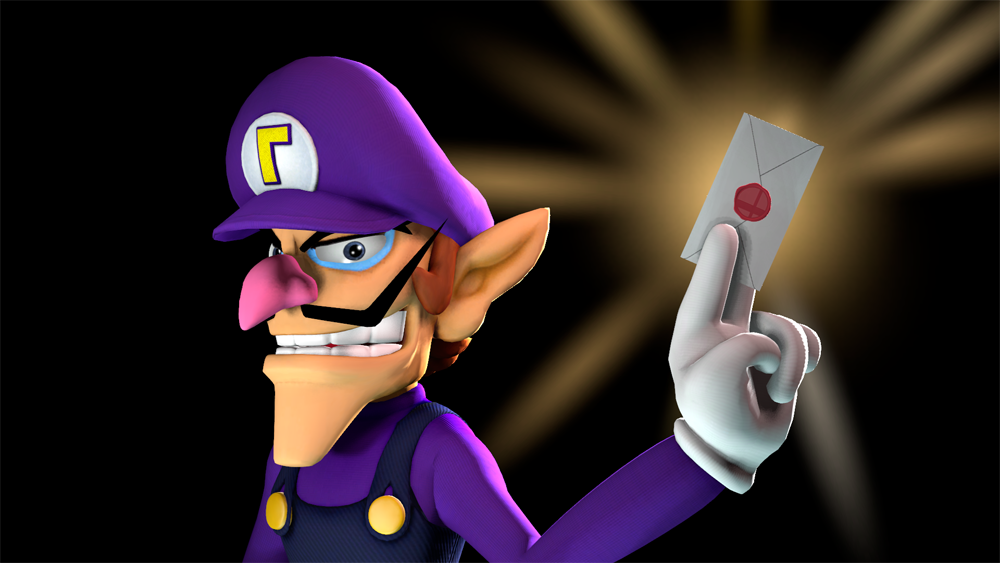
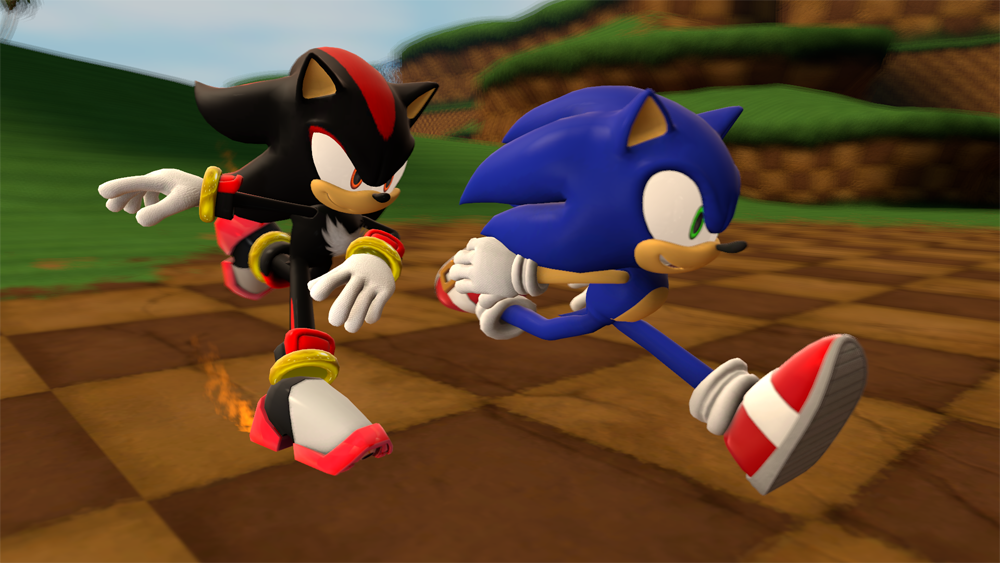
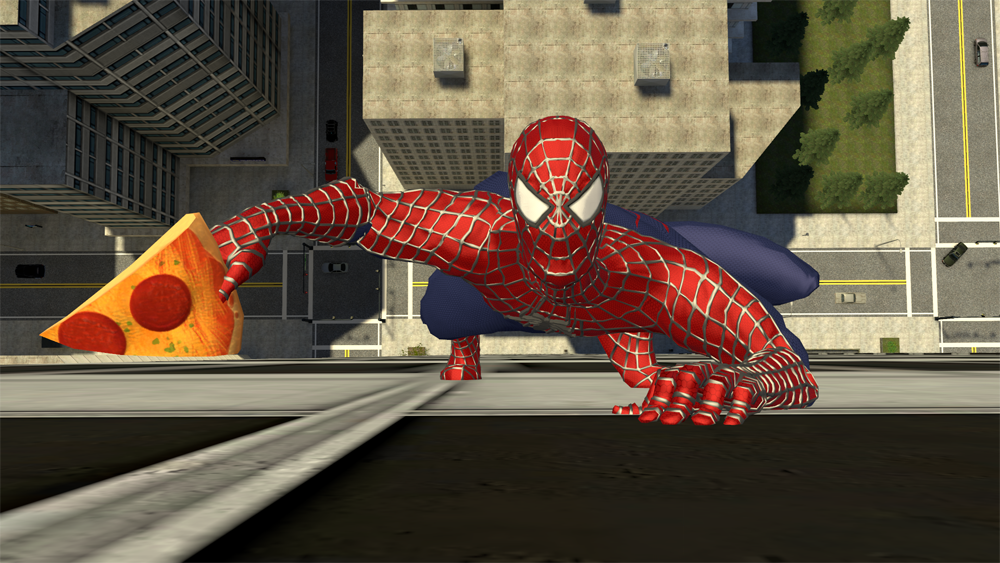
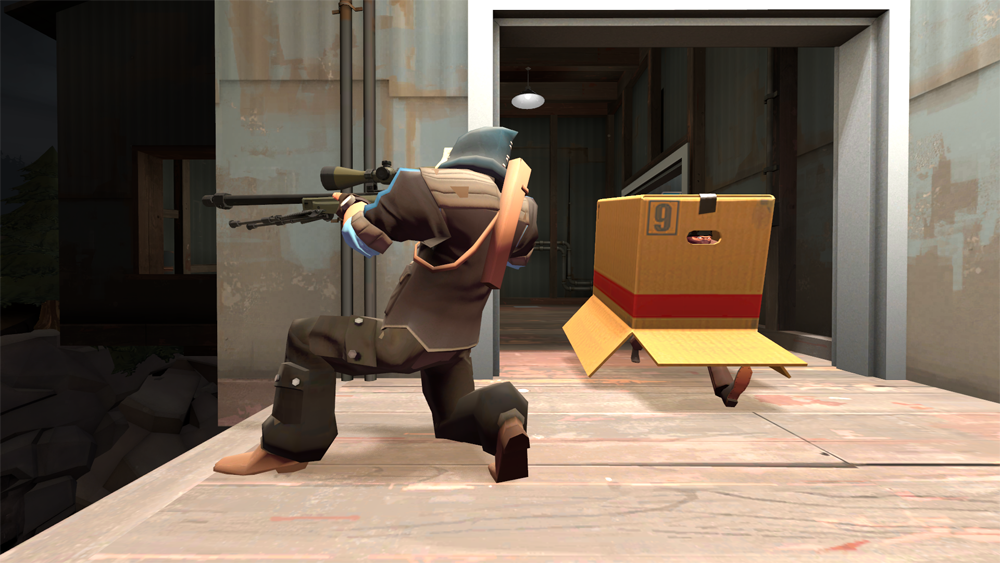
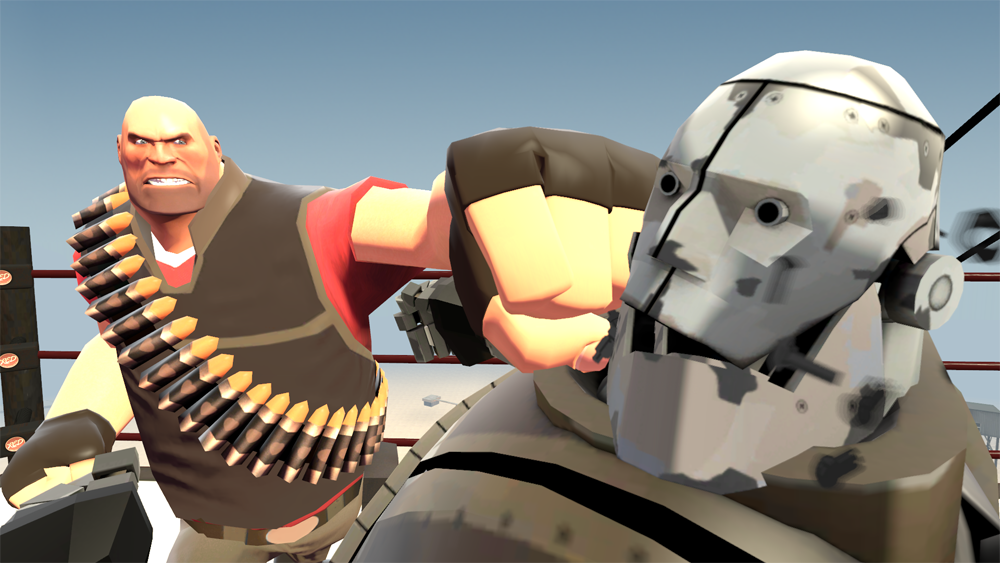
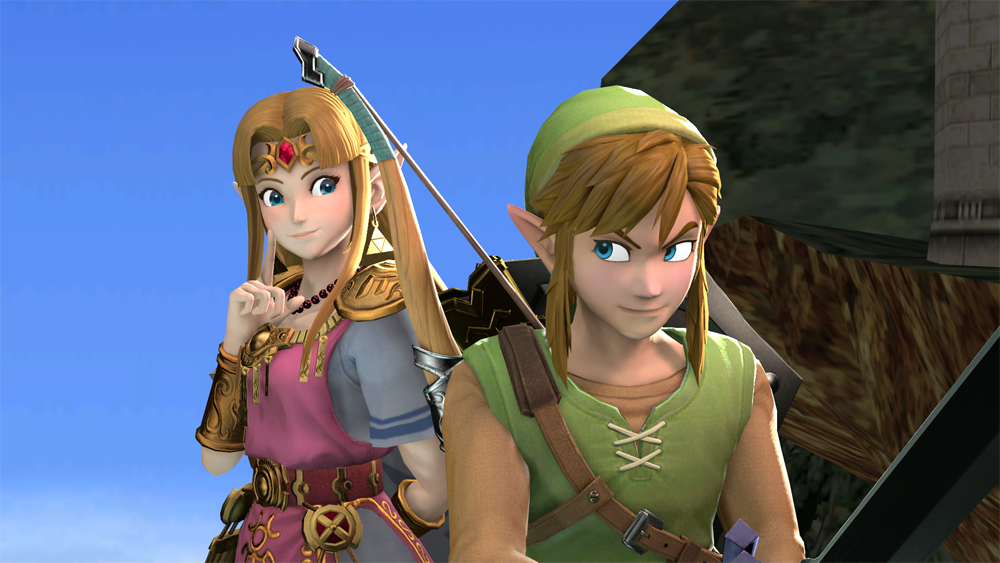
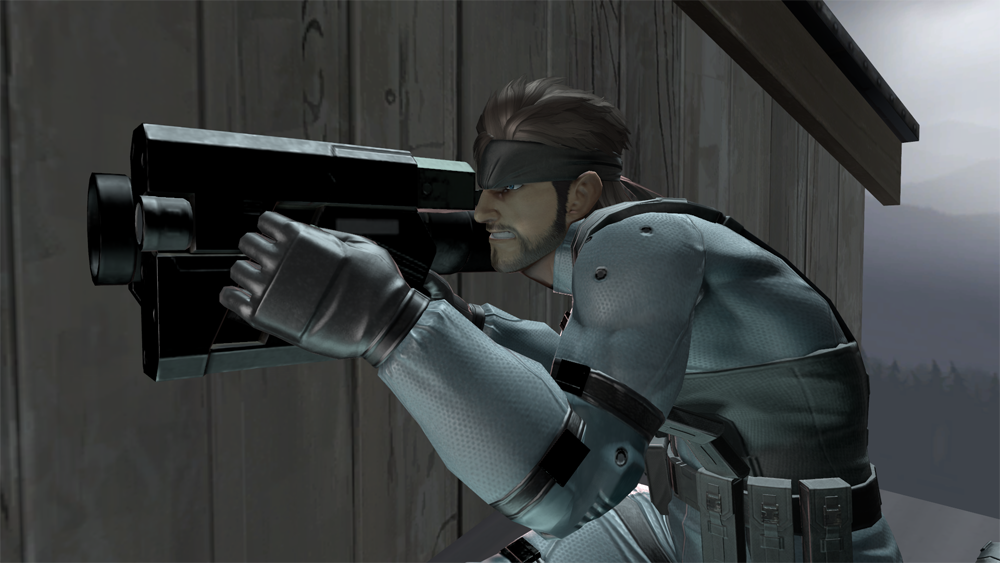
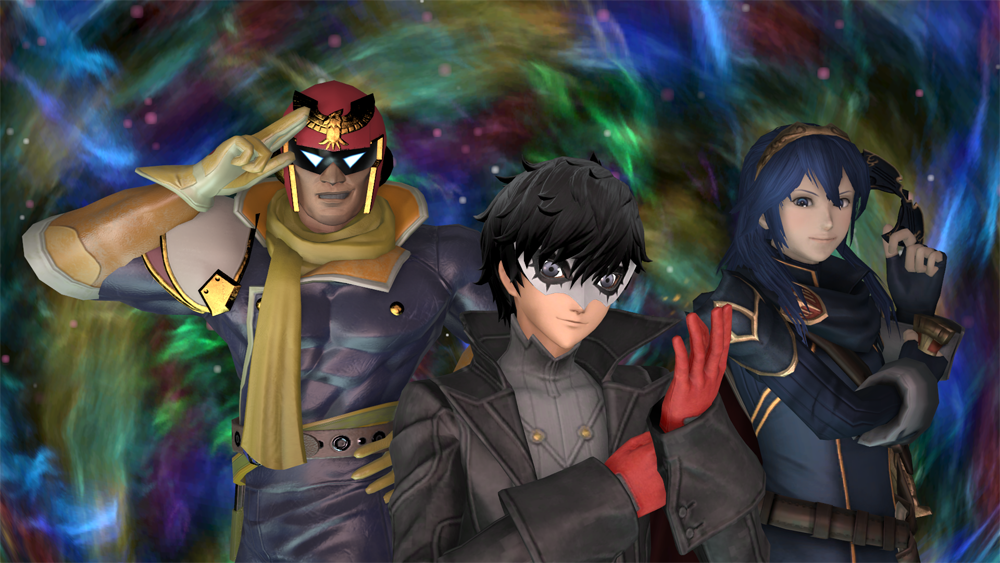
Here are the posters that I made:

Experimental Infographic
We had to make an infographic that explained our explorations project. Many people had topics that had history about the topic, or why the topic was important. I didn’t really know how to make an infographic off of my topic, since my topic didn’t really have any historical or significance pieces about it. The only thing I could really do was to just make it a list infographic about the process of what I did.
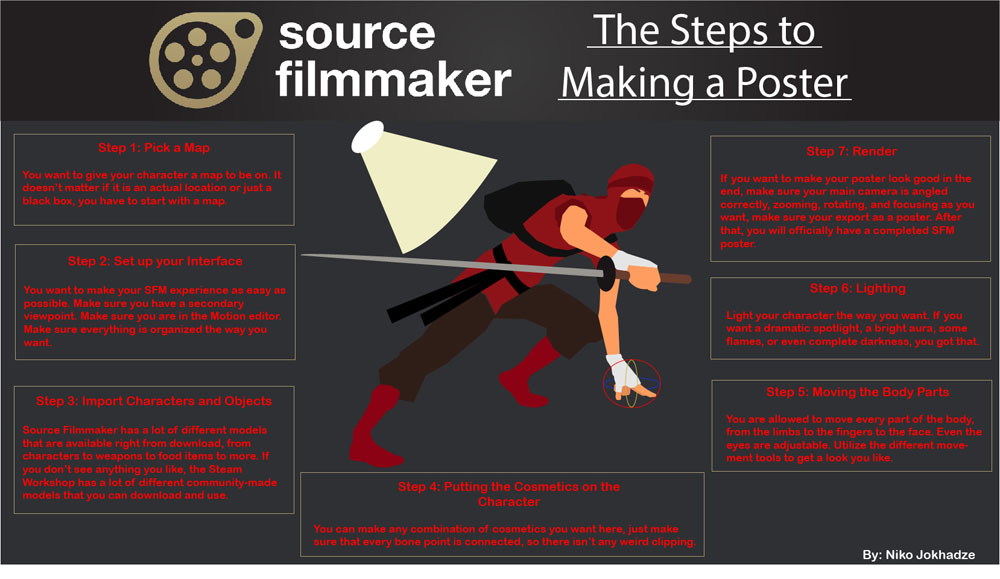
Here’s the infographic of the topic.
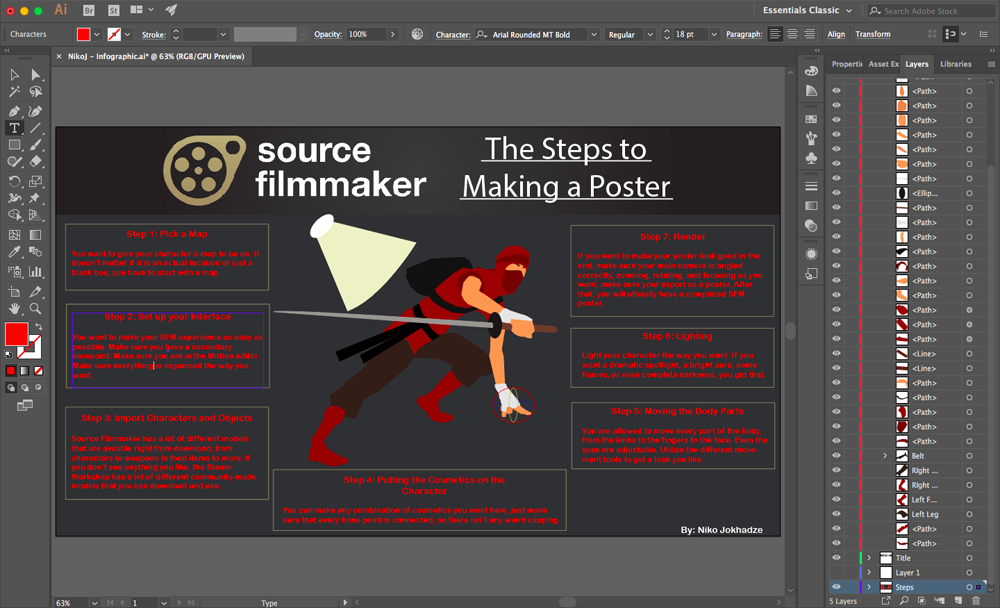
Here’s an image of how I made this infographic.
Reflection
I valued a lot from this exploration project. It made me think a lot about what goes into a successful poster. A lot of pieces had to come together to make something that was at least decent. I felt like I did benefit as a digital artist doing this project. I learned a program that I have wanted to learn, and this gave me a start to the passion project I had.
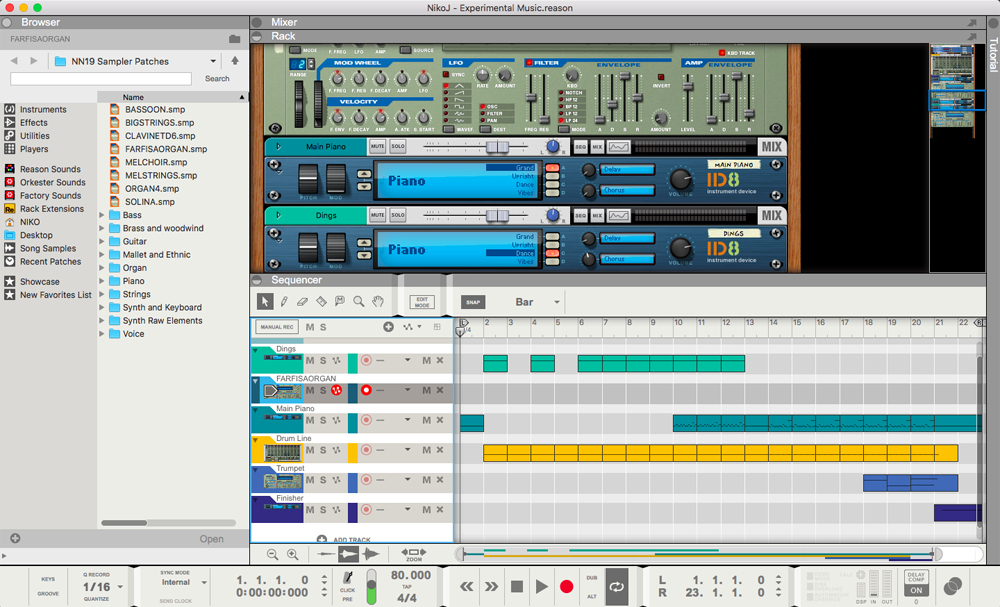
Experimental Music
We also had to make a small piece of music during the explorations unit. This was meant to be a way to play around with the Pro Tools or Reason programs, and make a song that had to be at least 60 seconds long. I think I made something that was just okay. The thumbnail has remnants of one of my original ideas for my Zenith, but I changed that idea during the Explorations project.
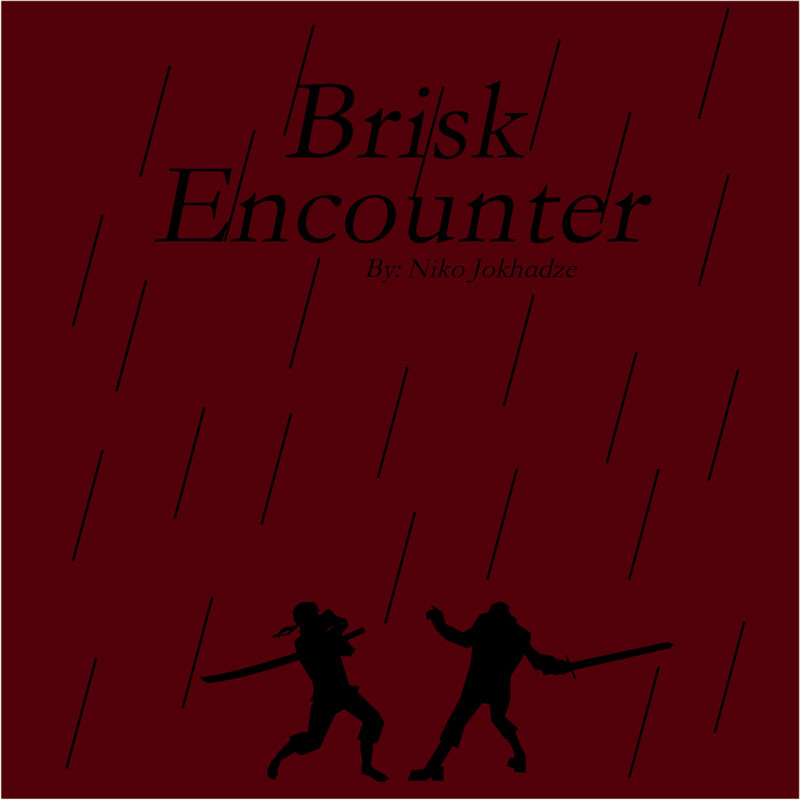
Here’s the thumbnail I made for the song, which includes the title of the song.
Do you people really care about how we make this stuff?
Exploration’s Presentation
We had to make a presentation of our exploration’s project as well. The goal was to get it under 5 minutes, which I definitely wasn’t able to do. I really wanted to go on for longer, but I had to rush it a bit at the end.
Here is a link to the PDF of the slides.
And here’s my presentation: