Funny Images
In this assignment, I had to combine 2-3 images together to create one image. Using Photoshop, I used various effects and tools to blend the images together to make it look more realistic. The first picture contrasts the size of a giant baby bird with a tiny squirrel sitting on top of it. The second picture was made using a picture of a pink stuffed animal, a crochet fish keychain, and my friend. I gave my friend a fish head and had the stuffed animal chase her.


This assignment was a fun way to explore Photoshop more in depth. It made me realize that I can create all sorts of funny images and I am excited to make more in the future.
Motion Graphics
This video was made using After Effects and its animation tools. In this video, various visuals are synced up to the music by matching up motions to the volume, and unique animations are created using keyframes.

This video was quite challenging to make since all these techniques were new to me. Although I struggled at times, in the end it was really fun and it was really cool to see what I can do with After Effects beyond basic video editing.
Multi-Layered Art
For the Multi-Layered Art Project, I collaborated with one of my World Building team members to create a layered wood art that represents our story and characters. We chose to model it after a church’s stained glass window to signify the church in our story. It shows the four main characters at the bottom and important elements of the story at the top — the bell, fire, and the healing flowers.
These are some of our sketches as we planned out the composition and how to separate the layers of the artwork. We sketched a different picture for each layer of the piece and for each character, so we knew what pieces we needed to draw in Illustrator.

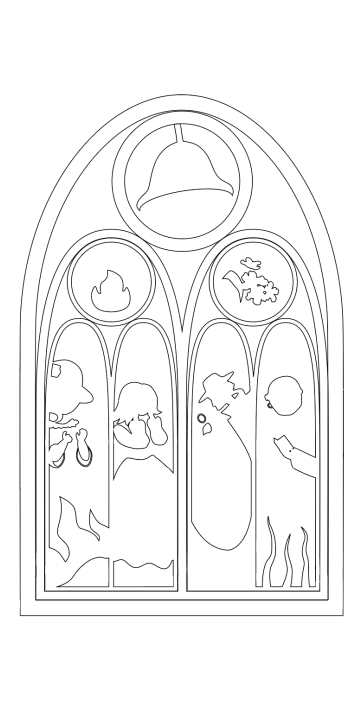

In Illustrator, we drew out the outlines of all the pieces to guide the laser cutter. The first two images show a couple of the layers of our artwork as we drew them in Illustrator. The third image shows what it looked like after we separated the pieces for the laser cutter. In total, we had 9 layers.

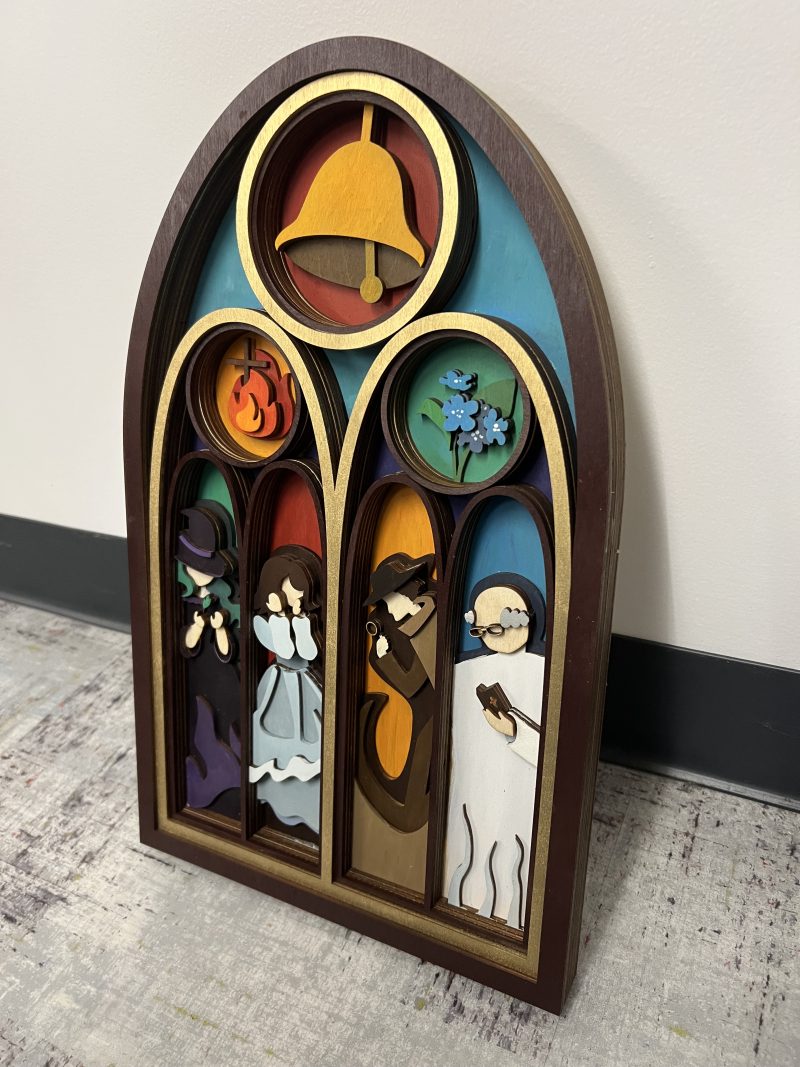

This is the final product after we painted, assembled and glued all the layers.
Artist Statement
I chose layered wood art for the Multi-Layered Art Project because it gave me the most freedom to make the piece a unique shape and also not have to worry about connecting floating pieces. It was also fun to be able to paint the piece in all different colors with acrylic paints. With the ability to make the piece a unique shape, we made a stained glass window like those in churches as a way to represent the church that lies at the center of our Worldbuilding story. In each section of the window is either a character or an important element of the story, such as the flower that ends up being the cure and the main character, the witch Lucille. Another way I like to think about the piece is as something the townspeople made in honor of the heroes saving the town.
Upon reflection about producing a faux 3D ANALOG art piece using multiple layers and then creating the same piece in the DIGITAL realm using 3D space, virtual cameras and lights, I see the benefits and advantages each method has. The physical art piece was more work to produce and inevitably has imperfections, but it is more fun to interact with in person because you can touch it and can look anywhere you want. On the other hand, the digital piece gives you more control, since you can adjust things like lighting and can move the layers around. Before this project, I had never used Adobe After Effects’s 3D tools. It was tedious at times, but I can see how it could be useful to prototype ideas to show others or to animate.