Reflections Project Introduction
The Reflections Project is focused on the question, “Who am I?” Throughout the project, we reflected on our identities by finding our core values and identifying our strengths. We then used what we learned about ourselves to create different projects across our Freestyle classes. In Design, we created personal mandalas using Adobe Illustrator and then used After Effects to create a video showing our mandala being built. These projects allowed us to take what we learned about ourselves and turn it into creative work while also learning new skills with different programs.
My Personal Mandalas
For the Mandala Project, I made mandalas that show who I am. I used Adobe Illustrator to create a black and white mandala and a colored mandala, using reflecting and repeating to bring the designs together. Each part of my mandalas has a meaning and represents something about me, like things I enjoy or how I feel. I also made a video in After Effects that shows my mandala being built step by step. This project helped me learn new skills while also learning more about myself.
To answer “Who am I?” for this piece, I drew things that I enjoy and like. I used lots of contrast, repetition, and reflection to bring the different parts of my mandala together. I also used pressure-sensitive brush strokes to emphasize different parts of the design. The eye in the center represents how I like looking at people’s eyes because I think they can show a person’s emotions and reveal part of their true self.
The rain represents how I enjoy rainy days. While many people associate rain with sadness, it makes me happy because I feel safer inside and like being cozy under my blanket. The strawberries, tomatoes, and boba represent things I enjoy and also remind me of hanging out with my friends. Using a drawing tablet and pressure-sensitive brushes helped me experiment with different line widths and add more detail to my artwork. I learned that I can use small details and techniques to make my art feel more personal.
The best part of my mandala is that every part has a meaning. Even though some of the symbols are simple, they represent things I enjoy, memories I have, and parts of how I see the world. When everything is put together, it creates an image that feels like a representation of me.
If the images do not display below,
On a Mac, press Command + (plus) then press press Command – (minus)
On a PC, press the Ctrl + (plus) then press the Ctrl – (minus)
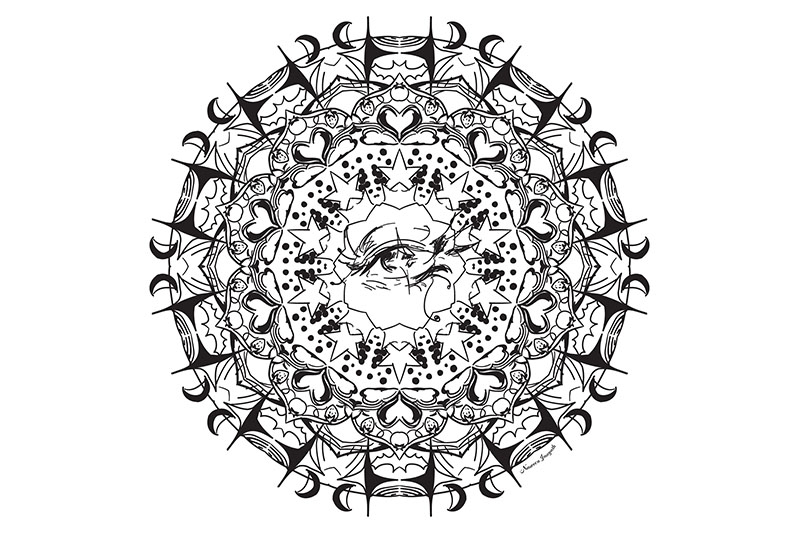

I felt that the LED stand for my laser mandala would best answer “Who am I” in that it glows and shines, because my name means bright light and I think my name best represents me because I like to stay positive. Working with only black and white strokes made me realize the importance of contrast and also knowing how to have less negative space because I first drew out my black and white mandala and thought that it didn’t have much depth and it was really empty, when I added way more black to it I thought it looked better. Through this project, I can apply my personality and learn who I am to artworks that I do later and know what my values and things I enjoy are.


For my colored mandala, I created a peacock inspired design using patterns, closed eyes, tears, and colors that represent different parts of me. Compared to my black and white mandala, the color made the piece feel more expressive and gave the patterns more depth. I chose mostly blue and teal because I like how they work together and create a calm but slightly emotional mood. I also used a calligraphy pen, gradients, and different stroke widths to add variation and make the details stand out. Working with color made me pay more attention to contrast, blending, and how each section connected to the rest of the mandala. I had a lot of fun making this one because I got to experiment more with color and see how different techniques changed the way it looked. What stands out most to me is how the colors, patterns, and facial details work together to create something that feels both decorative and personal.
For my Mandala Build Reveal Video, I used Adobe After Effects to show my mandala being created step by step. I had to separate parts of my mandala and time the animations so that each section appeared in the right order and zoomed in to show the small parts that I created in illustrator. This helped me learn more about how to use keyframes in After Effects to ease in and out while making it match with the audio. I also went through a lot of different music to find the right one that I thought would best represent my colored mandala, I wanted it to be calm because I feel like peacocks are usually calm and I am also a calm person.
After seeing the printed version of the colored mandala, I was surprised with how well the colors and the whole thing looked. The small details of my emotions were expressed by adding small faces of myself and different facial expressions. My mandala had multiple parts, in the middle you could see myself sort of having no expression and then having a face with lots of tears around it to represent that I get emotional a lot and then I added fireworks toward the middle to represent I also am a happy and positive person. I was very proud of how it turned out, especially because I was really motivated to make a new colored one that I finished the whole thing in one day because I got in the zone of it, and it was honestly very relaxing and fun. I hope to do more mandalas in the future!
Why I Write Essay
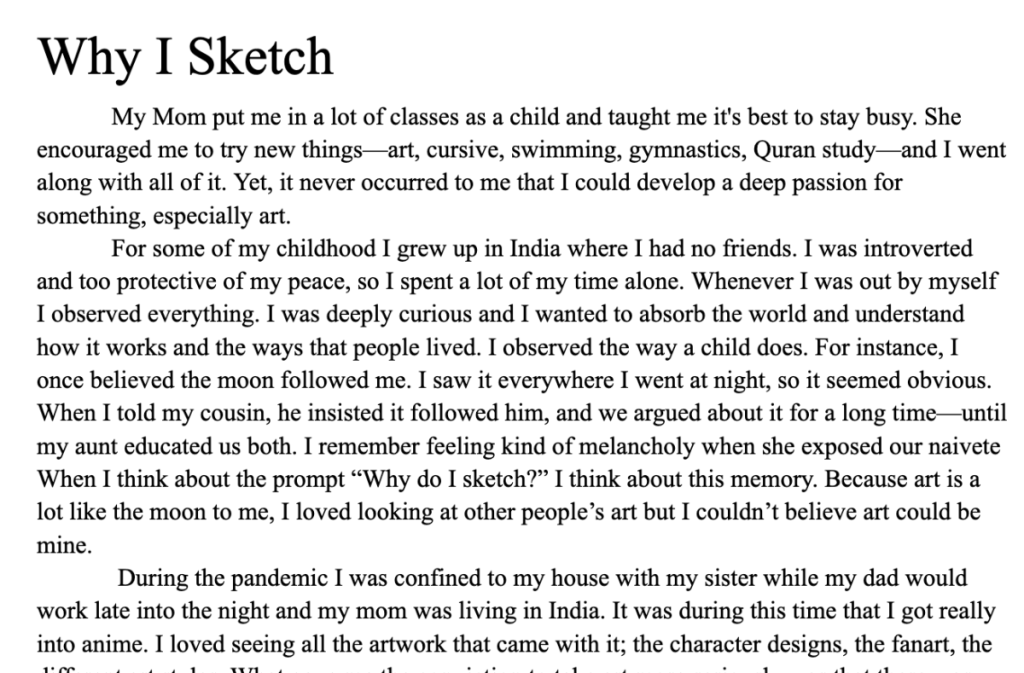
In English, we reflected on our creative passions and made a Why I Write Essay, which was really a Why I [creative passion] essay. The “Why I Write” essay is about why I do the thing I do, which for me is sketching. It’s about what drives me to sketch and what I want to share with others that other forms of art don’t. For this essay, I wrote the draft on paper, then typed it up, edited it, and revised it. I had to think about why I sketch and what the purpose was for me because I had been doing it my whole life. The essay made me think about my whole life and when I actually started to draw, which I hadn’t really thought about why I sketch that much. I decided to. Do an essay on why I sketch because I doodle and sketch a lot more than actually finishing my pieces, and I think the whole process is much more satisfying for me. The whole purpose of this essay was to help me better understand myself by reflecting upon why I’m so passionate about this, and I realized it’s because it’s my outlet, and it is the one thing that I’ve had throughout my whole life.
Animation
In Animation, we were introduced to 3D modeling and how to make objects and render it in 3D. We used 2 applications for this; one was Maya, which was used in order to make basic blocks and a normal amount of detail. Another app we used was ZBrush, which helps to make details and to make things look more natural instead of boxy. We started off with making basic shapes in Maya, then made a table, a Greek temple, a weapon of our choice, and finally our characters. After that, we learned how to add details to our weapon and table by using ZBrush.
Skull Render
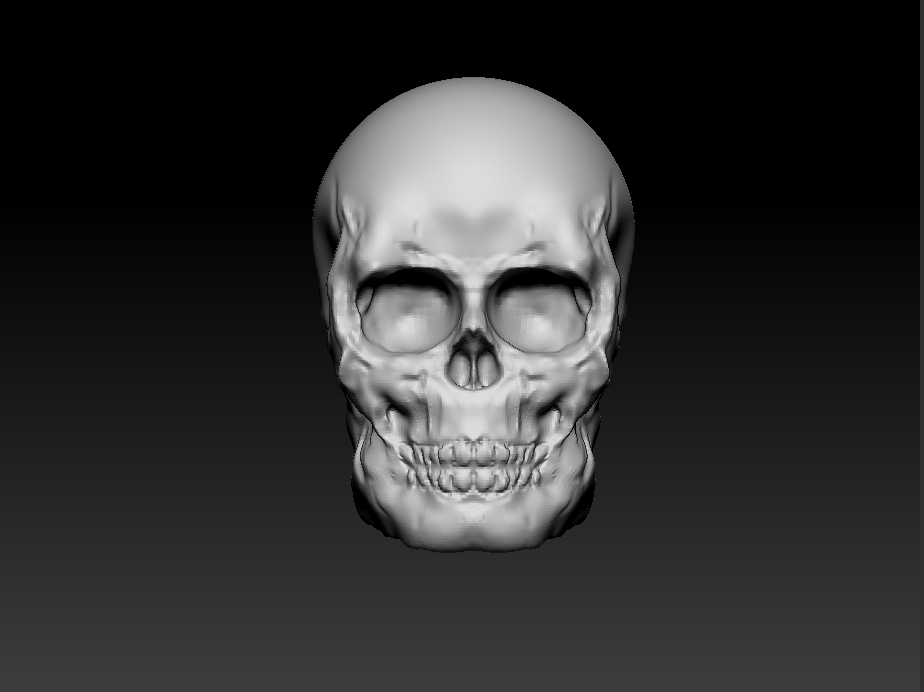
This was our first project that introduced us to ZBrush, and it included lots of experimentation and troubleshooting in learning how to use the interface and control the brushes. I used the ClayBuildup brush to create features such as the jaw and eye sockets, and changed its size to make small intricate fractures in the skull.
Head Render
I chose to reference Miku’s head, as she was just my favorite character ever and it would be really fun to mold. In ZBrush, I just used the ClayBuildup brush to create her defining features, like his hollowed cheeks and eyes, as well as her hair. Because this was mainly just practice, we didn’t export it to Substance Painter 3D, and it remains uncolored, and the hair and face didn’t match, but I still liked how it turned out.
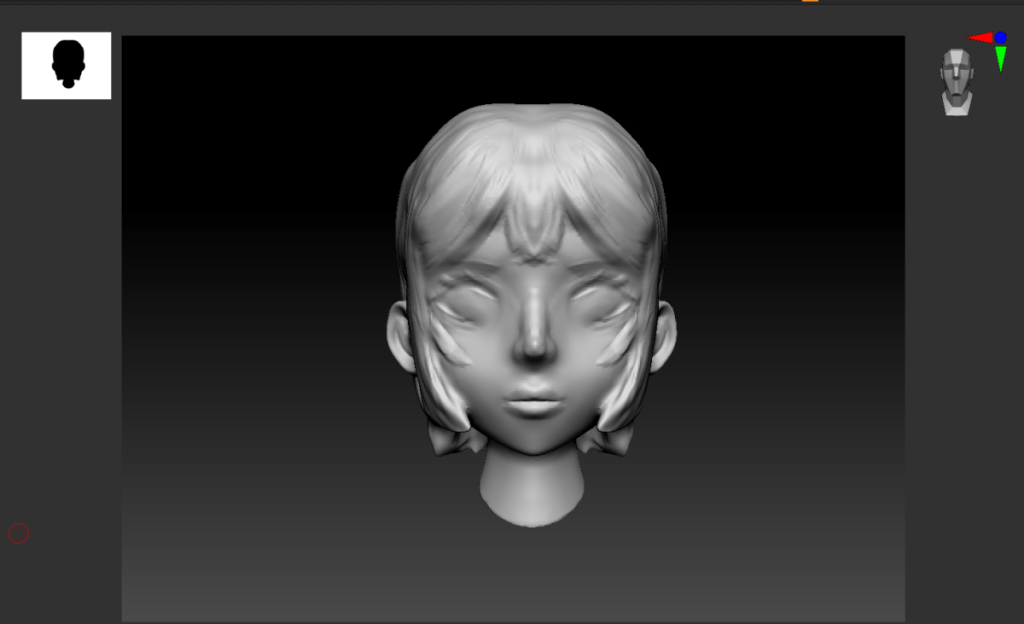
Table Render
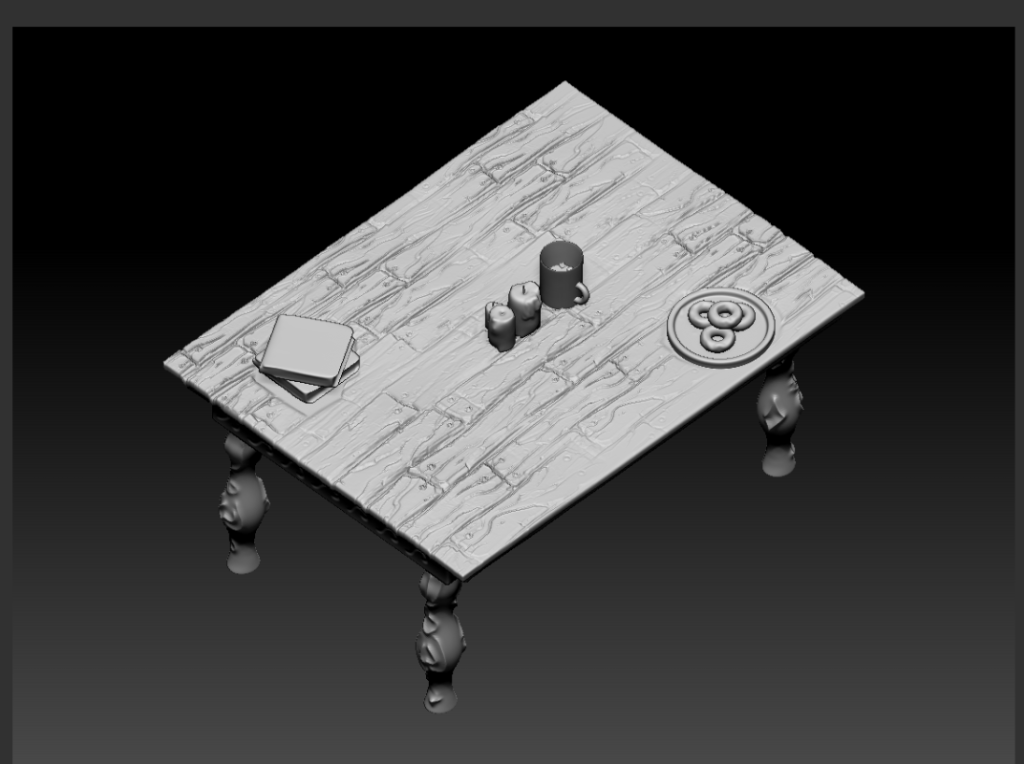
The table was one of the first projects, and for this one I didn’t have enough time because I got sick, but I like how it turned out. I added props on the table, and I decided to add things that I thought would be on my table, so I put donuts, books, and a cup of a drink. The drink was the hardest to make, as it had more variations in shape, and I also decided to add ice cubes, so I added more detail to that. At first, my table was too big, and then I decided to make it smaller because, compared to the items, the table looked really giant.
Game Weapon Render
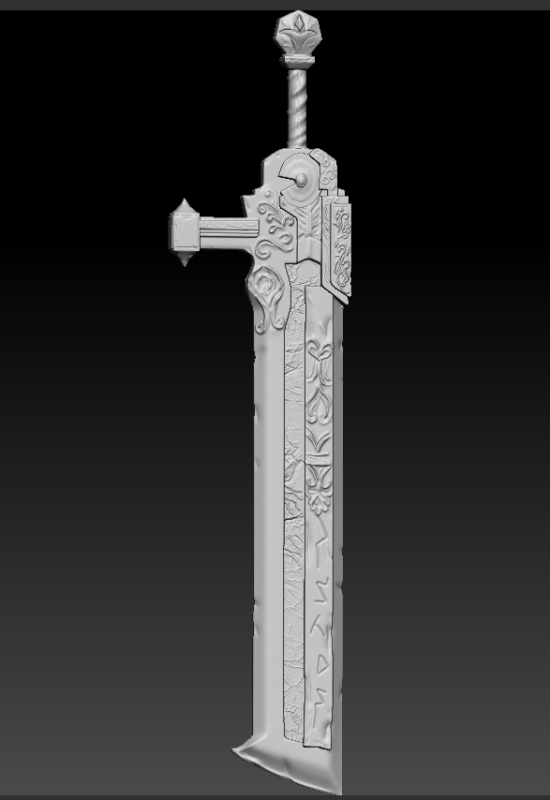
I was really excited for the Game Weapon. I decided to do a big, bulky kind of sword, and I wanted to add details to make it look like it’s very heavy, and I also added multiple different shapes. I had to use new skills like extruding and grouping together objects to make it all come together. Using ZBrush, I added lots of fine details that you can see on the blade of the sword. I also added many patterns to make it look more fantasy-like, and I enjoyed painting on it with ZBrush.
Reflection
Overall, what I valued in my animation class was that we got to add our own stylistic choices in making the 3D models and also got to have fun with the assignments; for the weapon, I got to add lots of details that were my own style. I also enjoyed seeing how the behind the scenes or what kind of applications are used for 3D animation and modeling since I didn’t know much about it at all.