Introduction
The goal of the Reflections Project is to learn more about ourselves and who we are. In English, we wrote our college essays, thinking about which past experiences best define who we are today. In Digital Media, we focused on our core values, and expressed these values by making mandalas and using Adobe After Effects.
During the Reflections Project, I learned more about myself, my values, and how I like to express myself. Each project I did required me to reflect and focus on what really matters to me, then challenged me to show that through my work.
My Personal Mandalas
In Digital Media, we made mandalas that reflect who we are. These Mandalas were created in Adobe Illustrator, using a technique to reflect and repeat brushstrokes around the whole canvas. By using a clipping mask and adding effects, it simplifies the process of creating mandalas so we can focus on making the art.
If the images do not display below,
On a Mac, press Command + (plus) then press press Command – (minus)
On a PC, press the Ctrl + (plus) then press the Ctrl – (minus)


When I first saw my laser engraved mandala, I was shocked by how clear the details were. I was excited to see how my design would go with the pattern of the bamboo, and it turned out really well. The physical analog artwork matches the digital artwork perfectly, while also having more character from the details and texture of the bamboo. I chose bamboo for the material because I like the pattern it has. It has a similar texture to wood, while still having clean edges, unlike the wood slice. It also ties into the content of my mandala because of its connections to Chinese culture.


For this piece, I used the same design as my black and white mandala, with a few adjustments, and added color. Once I saw the colored mandala and the laser engraved mandala, I realized that both pieces have their own unique appeal. The colors of the colored mandala really stood out and brought together the concept of the moon and the night. My intentions with the color scheme were to recreate the colors of the night sky, the warmth of the moon, and to bring a sense of serenity to the viewer.
Working with color was pretty different from just drawing in Illustrator. I had to make some adjustments to the lines to create closed spaces, and then create a Live Paint object that I could fill with colors. Before I began coloring, I thought that it would be a simple process to add color to the black and white mandala. However, during the process of coloring, I realized that I had to think very intentionally about where to place which colors, which parts I should emphasize, and how I could utilize gradients to add more depth.
In the end, I am very satisfied with how my colored mandala turned out. I think how the moon turned out in particular was very well done. I really like how the gradient adds a glowy effect to the moon and draws the viewer’s eye.
[Introduce Mandala Build Reveal Video – what used to produce video? (after effects)]
This mandala project has been really interesting. I have never created something like this before, or used the repetition tools in Illustrator much before. Having a final piece that I can hold in the end was also very exciting. Seeing the detail that can be achieved with laser engraving was really amazing. I definitely want to make more projects using lasers in the future because of their detail and precision. Making this project and seeing how others have used the mandala format creatively has been very inspiring and I really value being able to see others’ work.
Art Curation for Personal Museum
The Personal Museum is a project where we learn more about ourselves and our artistic style through the pieces we like and dislike. On the annual Freestyle Academy field trip to the SF MOMA, we were tasked with finding 3 art pieces we would include in our personal museum and 2 that we would exclude. At the SF MOMA, I saw a wide variety of art pieces in diverse styles. Through this project, I learned more than I thought I would about my own artistic taste.

3 art pieces I would ADD
to my Personal Museum


2 art pieces I would EXCLUDE
from my Personal Museum

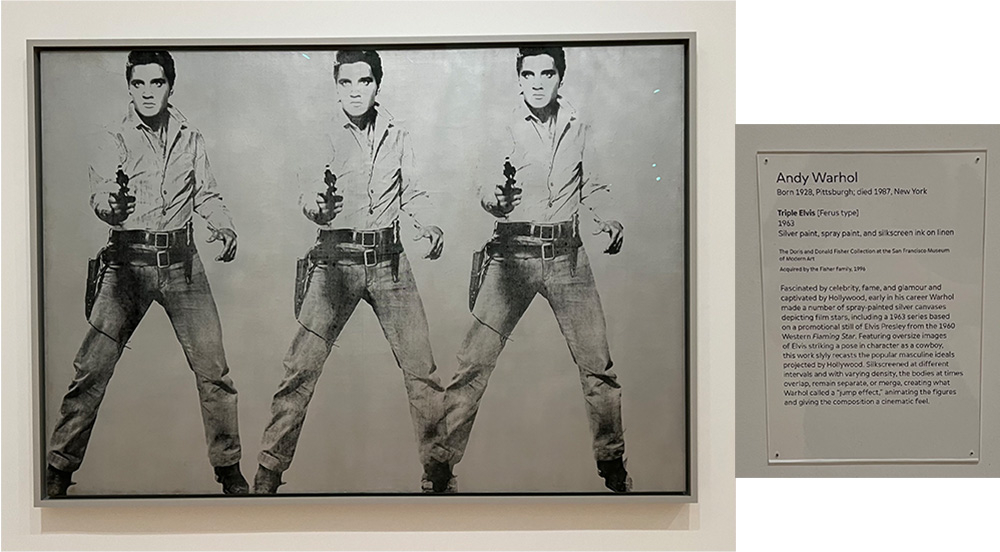
In my own artwork, I strive to make something new, unique, and compelling. I also like when I include pieces of my own culture within my artwork. For example, the first products I created for my etsy shop were rats, which is my Chinese zodiac sign. Another reason I chose to make rats was because I felt that they were less commonly sold and on Etsy and under appreciated. My values as an artist influenced my choices in my museum because I prioritized pieces I saw as intentional and unique in their techniques. Pieces that included aspects of other cultures or reminded me of them also made it into my museum.
Animation
Skull
For our first time using ZBrush, we sculpted a skull. ZBrush is a 3D modeling application that mimics sculpting with clay, allowing for intricately detailed and organic models. This skull started out as a simple sphere, and was then stretched and carved into.


Head
After practicing with the skull, we moved onto sculpting a head. For my head, I created a take on the character Frieren from the series Frieren: Beyond Journey’s End. This was a lot harder to sculpt because of the details and the size of her hair.

Table
Next, we started to learn how to use Maya, which is a professional 3D modeling software. In Maya, I made the basic shapes of the table using shapes like cubes, cylinders, and spheres. After making the basic shape in Maya, I exported the model and took it into ZBrush where I added more details. Using Alpha textures made adding detail and texture much easier, such as in the wood grain on the table and the design on the backs of the chairs.


Weapon
Making the weapon followed a very similar process to making the table. I first made a basic model in Maya, following a sketch I drew, then imported it into ZBrush for sculpting. Some parts were hand sculpted, such as the eye and the handle, and other parts like the scales were printed on using Alpha textures.


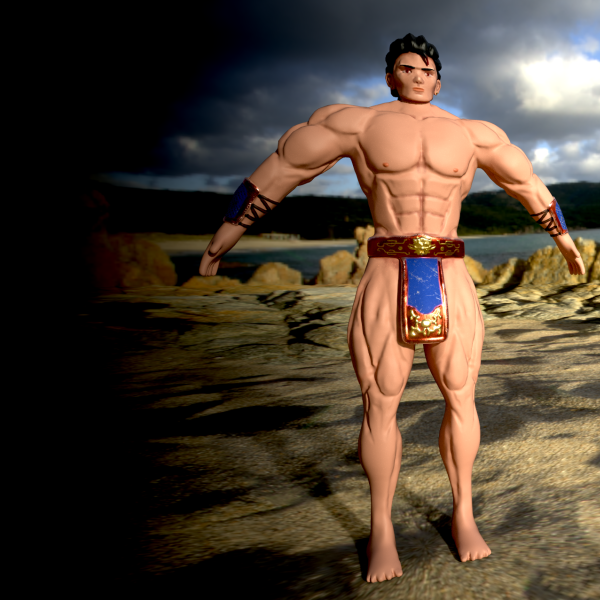
Character
Finally, the biggest project in Animation this semester was the character. While making the character, I actually switched designs halfway through. The images from earlier in the process are of my original design, and the later images are of my final design, but the process is the same nonetheless. First, I drew a design that would be used to maintain proportions during modeling. In Maya, I added a decent amount of detail to make the later sculpting faster and to hopefully retain the geometrical element of my design. Then, I imported the model into ZBrush to add more detail, such as hair texture, the designs on the armor, and sculpting the muscles. Finally, I moved the model into Substance Painter, which adds color and texture while keeping a model lower poly.


Reflection on Animation
This past semester has been very fun and rewarding for me, especially as someone who plans to work with 3D modeling in the future. I have never used or had access to these tools and programs before, so it was very exciting to use the tools that professionals use and that I may be using in the future. I learned a lot and have improved on my previous skills immensely. I am excited to learn and do a lot more next semester, such as finally animating with our characters in the narrative project.