In Digital Media, the main focus for the World Building project was to learn visual effects to enhance our story through learning Photoshop, Illustrator, and After Effects.
Funny Compositions
Prior to making my surreal composition for my story, I made some funny compositions through Photoshop as practice. This is something I have always enjoyed doing, as I commonly cut out pictures of me and paste them into video game backgrounds. When creating the funny compositions, I wanted to take the chance to continue this, so I took some photos of me sitting and loaded up Minecraft to take some screenshots of the game, before cutting and pasting each element. Finally, I applied a color blend mode effect to make sure the lighting matches up.

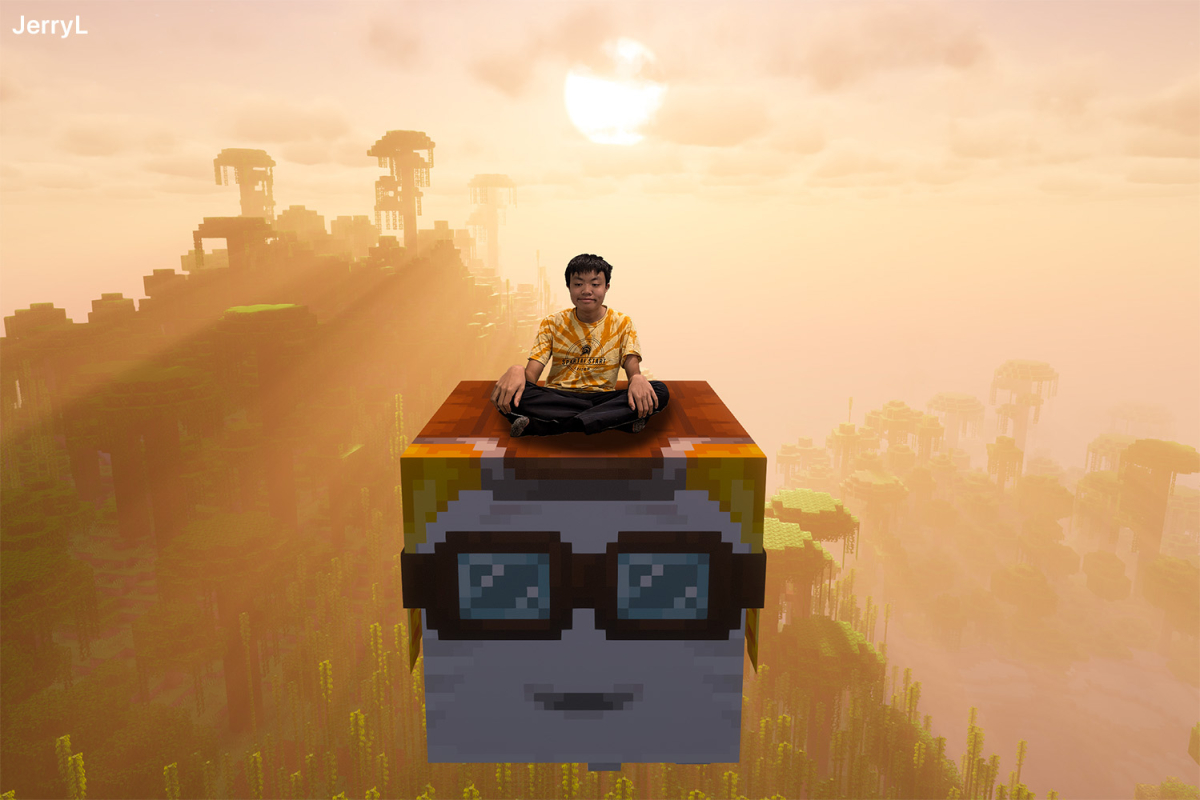
Being able to produce funny compositions means I can visually communicate a story through humor, which most of the time cannot be captured by singular unedited photos. This also means I can create memes of topics I like and post them on Instagram for people to see.


Motion Graphics
While learning funny compositions, I also got to learn many basic features of Adobe After Effects. For those who don’t know what After Effects is, it’s basically a visual effects editing software that has a ton of 2D and 3D creative effects that can be done, which is a really creative tool, but can also make your computer sound like an airplane engine.
I learned many elements of After Effects that I did not know previously, such as text animators, tracking moving objects through the rotoscoping brush tool, and making sound wave effects through responding to the background music. At the end, I used most of the components I learned to make my own short After Effects project, where I made it based on a staple remover because why not.

Even though I have done a small bit of editing through After Effects prior to this, learning more animation tools and special effects would significantly add onto my video editing skills for my Freestyle and personal projects. I can now do things like changing the background of a moving subject and create a drawing effect on text which I could not do previously. Additionally, I was able to help my community with video creation, as I was able to utilize After Effects to help make a 2025 Recap video for Olimpico Learning, an organization that helps younger students learn STEAM education.
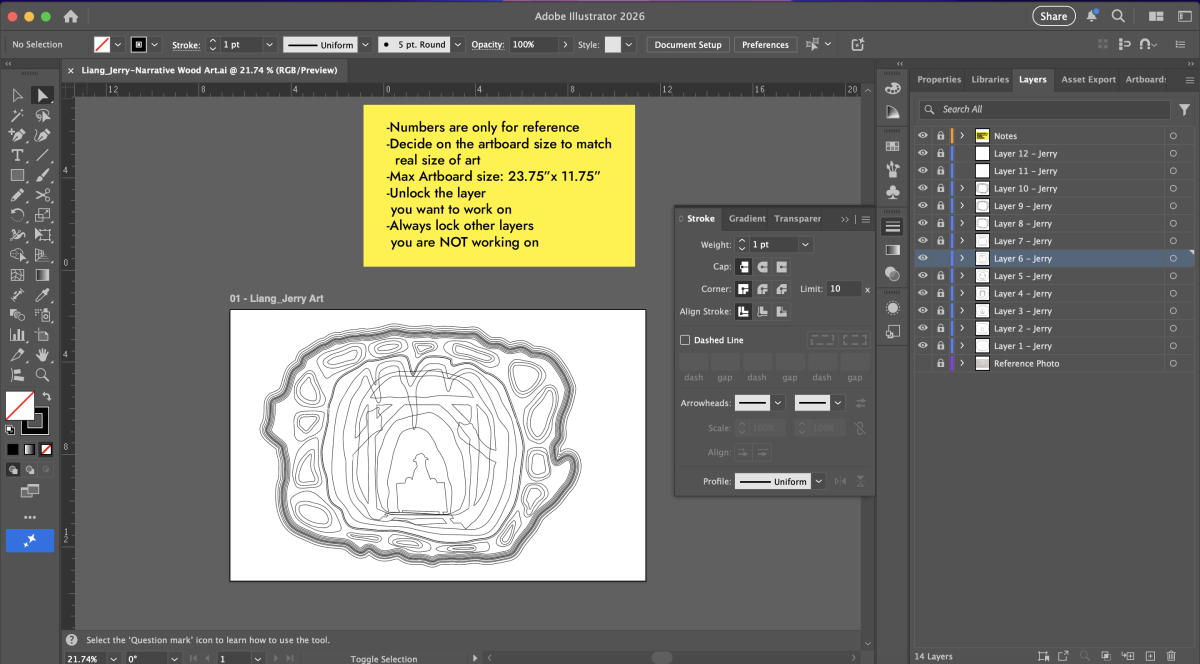
Stacked Wood Art Project
Like with the Adobe Illustrator project I made last year where I created a design on a mousepad, this year I got the opportunity to make a visual perspective layered art using wood to illustrate the theme of my World Building project, and then take it home after exhibition in May. Since my story is based on miners who are forced in labor under an evil mining company, I illustrated my scene to show a scared miner in a mining cave environment. Through this project, I began with creating a sketch of my wood art, then making each layer in Adobe Illustrator, then to making a 3D assembly animation of my layered art in After Effects, and then finally assembling my actual physical wooden layered art.

The challenging but fun part of this project was to make an animation of each individual layer coming together in Adobe After Effects. This involved putting each of my layers in 3D space, using a virtual camera to animate in different angles, and adding a virtual spotlight to show the shadows in the background. My project took really long to render, but it was extremely satisfying to watch the animation of each layer landing on top of each other.
