Introduction
“How can I use unconventional forms to express myself?”
In this Conceptual Project, I’m challenged to step outside traditional forms of communication and experiment with creative ways of expressing myself. By working with mediums like music, visual art, animation, experimental film, and web design, I focus on developing a personal aesthetic rather than following a set formula. The project also pushes me to build real technical skills using professional equipment and software, allowing me to combine creativity with digital tools. Overall, this project is about taking risks, refining how I communicate ideas, and using unconventional methods to create work that feels intentional and authentic.
My first project in the Conceptual Unit focused on exploring the emotion of awe through personal narrative and visual art. For the SFMOMA assignment, I chose Ragnar Kjartansson’s “The Visitors” as my artwork, which featured nine screens showing artists performing simultaneously in different rooms of a house.
What struck me most about this project was how it asked me to engage with my own emotional responses rather than just analyzing external sources. I had to dig into a deeply personal experience—my transition from COVID-19 lockdown back to in-person school—and articulate feelings I usually keep internalized. The artwork’s themes of collective effervescence and isolation-turned-liberation mirrored my own social development during a critical adolescent period.
Creating the video voiceover challenged me to condense complex emotions into a brief format. I had to balance discussing the profound loneliness I felt during lockdown with how music and visual arts became my emotional anchors during that isolated time. This was one of the first writing assignments that genuinely asked how I felt, not just what I thought about a text or document.
On the technical side, producing the Art Reflection Video in Premiere Pro required me to merge my English writing with Digital Media skills. I learned how to sync animated text with my vocal performance, choose music that complemented my reflection’s tone, and use various visual transitions to enhance the narrative. The challenge was making sure the technical elements supported the emotional content rather than overshadowing it.
on’s tone, and use various visual transitions to enhance the narrative. The challenge was making sure the technical elements supported the emotional content rather than overshadowing it.
Art Reflection
The SFMOMA field trip challenged us to engage with art on a personal level by finding pieces that evoked awe—something vast that transcends our current understanding. This experience bridged English and Digital Media, requiring us to write a reflective response and transform it into a multimedia video project.
The assignment pushed me to grow in multiple ways. Conceptually, I had to move beyond analytical writing and tap into genuine emotional responses, connecting personal experiences to the artwork’s themes. Artistically, I learned to make intentional choices about how music, visuals, and pacing could enhance my narrative’s emotional impact. Technically, working in Premiere Pro taught me to synchronize voiceover with animated text and use transitions purposefully.
The project showed me that powerful creative work happens when conceptual depth, artistic vision, and technical skill work together.
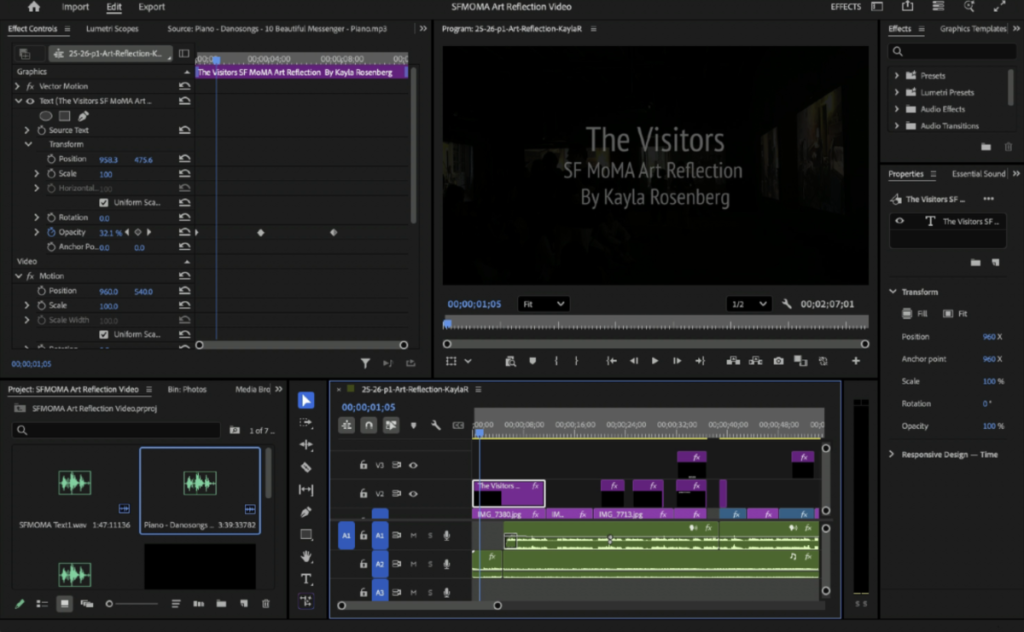
Behind the scenes in Premiere Pro: layering voiceover narration, background music, and text animations to create “The Visitors” Art Reflection video.
The Art Reflection Video production was valuable because it forced me out of my comfort zone in both classes.
In English, I’m used to keeping my emotions separate from my writing, but this assignment required me to actually examine and express how I felt about a specific experience. Writing about my own transition from isolation to social interaction during lockdown was uncomfortable but necessary—it made me realize that personal narrative has a different kind of power than analytical essays.
On the Digital Media side, I gained a new appreciation for how editing choices affect storytelling. Before this project, I saw things like music selection and text timing as surface-level details. But working through the production process showed me that these elements directly shape how an audience experiences the story. Every fade, transition, and audio adjustment became a deliberate choice rather than something arbitrary.
The real value came from seeing how these two skillsets informed each other. My writing gave the video emotional weight, while the production techniques helped communicate feelings that words alone couldn’t fully capture. It was the first time I understood how interdisciplinary work can create something more complete than either discipline could alone.
Photoshop Blend Mode Editing
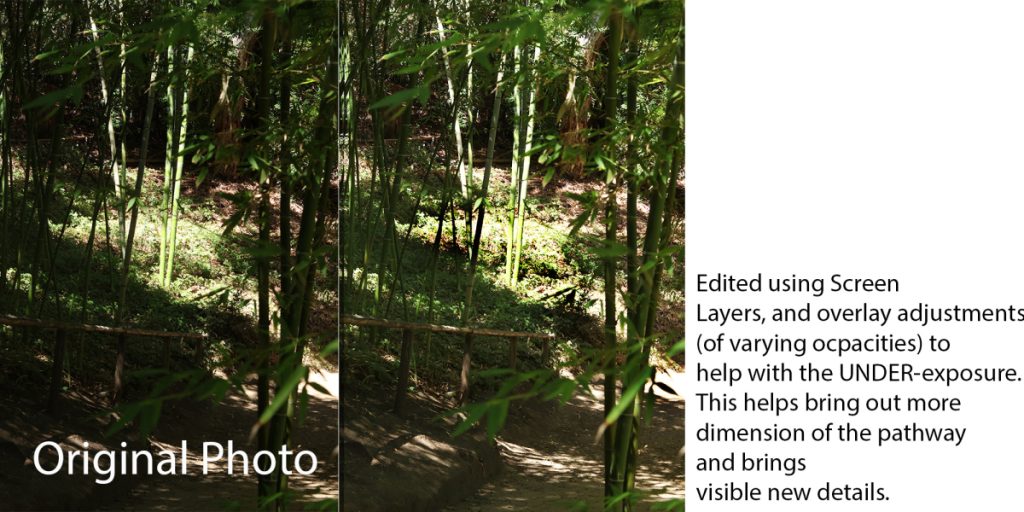
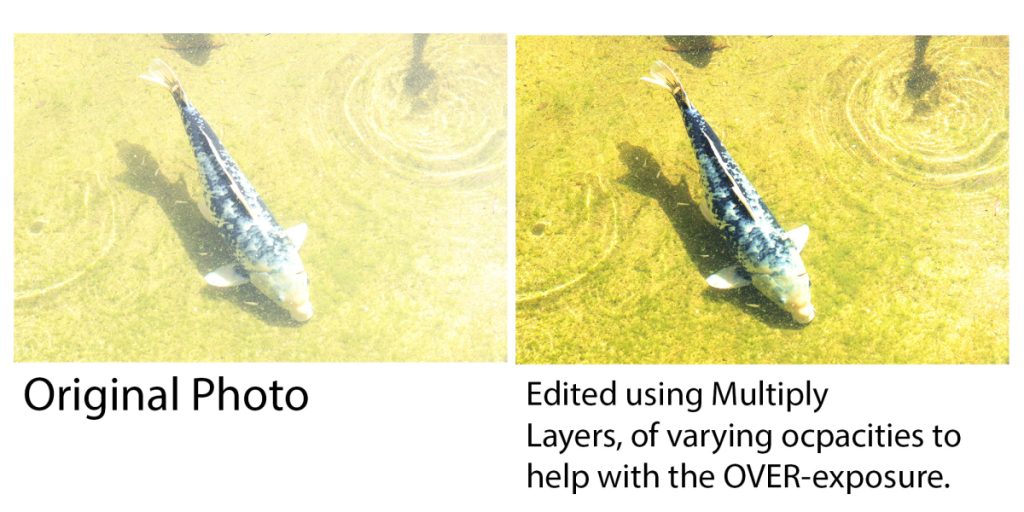
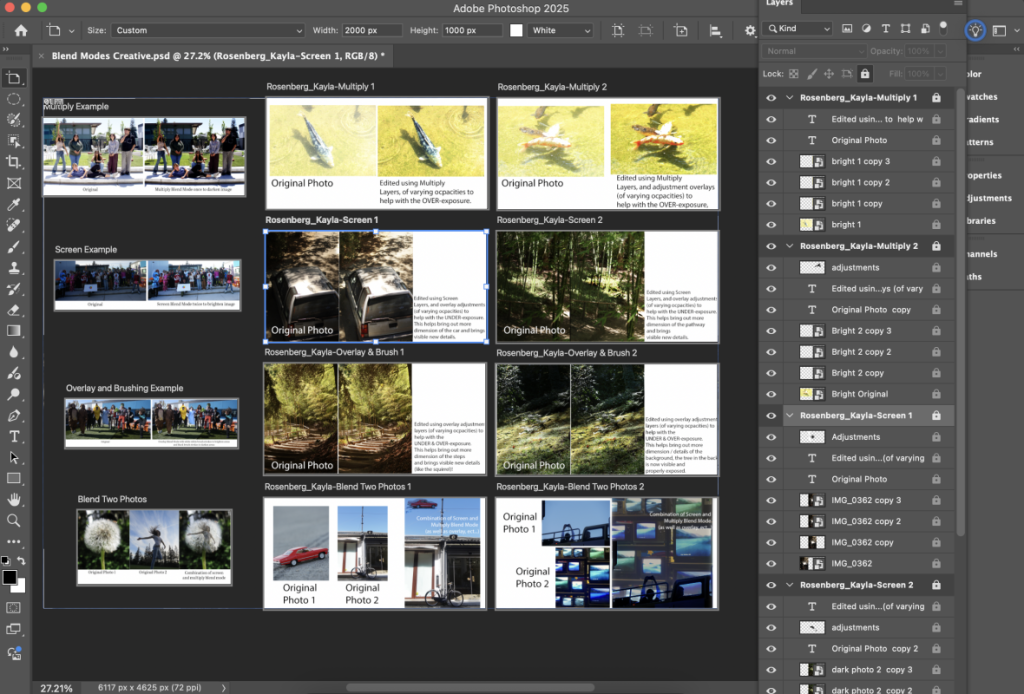
Blend Modes are essential tools for layering and manipulating images in Photoshop. This section features work exploring the four fundamental modes: Normal, Multiply, Screen, and Overlay. Each mode controls how layers interact—Multiply darkens using blacks, Screen lightens using whites, and Overlay enhances contrast by doing both.
Learning these blend modes shifted my approach from random experimentation to strategic decision-making. Understanding how layers interact technically allowed me to achieve specific visual effects intentionally rather than through trial and error, which became foundational for more complex editing work throughout the course.
I think I still have a lot to learn, but I really enjoyed looking at my photos in such a different way, asking myself how I can merge two photos and it actually looking cool. I did lots of experimenting and enjoyed it.




DSLR Photos
The DSLR practice sessions introduced manual camera controls through hands-on experimentation. We explored Aperture Priority (Av) mode for controlling depth of field, Shutter Priority (Tv) mode for long exposure night photography, flash techniques for portrait lighting against backdrops, Program (P) mode with ISO adjustments, and white balance manipulation for color temperature control.
These exercises built my understanding of the exposure triangle—aperture, shutter speed, and ISO—and how they work together. Instead of relying on automatic settings, I learned to make intentional choices based on desired effects, whether creating shallow focus blur or capturing dynamic light trails. This hands-on practice transformed the camera from an intimidating tool into something I could control with confidence and creative purpose.

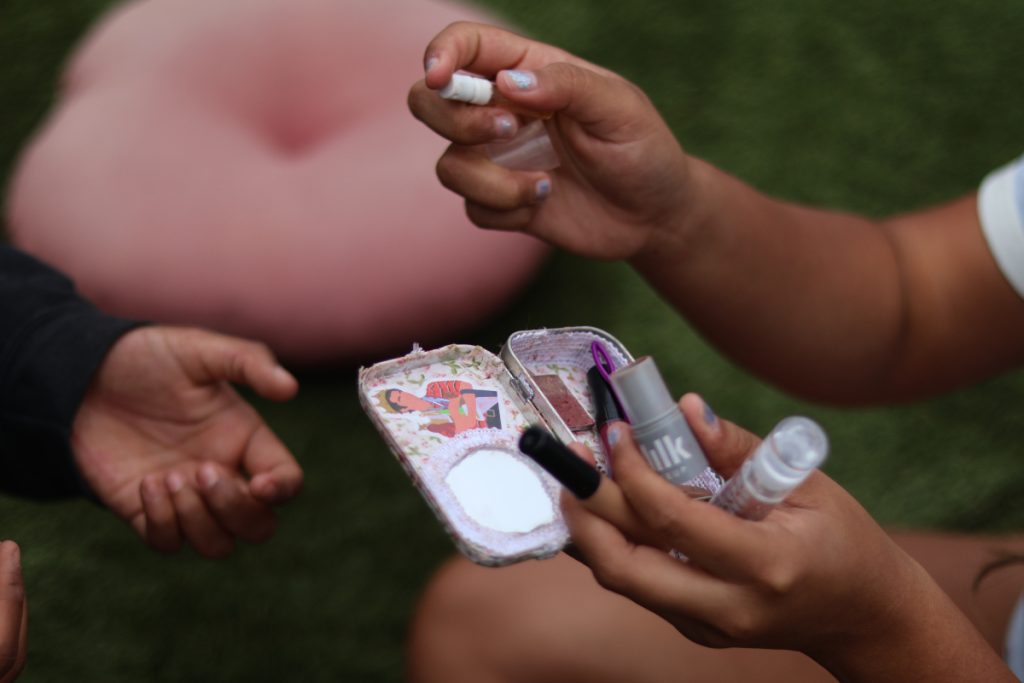

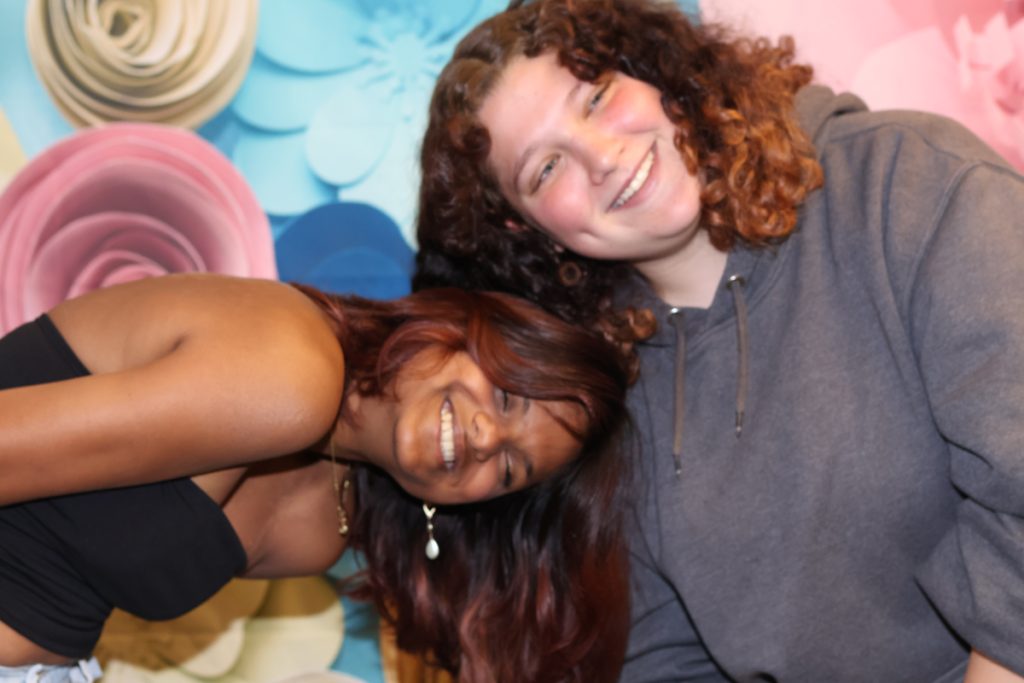
Learning to use the DSLR was initially overwhelming. Av mode with depth of field made the most sense early on—seeing how aperture created blurred backgrounds gave me immediate visual feedback. Shallow depth of field felt intuitive, while deep focus required more patience.
Tv mode with long exposure was frustrating at first. Keeping the camera steady and balancing light without overexposing took multiple attempts. When I finally captured light trails, it felt rewarding, but the trial-and-error tested my patience.
Flash practice with portraits was awkward. Positioning light to avoid harsh shadows while directing someone made me realize photography involves people skills as much as technical ones. I’m still not entirely comfortable with flash.
P-mode with ISO and white balance felt more straightforward once I understood the exposure triangle. I learned that ISO compensates for lighting conditions and white balance dramatically affects mood—something I hadn’t considered before.
Overall, the DSLR practice shifted my relationship with photography from casual phone snapshots to intentional image-making, even if I’m still developing confidence with some techniques.
Film
In film class so far, we’ve covered substantial ground. We began the school year with foundational exercises that built our understanding of camera basics, including green screen techniques, double effect compositing, and video editing fundamentals. From there, we moved into our experimental film unit, where we watched and analyzed classics that defined the principals and styles of experimental filmmaking.
We were then tasked with creating our own original experimental films—a challenging and rewarding process that took us from initial pitches and synopses through dailies, rough cuts, and final cuts screened on the big screen. Each assignment has built upon the last, transforming abstract camera knowledge into practical filmmaking experience.
Experimental Film
It began with doing a brief elevator pitch, once cleared and given feedback, I wrote my synopsis.

Once that was complete, we began filming.
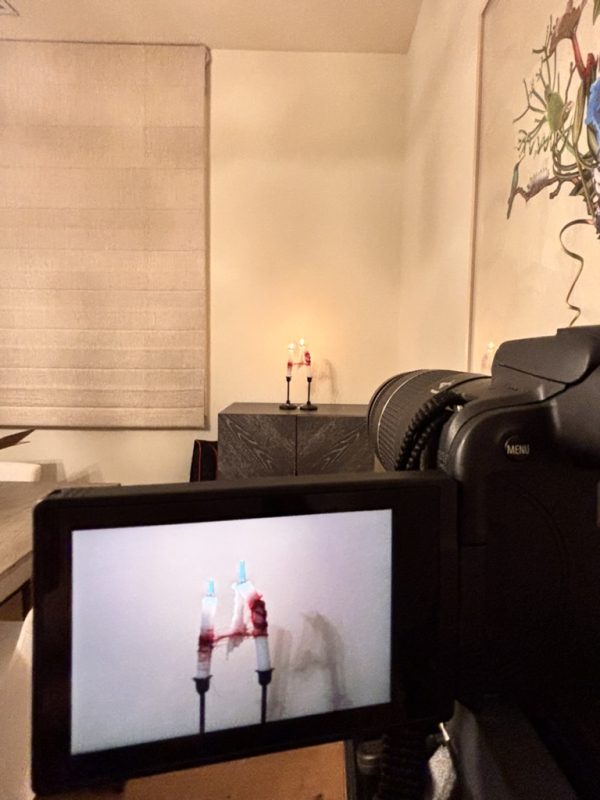


After a lot of trial and error, 3 trips to Micheals, and some fire, I was finished with my first film project!
Editing
Editing workspace for my experimental film in Premiere Pro. The timeline shows the layered construction of video clips (blue and purple), audio tracks (green), and effects that built the final cut. The dual monitor setup allowed me to compare different shots and sequences while fine-tuning transitions and timing throughout the editing process.
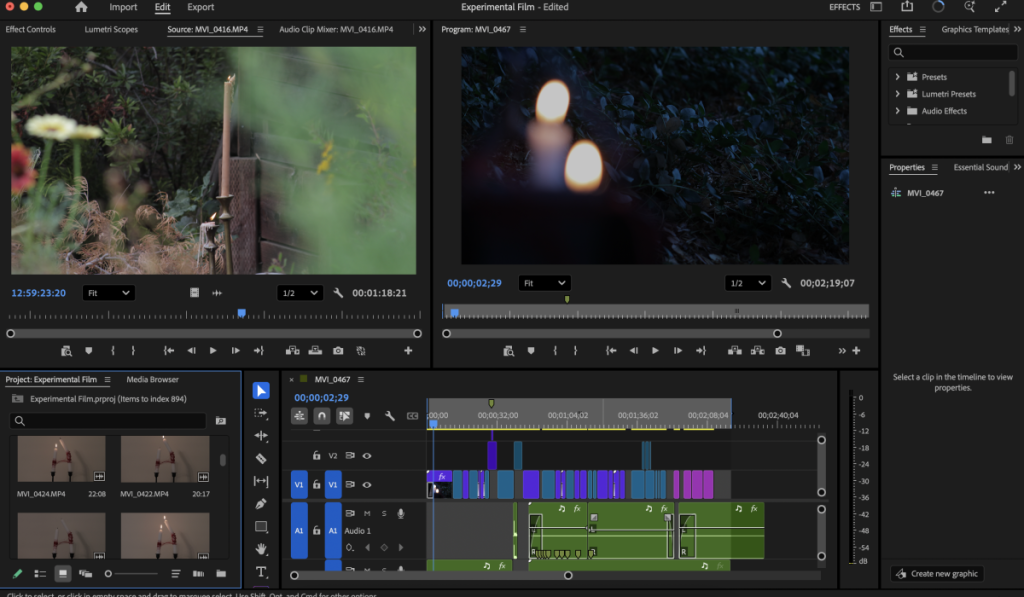
The editing process was more complex than I anticipated. What looked like a straightforward task of arranging clips turned into hours of fine-tuning transitions, adjusting audio levels, and experimenting with timing. I found myself making countless micro-decisions: should this cut happen a half-second earlier? Does this music fade feel abrupt or intentional? How do these layered visuals interact? The timeline grew increasingly dense as I added effects and refined pacing. What I learned is that experimental filmmaking isn’t just about shooting interesting footage—it’s about discovering the story and rhythm during the edit. The film evolved significantly from my original vision as I worked, with the editing process revealing possibilities I hadn’t considered during production.
Film Exercises
Video Scavenger Hunt
The Video Scavenger Hunt was one of our first assignments at the beginning of the school year, designed to help us get to know each other while learning fundamental shot types. We were divided into teams and given a list of different shots to recreate—each with specific requirements we had to meet. The goal was to capture as many as possible within the time limit, which meant we had to work quickly, communicate effectively, and think creatively about how to execute each shot with limited resources.
What made the exercise valuable wasn’t just learning shot terminology, but figuring out how to collaborate under pressure with classmates I’d just met. We had to assign roles, scout locations around campus, problem-solve when something wasn’t working, and make fast decisions about how to interpret the assignment requirements. My team ended up winning, which felt rewarding, but the real takeaway was how the exercise forced us to immediately apply technical concepts instead of just hearing about them in theory. It set the tone for the rest of the class—filmmaking as a hands-on, collaborative process where you learn by doing rather than passively absorbing information.
Green Screen Practice
The Green Screen exercise introduced us to chroma keying—the technique of removing a specific color from footage to composite subjects into different backgrounds. The setup was simple: stand in front of the green screen and experiment with the effect. I purposefully wore green to see what would happen, but quickly learned that wearing the key color makes things significantly harder. Instead of just removing the background, parts of my clothing disappeared too.
Rather than reshoot, I leaned into the mistake and made my legs disappear entirely, creating an unintentional floating effect. What seemed like a technical error became a creative opportunity. The exercise taught me that green screen work requires more planning than I expected, particularly with wardrobe, but also that accidents can lead to solutions you wouldn’t have considered otherwise.
Double Exercise
The Double Effect exercise taught us how to make ourselves appear twice in the same frame by shooting two separate takes on a locked-off camera and compositing them together in post-production. The key requirement was keeping the camera and background completely identical between takes.
I learned quickly that shooting indoors makes this significantly easier due to controlled lighting and a static environment. The most critical rule: never move the tripod. Even the slightest shift makes the shots impossible to blend seamlessly. I made this mistake and had to reshoot, which drove home how much filmmaking depends on technical precision, not just creative vision. What seemed simple—film yourself twice, put it together—required meticulous attention to camera position, consistent lighting, and careful compositing.