Mandala
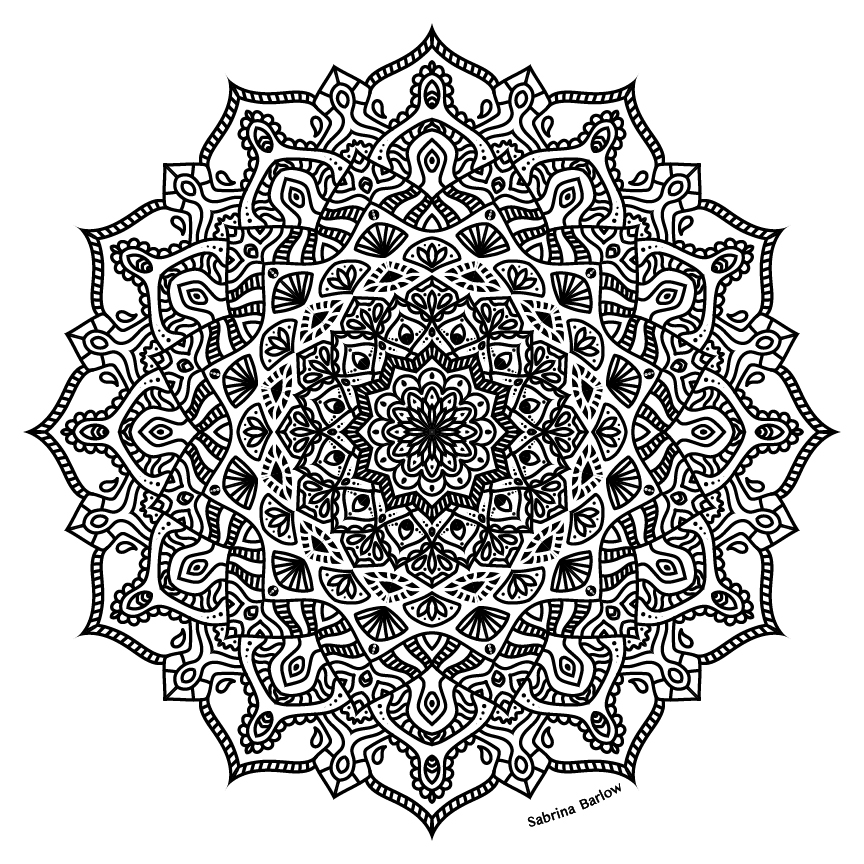
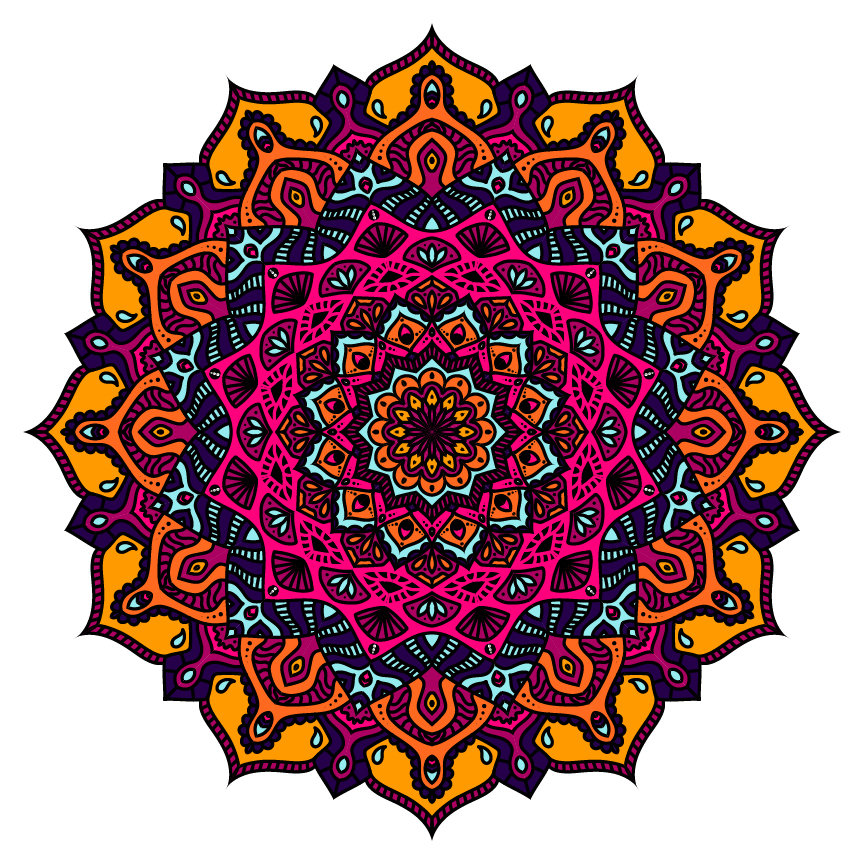
We started out this unit by creating a personal mandala. Learning the technique on Adobe Illustrator that we used to create the symmetry was really interesting and I think I will always make mandalas that way. My mandala reflects how I love the beauty in intricacy, with a beautiful piece whether you look at it from far away or up close. I had a lot of fun illustrating my mandala, which I call “Bejeweled,” and I’m very proud of how it turned out.
When I was a kid, we had a lovely Indian neighbor Bhawya who would often invite us to parties. At these parties, I loved seeing all the ladies’ Indian dress. They were all so ornate, with bold colors and fun jewels and embellishments.
Working on this mandala, I was inspired by the ornate “bejeweled” look of my Indian friends’ dresses. I used bold patterns, and then bold colors in my colored version, and there are many patterns that resemble jewels. The entire thing is ornate and detailed, which I love. I also took inspiration from the coloring books I loved as a kid, experimenting with different shapes and patterns.
I enjoyed the freedom of this project and how I got to experiment with different shapes until I had something beautiful. Learning how to code Illustrator to assist in this process was also fascinating, and I think I will definitely use these skills to make more similar things in the future.
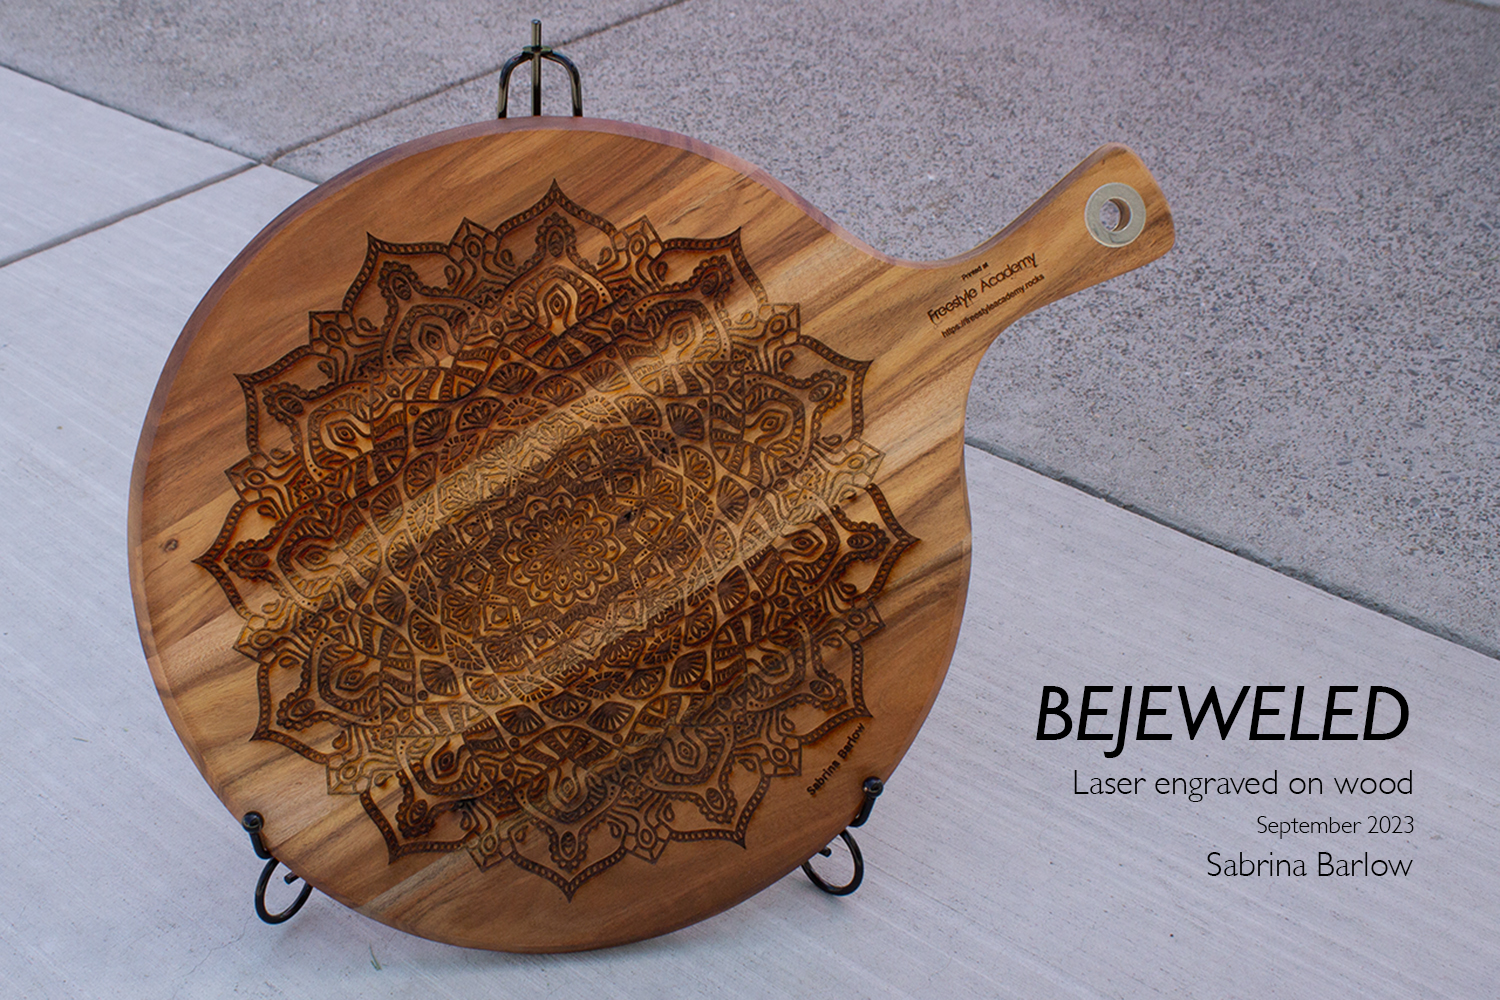
Seeing my mandala laser engraved on a wood pizza board was really rewarding. I think that my mandala transferred very well to this medium, and it’s really interesting to see the texture of the engraved lines. I’m very proud of how my mandala turned out, in all its mediums.
Motion Graphics
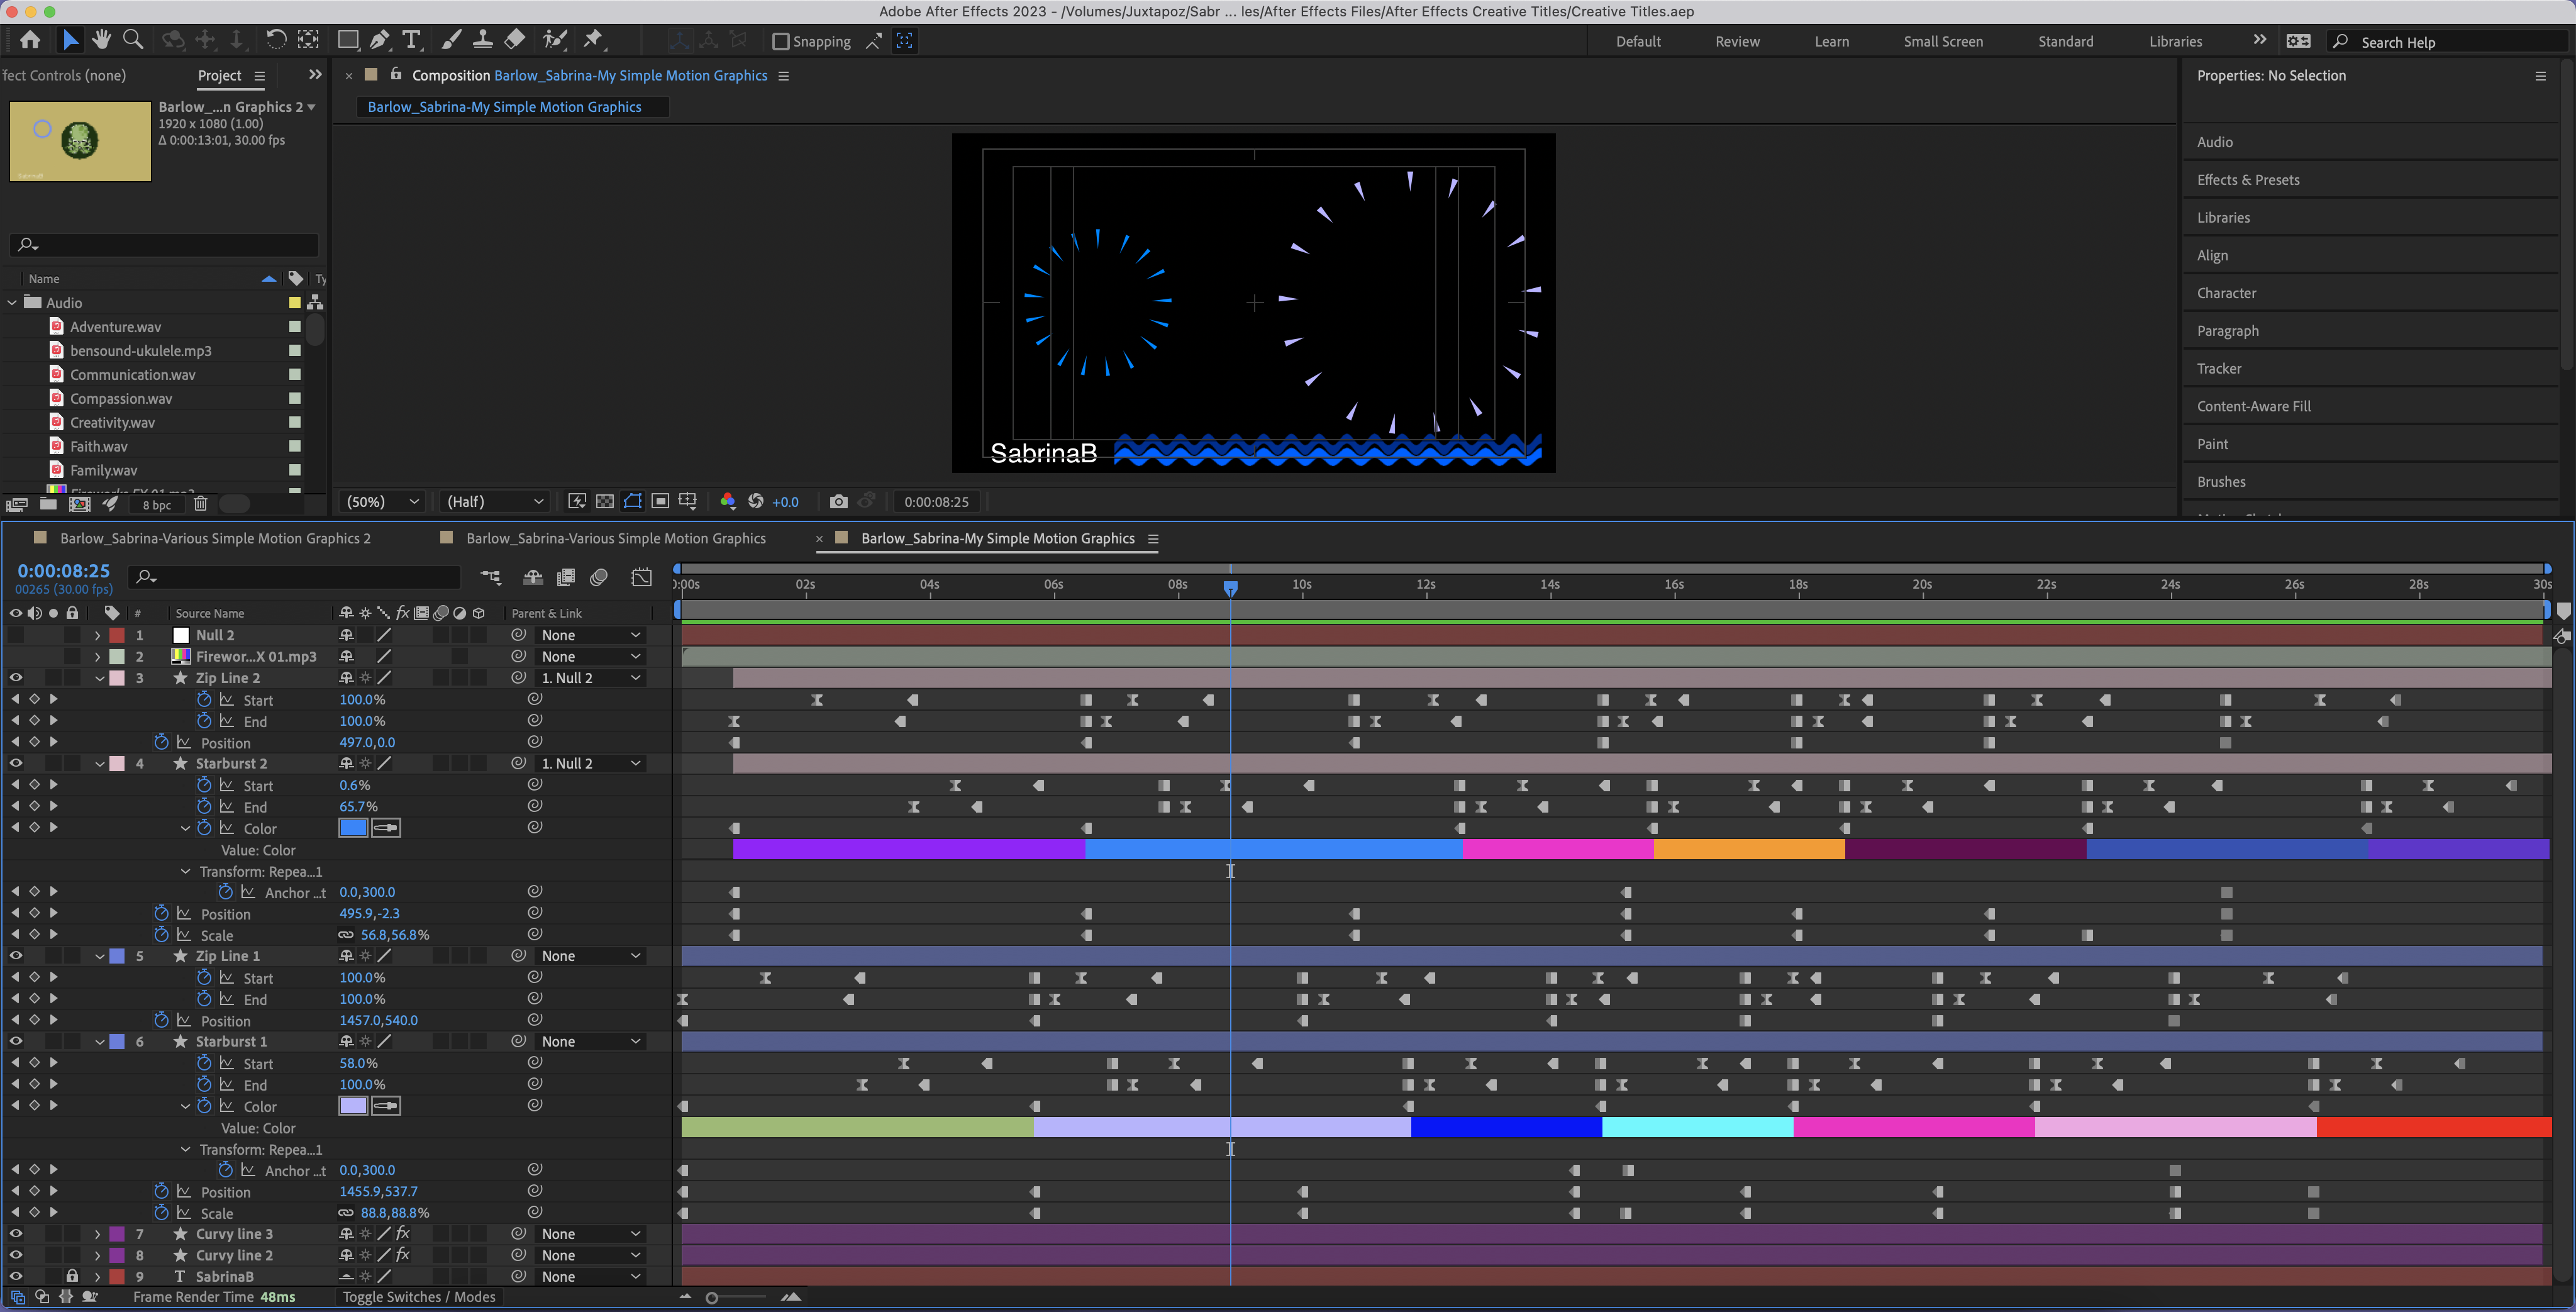
Next in Digital Media, we learned about video editing and various motion graphics that you can animate in Adobe After Effects. As you can see in the screenshot below showing my process in the interface, there are a lot of keyframes involved in animations like these. We learned about combining keyframes, taking advantage of preset animations, and how to customize the animation so that it turned out how we wanted to. All the videos below are simply practice, but it was a very valuable skill to learn.
In this video, we learned how to sync different graphics to the audio we chose. I animated the Avengers symbol, the line on the bottom, and the moving line to all react in different ways to the audio, which is the Avengers main theme.
In this video, we animated lines to either move horizontally or radially, editing effects such as width and opacity and adding sound. I animated a fireworks scene for this one. It’s fairly simple but as you can see in the screenshot earlier, it was a lot of keyframes!
For this video, we learned about rotoscoping, which helps with text effects. This was my favorite because it looks so professional. Text animation like this is a really valuable skill that makes a video much more visually interesting and clean looking.
Overall, I really valued learning about these different techniques for animation in video editing. I don’t usually do a lot of video editing, so this was out of my comfort zone, but I enjoyed experimenting with this new medium.