Introduction
The Zenith project challenged seniors to ignite their passion and elevate their skills and experiences to create their ultimate and most successful Freestyle project. Each senior chose their own focus of their Zenith Project with the limitation that the project must be related and approved by their Elective Teacher in Animation, Design, or Film. Seniors formed their own plan and timeline to execute between March and May to complete their project. Together with Freestyle juniors and staff, we celebrate each Senior’s Zenith Project in May each year.
For my Zenith Project, I made two handmade jewelry sets using different color schemes, with each set including a bracelet, necklace, and phone charm. I decided to do this for my Zenith because I thought it would be fun to try something new and step out of my comfort zone in terms of the kind of art I usually create. Most of my experience is with digital art and design, so I wanted to challenge myself by making something physical and hands-on instead. I was also inspired by seeing friends and people on social media make handmade jewelry, and thought it would be fun to try making it myself.
Process

I started my project by looking for inspiration and creating a moodboard. The specific style of jewelry I wanted to make was cluster jewelry, so I looked on Pinterest and other social media platforms to find inspiration photos that matched the aesthetic I was going for. I also created a different color scheme for each jewelry set.
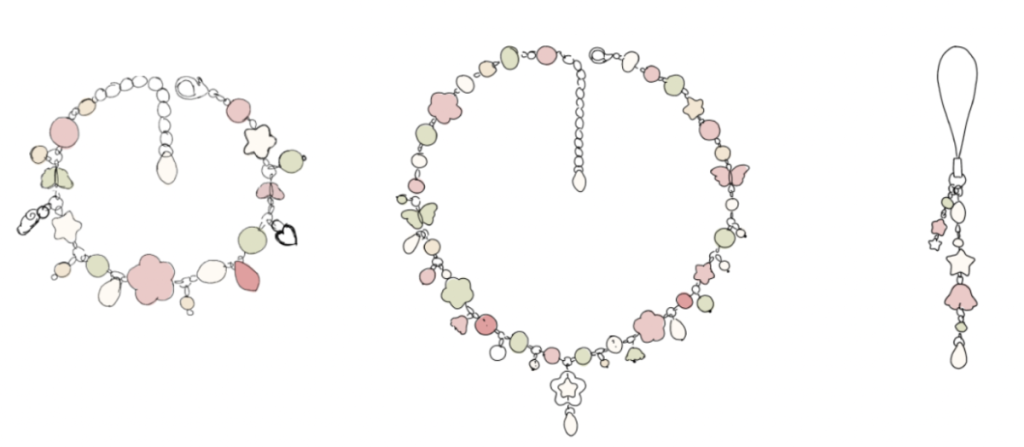
I also sketched out potential designs for each jewelry piece. To create the sketches, I referenced the inspiration pictures from my moodboard and used them to help plan the bead placement, spacing, and overall layout of each design.


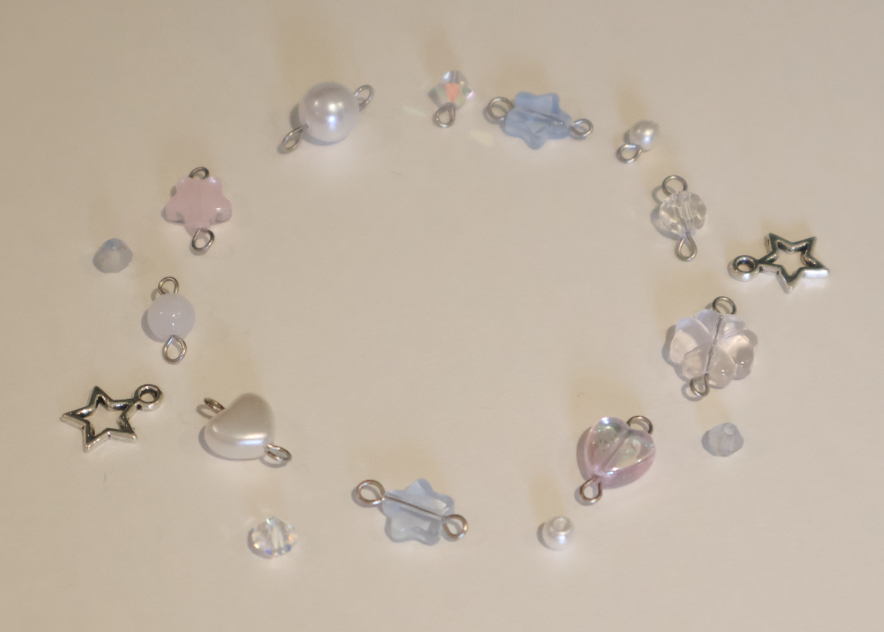

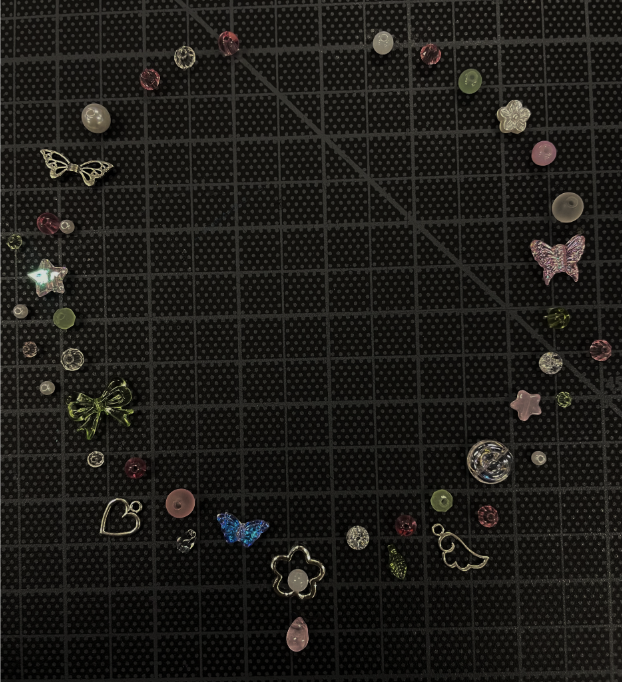
I started the bracelet-making process by choosing which beads I wanted to use and deciding where to place them in the bracelet layout. Since this was cluster jewelry, I also selected smaller beads to place in between the main beads so they could act as little dangling accents and add more detail to the bracelet. After finalizing the layout, I started assembling the bracelet. For each main bead, I first placed the bead onto an eye pin, trimmed the excess wire using the wire cutter on the round nose pliers, and then used the pliers to create a loop at the top to secure the bead in place. Once all of the beads were attached to the pins, I used jump rings to connect the bead sections together into a chain-like structure. I grouped multiple beads onto individual jump rings, linked those sections together, and then attached the chain extender and lobster clasp to complete the final bracelet.
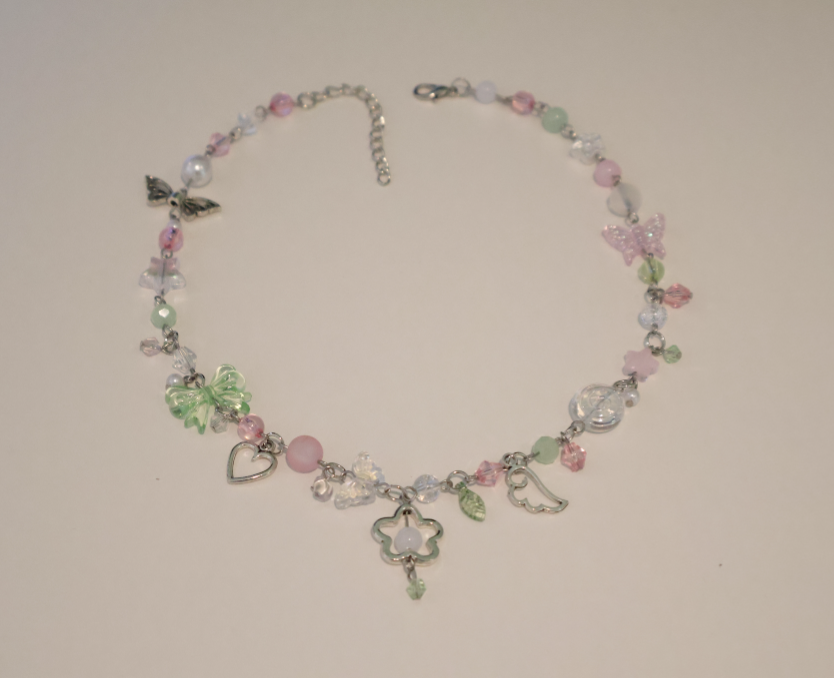


When making the necklaces, I used a similar process, but instead of connecting groups of beads together with jump rings like I did for the bracelets, I connected the eye pins directly to one another to create a smoother chain for the necklace and only used jump rings when attaching the smaller dangling beads. I placed more of those beads near the center of the necklace, since that area would be the most visible when worn.

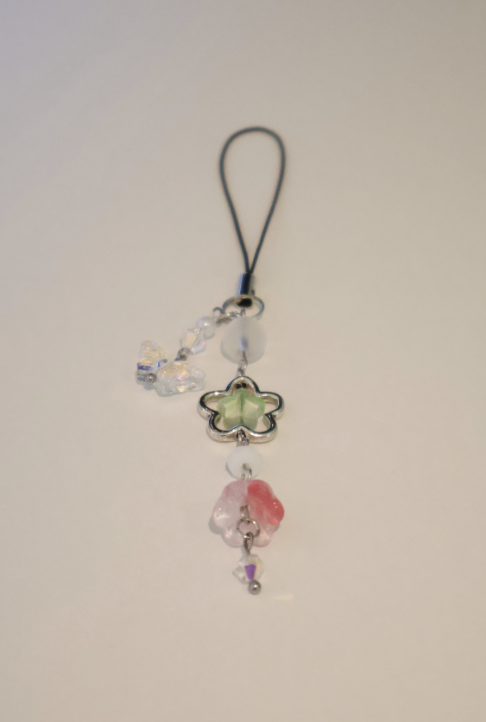


For the phone charms, I used the same general process as the bracelets and necklaces, but I used fewer beads so the charms wouldn’t feel too heavy or bulky when attached to a phone. After designing the layout, I secured the beads onto eye pins and head pins the same way as before by trimming the wire and creating loops with the pliers. Then, I connected the pieces together using jump rings and attached the finished design onto the phone charm strap.
Final Product


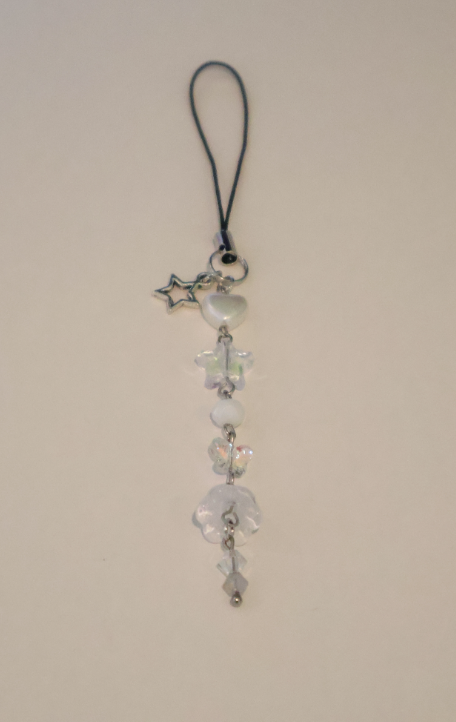
Looking back on this project, one challenge I faced was almost running out of certain beads and materials. If I were to do this project again, I would probably start with the necklaces first since they used the most beads and required the most variety in the design, and then I would move on to the rest of the pieces. Another challenge I encountered was making loops with the head pins. I found that creating loops on head pins was a lot harder than using eye pins because I had to shape the loops without being able to use the preexisting loop on the eye pin for support, and still had to make them look even and secure. But over time, I became more comfortable using the tools and improved my technique through practice. Overall, this project was a really fun and rewarding experience and I’m happy with how the final pieces turned out!