Introduction
This project has allowed me to learn new skills and forms of expression. These tools that I learned to use for these forms of expression included but was not limited to Adobe Photoshop, Adobe Premiere Pro, Avid Pro tools, and Tascam Audio Recorders. As well as extending my knowledge in Adobe After Effects and DSLR cameras. I was able to apply these new skills in my poetry, music, film and web production.
I value being an English and Digital Media student at Freestyle because it provides me with classes that expand my knowledge in technology and allow me to be creative in my general academic class of English. Freestyle’s English class provides a more art based approach to writing so that it is far more enjoyable. For Digital Media, it allowed me to learn to use a wide variety of programs that I otherwise would have struggled to adjust to.
Haiku Poetry
For our English and Digital Media classes, we wrote out a haiku and made a recording video following it presenting our visual that goes with the poem.
I personally found a lot of value in the Haiku video production process as it allowed me to apply my knowledge I had gained in Digital Media on how to edit in Premiere Pro to use. I have done editing like this in the past on Adobe After Effects, another editing program through Adobe, so having the opportunity to learn to do it in another program was great!
Free Verse Poetry
In English we studied many forms of poetry providing us the opportunity to find what we like best and to just to try things in poetry we hadn’t previously. After this process, we were able to choose a poem of our or write a new one that we liked. I chose to use my ekphrastic poem, a poem based on another piece of art. I used the painting, Coffee, by Richard Diebenkorn, to inspire my piece, almost like a story. We then in Digital Media took images with our DSLR cameras, edited the images in Adobe Photoshop and then integrated this into a video with a recording of our voices over it in Adobe Premiere Pro.
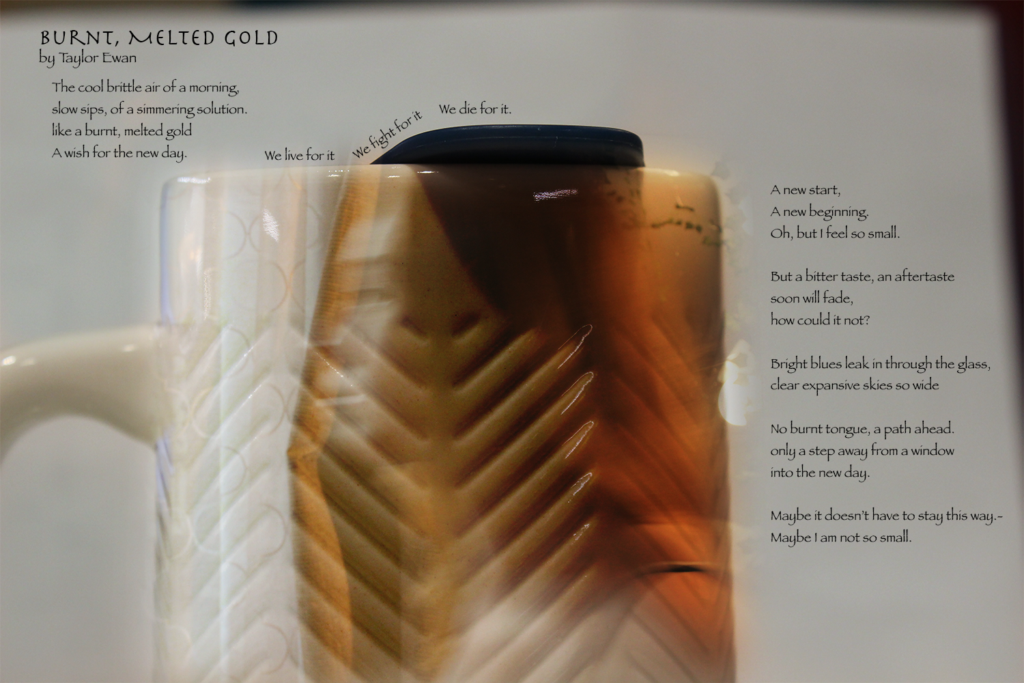
“Burnt, Melted Gold” is a free verse ekphrastic poem representing the painting, Coffee, by Richard Diebenkorn. In the painting, a woman sips a cup of coffee, and in the background, clear blue skies appear through a window. The poem alludes to the importance of a new start everyday and how we can truly make a large difference, the coffee representing a new start and opportunity. The speaker, the woman in the painting, is experiencing the feeling of hope, in relation to a new chance to make things better following a bad day. In the first stanza, I use symbolism to represent coffee as a new and positive start to a day, making it a valuable item. For this, I use the descriptive sensory language, “burnt, melted gold”, the term gold to show its value. I also use sound techniques such as alliteration in “slow sips of a simmering solution.” to contrast the sensory detail describing the coldness of the morning with a clear blue sky in the background. I then use repetition to express and emphasize the hyperbole in the second stanza as well as downward steps in enjambment to show the lengths someone will go for a new start. This leads to the shift in tone. The start of the poem is very calm and peaceful in its imagery using the window as a path into a bright new day, but as the poem progresses it becomes more serious, reminiscent, and reflective. In the final 3 stanzas, I attempt to shift the tone back to a more hopeful, serene and calm feeling using the idea of a new start and not having individual sentences but a continued statement. I use sensory imagery, repetition and lineation to create a flow and progression of thoughts within the subject. And with this, the poem shows the value we can put into a new day and new opportunity. During peer review, my readers enjoyed the shifts in tone as the speaker became more confident, but suggested that I change some of the wording to add more sound quality. For example, changing the word “liquid” to “solution” following “slow sips of simmering”, as well as adding to the concept and meaning of coffee as being a solution to problems and a re-do. The most helpful feedback I received focused on word choice and punctuation/enjambment. For my punctuation I matched the punctuation of the title with the identical line in the poem, “burnt, melted gold”. I was particularly inspired by “Letter to My Blackout” by Maria Hummel because of the lineation style in stanza brakes and repetition that she used in order to form and move along a story. I repeated the statement “I am not small.” to emphasize how much a person can make a change, in themselves and others, and gain a sense of empowerment.
I personally feel that I gained a lot from this project process. Overall I became better versed in the basics of Pro Tools, was able to put my Photoshop knowledge to use. I really enjoyed the creation process of the image to go with the poem because it allowed me to create my own interpretation and take on the art piece.
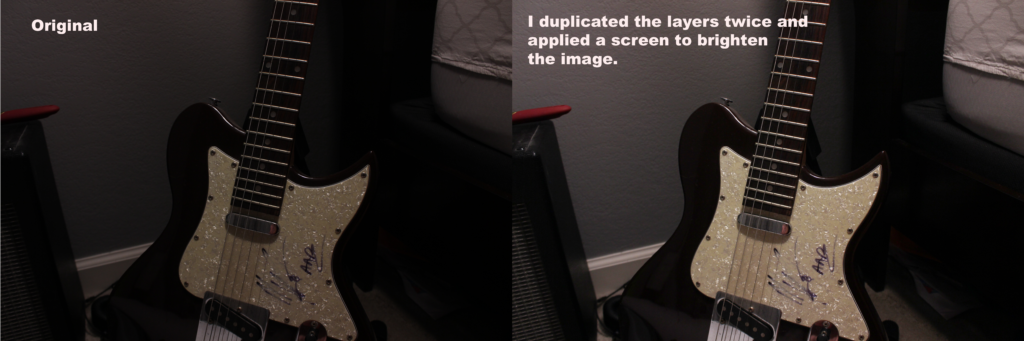
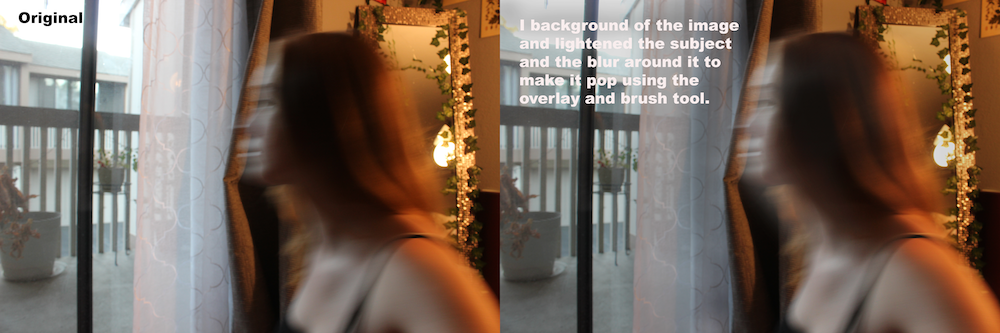
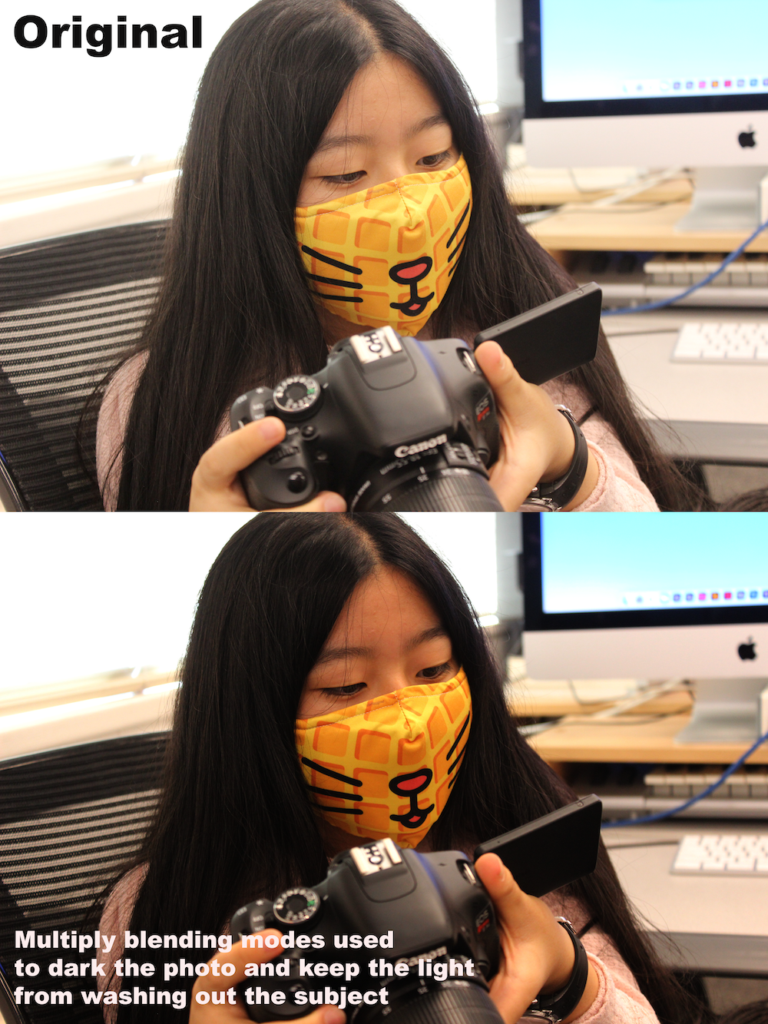
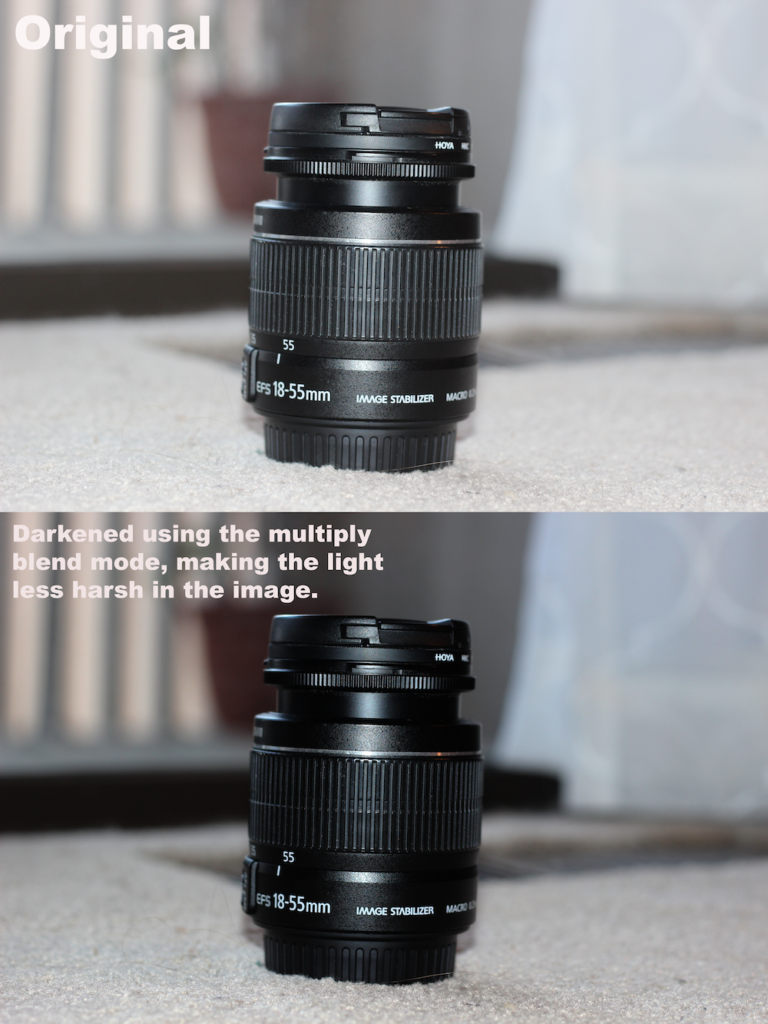
Photoshop Blend Mode Editing
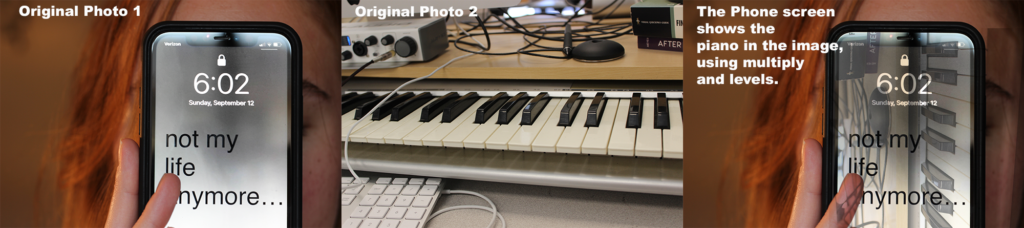
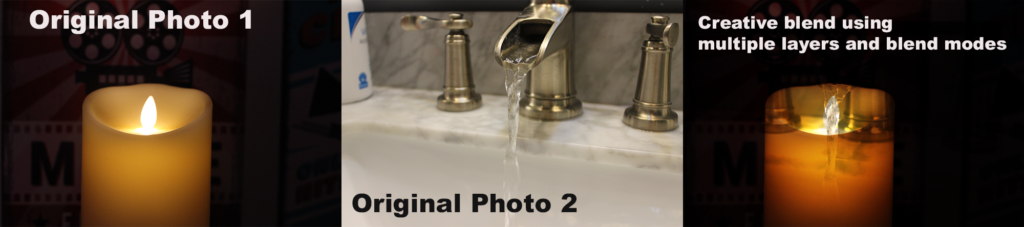
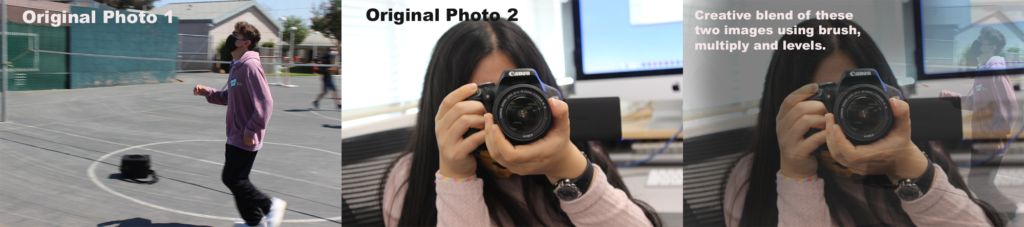
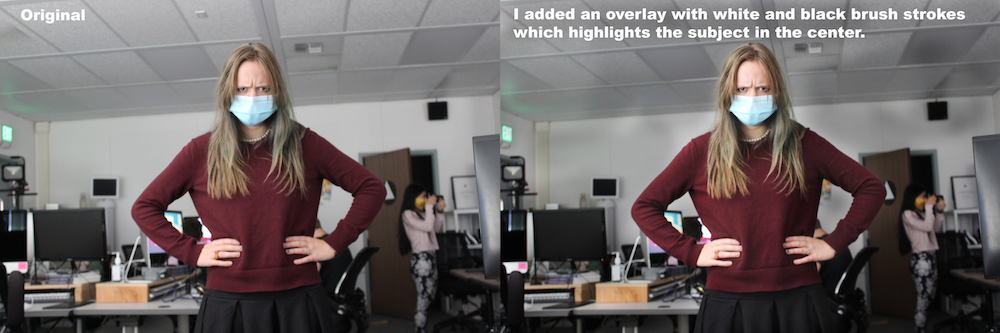
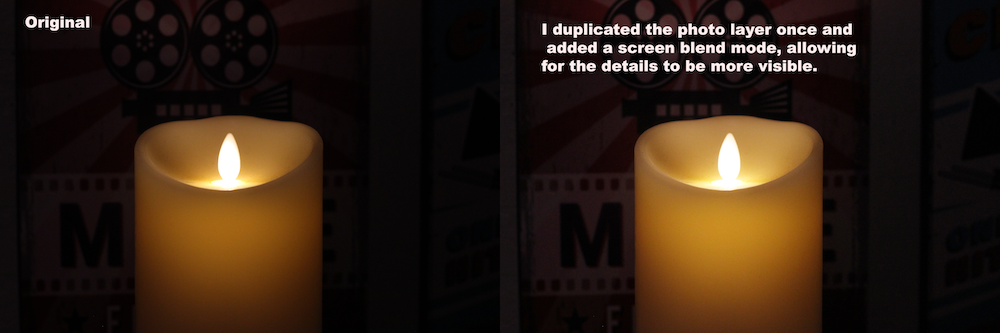
During the process of learning Photoshop we learned something called Blend Modes. They allow you to brighten, darken, overlay, and combine different images together in a clean and easy way. During this assignment, we went through and tested different blend modes on different images to improve them. I now use these blend modes almost every time I edit a photo.
What are your thoughts about using Photoshop Blend Modes?
1. I think that it was challenging but overall I found it highly interesting and know that I will have a lot of knowledge and resources to do cool projects in the future and touch up my images.
What did you value about learning Photoshop Blend Modes?
2. I valued the blending of two images together to create a new image because of its space for creativity.

Film!
Being a film student this year has been absolutely amazing. With our experimental film, exercises, and group work I learned tons and was able to get in touch with my creativity. I learned so much about working with others and speaking up for my ideas through critics, proposals, and group exercises. Critiques in which we work with the class to improve our work were extremely scary at first but now I value them because although it is nerve-racking to show your work and get feedback, your end product is so much better. On top of this, I enjoyed getting to know all of my classmates who are just as passionate about film as I am.
Experimental Film
What is my experimental film about?
First we took our concept statement we previously used for our haiku poem and came up with an idea for the film.
Concept Statement:
I am exploring the feeling of panic through decorating my room.
How I adapted this concept:
A person whose face is never shown walks into a room, yet the room is a blank white. On the way to this room they are shown in the form of a low shot of their shoes going by as they walk and their hand as they open the door. On their way to this room they look at their reflection in either a picture frame covered in glass or a window (likely from the inside). Once they are in the room, the character puts up a singular mirror on one side of the room. In the reflection a person can be seen, but the character is unhappy with what they see and takes down the mirror to grab yet another mirror. The mirror the character now has in their hand is then put up on a different part of the wall. This mirror shows a different person, but the character in the mirror is unhappy yet again with what they see. They continue to do so in a more rushed and panicking manner. During this time a ticking sound like the tick of a clock then becomes more frequent to build an anxious feeling within the viewer. This ticking sound starts at the beginning of the film but is very soft and slow. The putting up and taking down of mirrors continues to loop and we never see who the real person is, as their reflection is ever changing. Rather than appearing unhappy in the reflection as the film goes along, the character is becoming extremely panicked, anxious and confused with what they are experiencing as if they forgot what they actually look like. Throughout this we will see the same person (not their face but body such as hands, arm of the back of their head) putting up these mirrors. I will edit the mirror’s reflection into the image as a way to make the body putting up the mirror stay the same but the reflection. Because of this I want to use a similar technique to doubling where I will take a clip in the same angle and camera position using a tripod and keyframe the reflection into the mirror of the other shot. The walls of the room will be a bright white to create a lonely nothingness feeling that will not take away from the subject and their struggle. Almost in a way to amplify the panic that they are experiencing.
Since the synopsis, my plan had changed and developed quite a bit.
The whole process of making the experiment film was a long but rewarding one. I had first filmed my entire film start to finish in one sitting and after our first round of critiques, I found I had to start over from square one due to an issue with my green screens. However, redoing this saved me lots of time in post-production/ editing and overall made the film much better. For the mirror, there was not actually a mirror there. Rather, I filmed the individual people with a green screen behind them and inserted that video into where the mirror would have been. So, for each clip showing the mirror, I actually had one video on top of another, and where the mirror should have been was a green screen! I struggled to edit the video to induce a sense of panic and confusion but I am happy with the end result although there are definitely improvements I would have liked to make. Instead of shooting every shot at specific angles to make it match up with the mirror, I used Adobe After Effects to shift the angle of the video to appear like the reflection is facing in the direction of the mirror, as it would naturally.
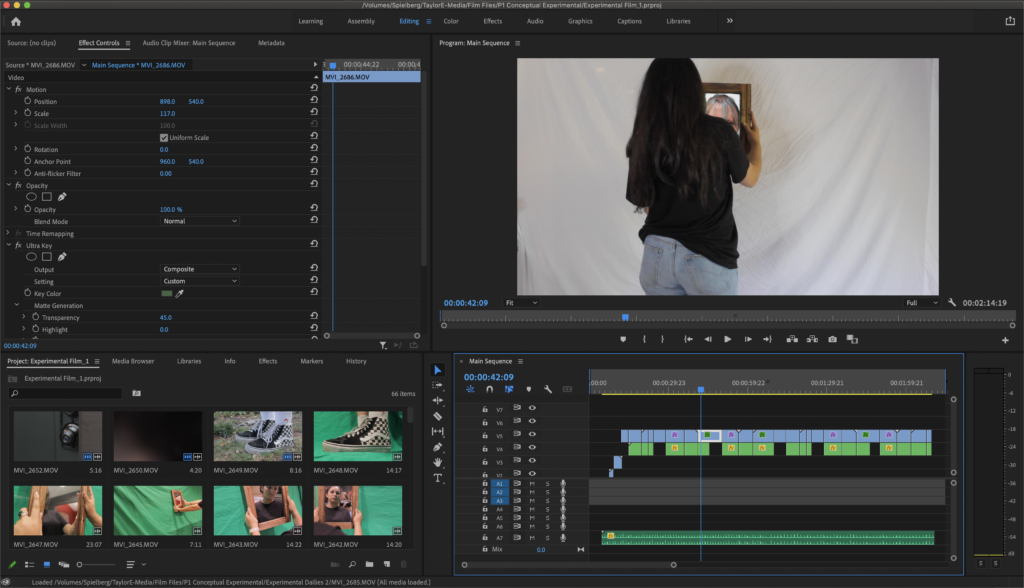
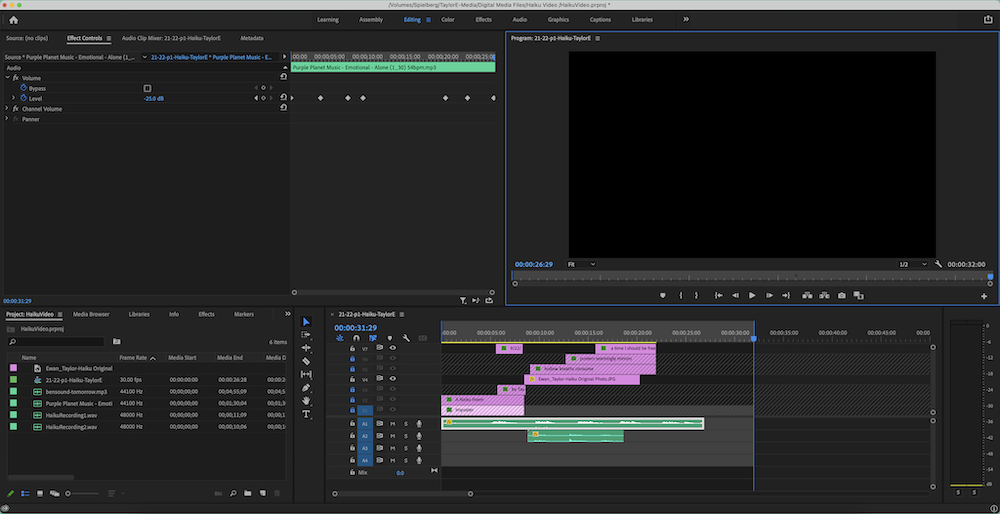
In the image above, you can see my Premiere Pro interface which is where I did the majority of the editing together of my experimental film. Looking to the bottom left, you can see some of the clips I filmed, however, I did not use most of those clips, only a small portion of the clips I ended up using. The bottom right is my main sequence in which I put together the clips and layered the green screen pieces together. The top left shows the effects and specific changes I made on an individual clip in order to have the green screen look better. Finally, the top right is where I was able to view the video as I edited it.
Film Exercises
During the span of the first semester, we did quite a few group and individual exercises to really get a grasp on what we were learning about.
Scavenger Hunt
Green Screens
Double Mint
For the double-minting activity, I used a process of splitting a screen in which the shots were identical in composition and making it seem as though there are two of the same person.