Conceptual
INTRODUCTION
Freestyle Academy’s Conceptual unit for Juniors aims to teach students to use unconventional forms to express themselves, strengthening their abstract thinking and communication skills through a variety of projects with different mediums across their English, Digital Media, and Elective classes.
In my first projects in my English and Digital Media classes, I immediately found myself challenged in ways distinct from other courses I took in the past. New technology that I learned in Digital Media, along with English assignments that pushed me to think much deeper about writing in comparison to other English classes I’ve had over the years, were all very engaging and opened my eyes to the many creative possibilities that I would explore this year.
ART REFLECTION VIDEO
Early in the year, Freestyle students went on a field trip to the San Francisco Museum of Modern Art. In our English class, we wrote a reflection on a particular art piece that inspired awe in us, challenging us to think deeply about our own emotions and experiences in order to channel that in a short paragraph response. That writing was then taken for our Digital Media class to create a voiceover for a video to be made in Adobe Premiere Pro.
In this project, I learned and applied many technical skills through Premiere Pro. Editing audio was part of that, normalizing and editing voiceovers to be a good volume, learning to add fade in/outs and carefully listening to make sure my project sounds how I want it to be. In the beginning of this video I utilized the numerous collections of free sound effects, ambient noise and music that Freestyle makes available to its students in order to make a short audio sequence to introduce the mood of the video as I showed the intro text on screen. The other aspect was editing the visuals, such as the text and the photos. Each image and block of text was edited using keyframes in the effect controls panel of Premiere Pro, allowing the visuals to glide across screen and fade in and out of sight.
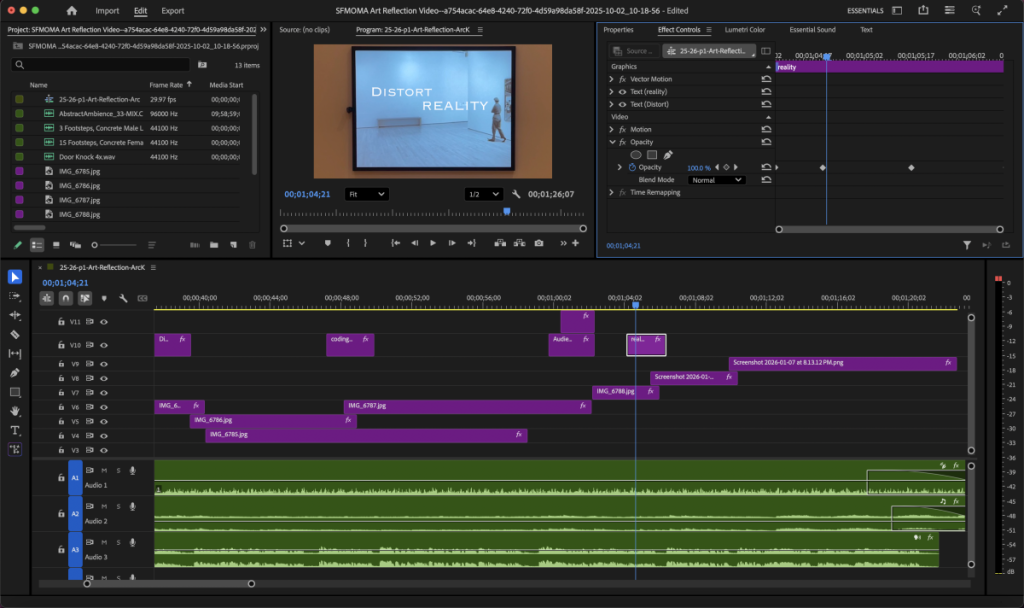
While working on this project, I grew a lot in my ability to learn and use new software, and pushed myself to experiment with media forms I never really thought of using in the past. In the end, I’m very grateful for this experience, and am glad to have another skill I can use for creative projects.
PARODY PRODUCTION
▶ Never Gonna Win This Game
⏸ Never Gonna Win This Game

The goal of this assignment was to create a parody song: choose a song, rewrite the lyrics to a verse and chorus, and then use Freestyle’s isolation booths to record vocals and Adobe Audition to edit the audio together.
I chose to make a parody with the song Never Gonna Give You Up by Rick Astley, entirely because of the memes. I knew I wanted to do something with this song, so I went with the first random thing I could think of: not knowing how to play chess.
After I had a topic, I opened up a doc and started rewriting the lyrics to the song. What I valued a lot about the process of making this parody was that we were encouraged to just make something fun and not try too hard on the singing, and this project ended up being very fun to work on. I learned how to record in Freestyle’s Digital Media classroom’s isolation booths, took a couple takes of me singing my lyrics, then moved onto editing audio in Adobe Audition. During the editing phase of this project, I realized my singing audio was really quiet (since I didn’t want to sing loudly in the isolation booth…), so I edited it to be louder, and then did things like adding reverb and other effects to make it sound better with the backing track.
The lyrics I wrote are from the perspective of someone who doesn’t know how to play, and is currently losing a game of chess. Chess references are shown especially in the chorus, commenting on how all the pieces move in different lines and how the game piece called a knight looks more like a horse.
Parody Lyrics
I might be a stranger to. Chess
You know the rules. And I do not
A different game’s what I’ve been. Thinking of
Why are there so many different pieces here
I don’t wanna ask you how to play again
Don’t wanna say I don’t understand
Never gonna win this game, never gonna get checkmate
What do you mean that’s a knight, that’s a horse !
How am I meant to strategize, they all move in different lines
I don’t think that I’m gonna win this game…
PHOTOSHOP BLEND MODES
One of the many skills we learned in Digital Media class was editing images with Adobe Photoshop. In this assignment, we learned to use Photoshop’s Screen, Multiply, and Overlay blend modes to adjust color contrast of photos and blend photos together.
What do you value about learning about and creatively using Photoshop Blend Modes?
I value having ways to edit photos together and edit the brightness, contrast, and more of images. Its nice to know that I can still alter an image and make it closer to how I want it if it isn’t quite there after I set up and take a photo. I also value having ways to creatively blend photos together, I see there being many possibilities where i can use those skills for interesting products.
How do you see yourself using your new Photoshop skills with your creative projects?
I mainly see myself using these skills for when I take photos and realize after shooting them that it’d look better if the colors & contrast were slightly different, but also maybe for when I want to merge photos together for whatever reason, among other possibilities.


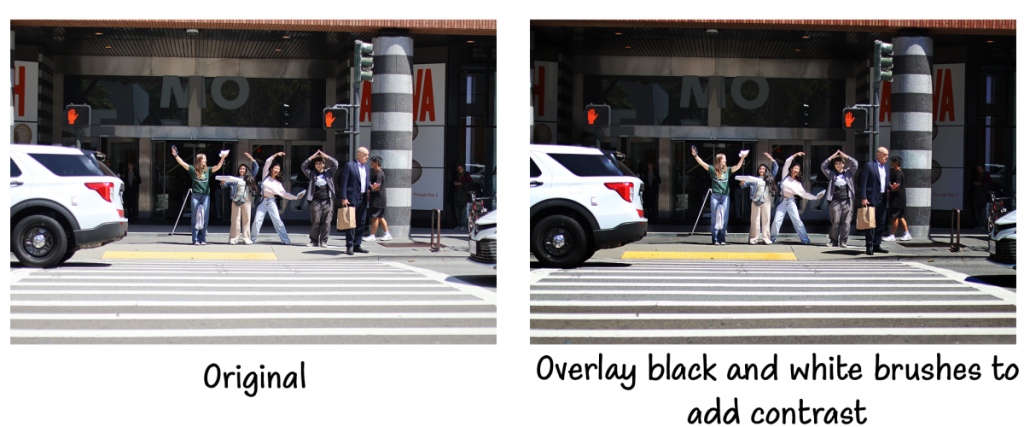
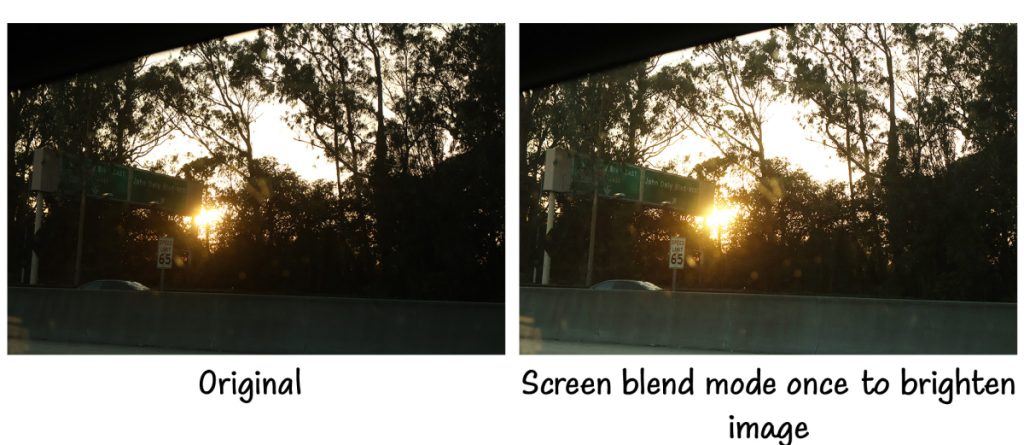
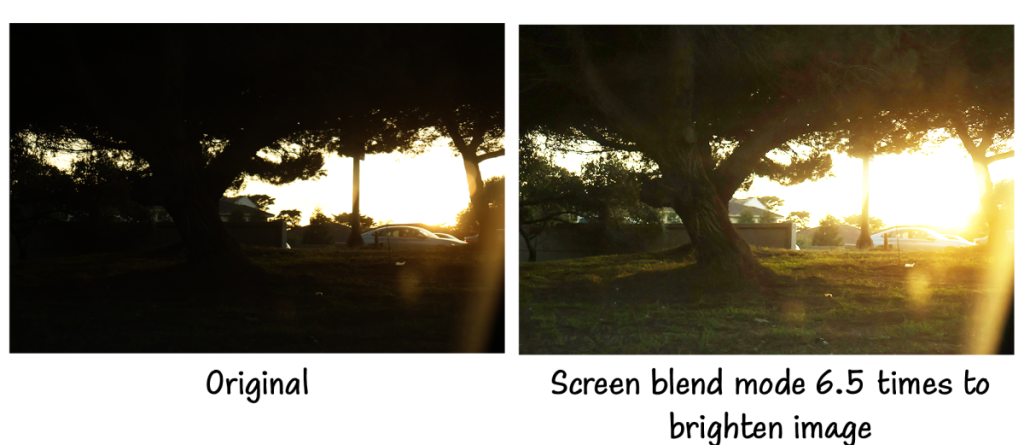


DSLR PRACTICE PHOTOS
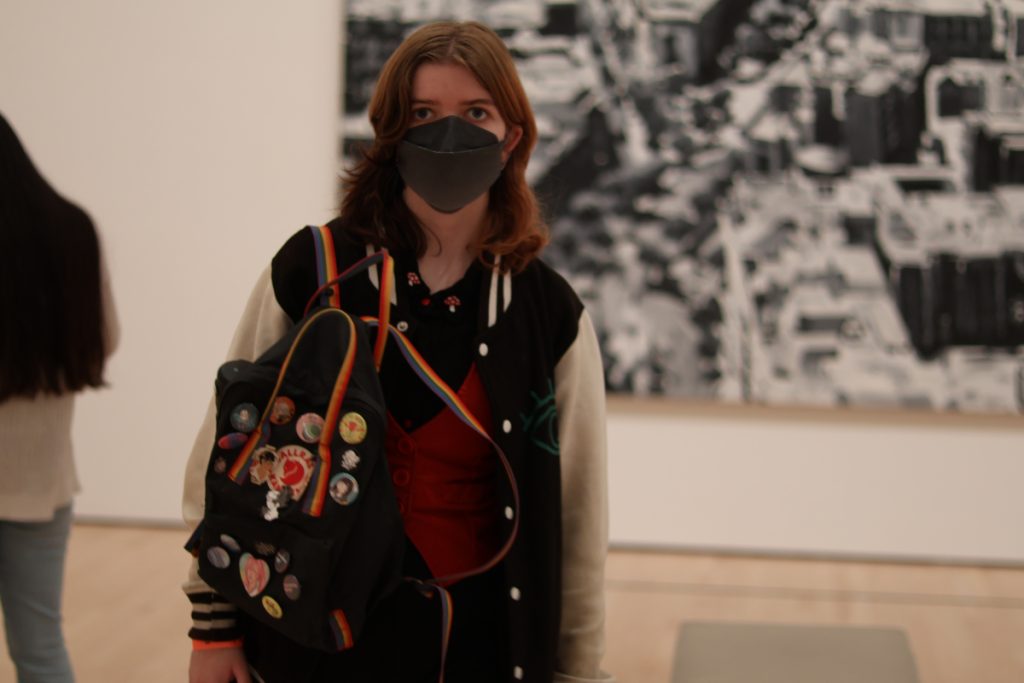
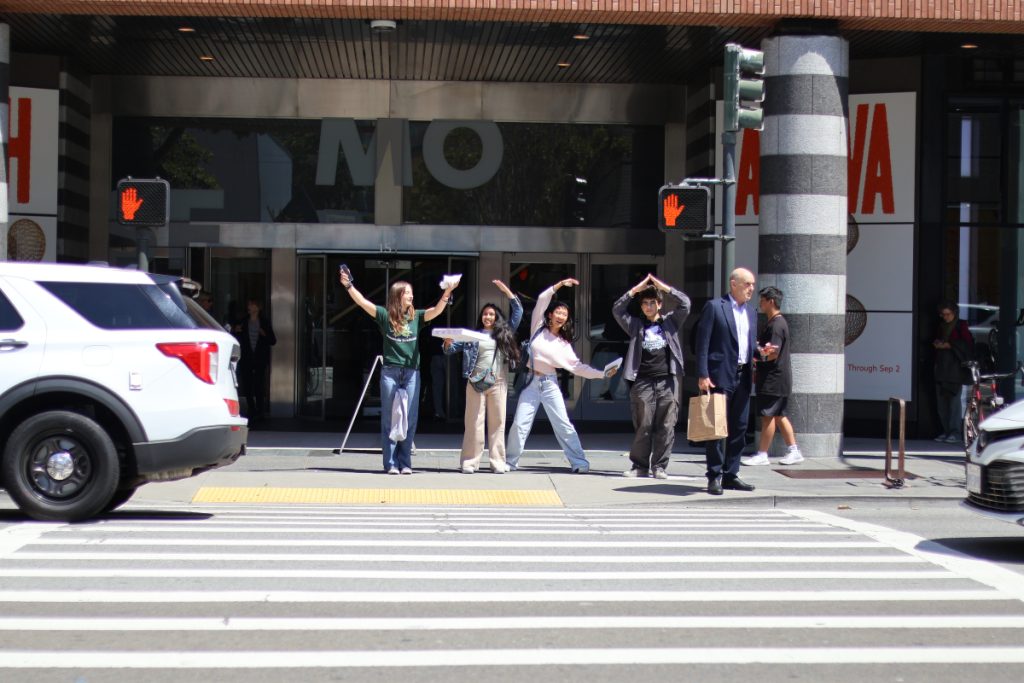
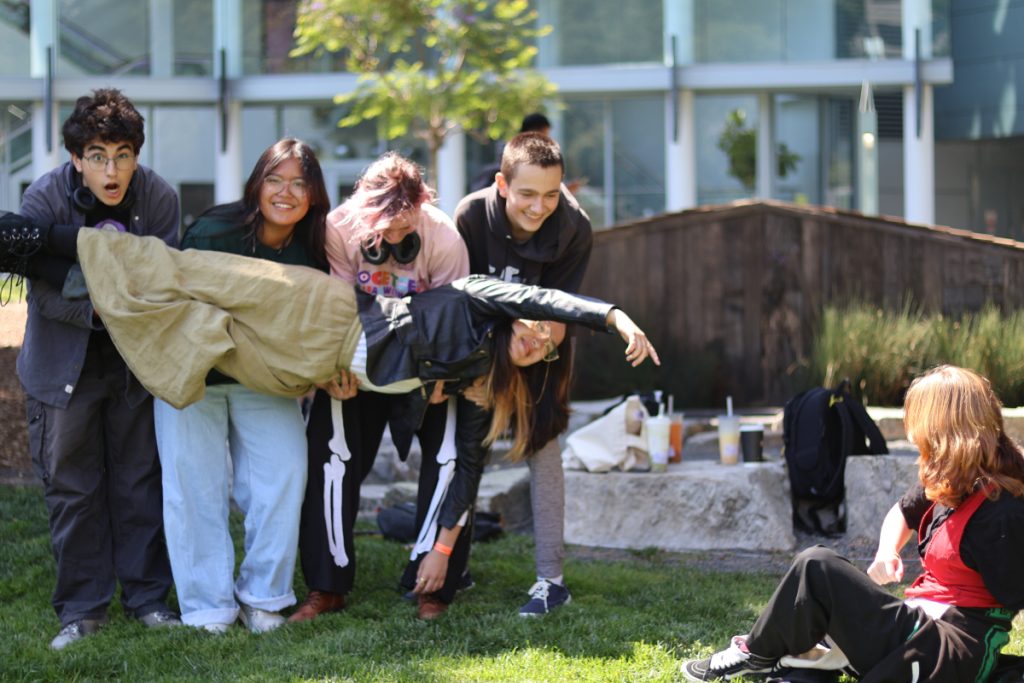
At Freestyle, all students are given a DSLR camera, and early in the digital media course, we were guided through how to use them to take photos. We experimented with various camera modes; how to focus the lens on certain parts of the image, different expose times for various light levels, White Balance, and more. Shown here are some photos I took during our SFMOMA trip and in the Digital Media classroom.


ANIMATION
HISTORY OF ANIMATION
At the start of the year, we watched various videos on the history of animation and the 12 principles of animation. We wrote a short essay summarizing what we learned, and then analyzed a short clip of a favorite animation of our choice to note down how the principles of animation were used. I chose a clip from the pilot animatic of Pretty Pretty Please I Don’t Want to be a Magical Girl, specifically the scene where Aika beats up Eclipse with a lead pipe. I find it hilarious how this is the only fully animated and colored scene in the entire pilot episode.
ZOETROPE
Our first animation project of the year was a Zoetrope, a pre-film animation method. Original Zoetrope devices utilized specially placed slits in the cylindrical body of the machine that a viewer would watch the animation through as the body spun, the animation on a strip of paper placed around the inside. The devices in our animation classroom use mirrors on the inner part of the machine instead, giving the same effect while being easier to see.

This project required 13 frames of some motion that could loop endlessly. I like drawing deer, so I chose to animate a deer running. When learning history of animation, we learned of Eadweard Muybridge, an English photographer well known for his work in photographing sequences of motion. His work included many photos of animals walking, running, jumping… meaning I was able to find reference photos for frames of animation of a deer running rather easily. Yay! I studied those images and then sketched out my frames.
A light board was used along with all analog animations we made to help see the previous frames during the animation process. Light boards are exactly what they sound like—a large light that paper is layered on top of, allowing the animator to see the drawings of one frame (on one piece of paper) while drawing a different frame (on a second piece of paper, layered on top of the previous). This meant I was drawing 2 copies of my Zoetrope during the sketch process in order to let myself see the previous frames as I drew. The 13 frames of animation were sketched, inked, and then colored with colored pencils.

PHENAKISTOSCOPE

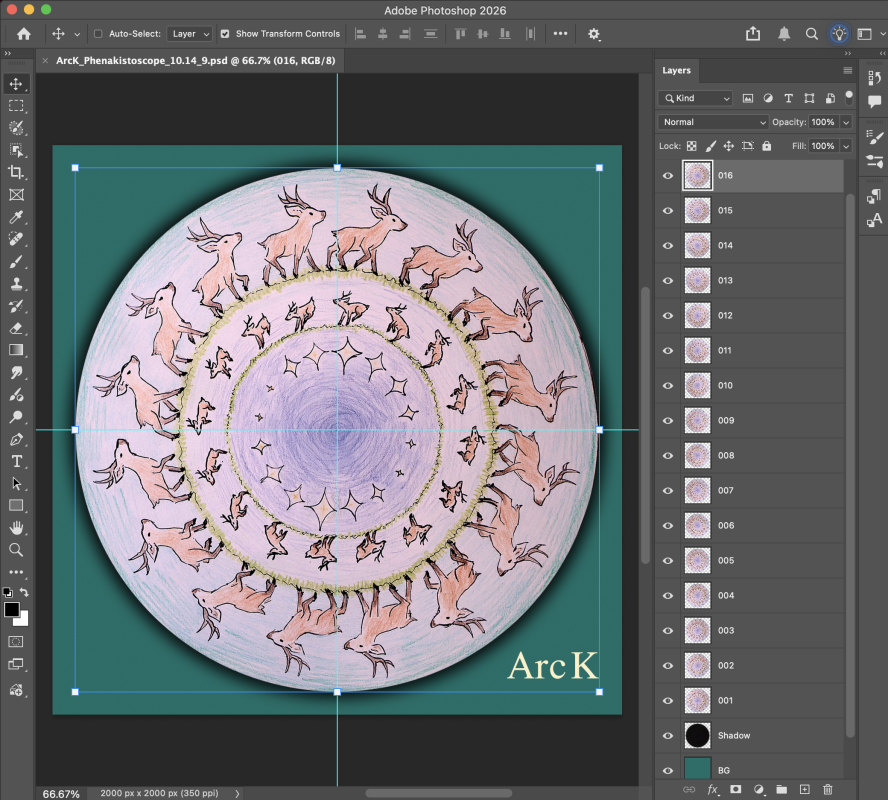
For this Phenakistoscope, we were to animate around three separate things across the 16 frames; I chose to animate deer and a star.
The focus of my piece is deer, my favorite animal. The specific species of deer drawn for this project are marsh deer. I wanted to understand how movement works for this animal, so I searched up reference images to study. None of the image sequences I found were exactly 16 frames, so I had to choose which ones to include and which to skip over to make the animation fluid. If I were to change something, I would edit the walk cycle on the outer circle of the animation, making it a bit more smooth and possibly adding some secondary action through the deer’s ear to make the movement more interesting.
This project gave me a much deeper understanding of how motions like walking and jumping work in quadrupedal animals such as deer. I am most proud of the jump cycle, as those drawing were rather small but I managed to get a clear movement that loops nicely.

This project was drawn on paper, and then animated through Adobe Photoshop. Similarly to the Zoetrope, this project was created with a light board and 2 different paper copies of the phenakistoscope template, the light board being used to see the previous frame on one paper copy as the next frame is drawn on the second copy. This project was more difficult to create than the Zoetrope, due to the greater number of frames, but more so because there was no good way to simulate the animation during the creation process to check for errors in the movement drawn. Traditional phenakistoscopes would have slits cut around the edge (the outline of which is visible in the sketch below), and the phenakistoscope would be spun with the drawings facing a mirror while the viewer watched the reflection through the slits to see the animation. But since cutting out those slits would leave me with less space to draw in, and would be unnecessary in the end as we were to animate this project in Adobe Photoshop, I didn’t cut them out. I just made sure I was extra careful in the sketching phase, cross referencing frames with each other via the light board, and in the end, I’m proud of how this project turned out.
Once the project was transferred from the sketch paper to a thicker paper, inked, and colored, a photo was taken and uploaded into Adobe Photoshop to be animated. After the image was properly cropped and color adjusted, 16 layers were made (as there were 16 frames in the phenakistocsope), and the image was rotated slightly in each frame. Photoshop’s frame animation feature was utilized to create an animated GIF of the phenakistoscope rotating around.
FLIPBOOKS
Our first flipbook project was to be at least 90 frames; I ended up with near 100 of them. I chose to animate one of my original characters named Soleil. The frames were sketched out in basic shapes to see the motion, edited to make it smoother, then inked and colored with colored pencils.
The second flipbook was for a class-wide Exquisite Corpse game. Each student starts and ends with basic shapes, so one person’s ending frame would be the next person’s starting frame. In the end, all animation juniors’ flipbooks will be edited together to create one long animation project! This flipbook features three orignal characters of mine. Their names (in the order that they appear in) are Nova, Cypress, and Atoll.
Each of the frames for both projects were hand drawn on paper, utilizing the light board similarly to the previous analog animations, and then turned into a digital video through the stop motion software DragonFrame.


STOP MOTION
For this project I animated my character Soleil yet again, this time using a mix of paper and play-dough. This was certainly one the longest projects to work on, with the play dough puppet being shifted around and sometimes remade for each of the 90 frames. Animated with the DragonFrame software and a down-shooter setup for the camera, I was able to set up the scene on my desk and switch between adjusting frames and shooting them on the computer.
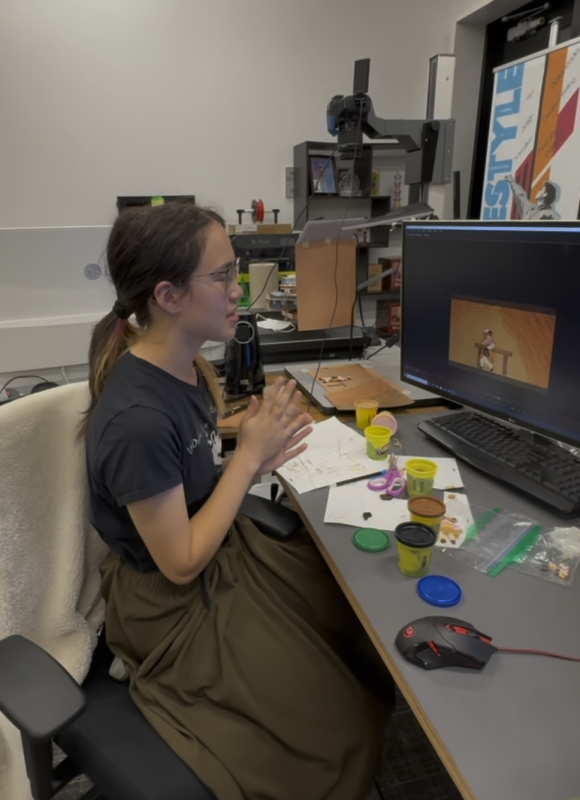
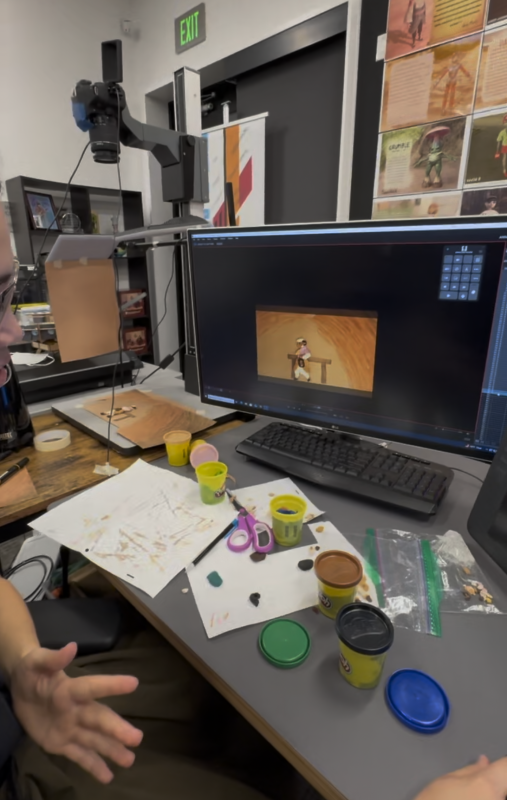
This project really strengthened my attention to detail and patience when it comes to animation. I found myself very focused on visualizing and planning out the motion in my head, sketching it on paper, and then analyzing my frames as I worked to ensure my animation is coherent and the motion is as realistic as possible. I had a lot of fun with this project, and am glad this class gave me the space to be creative and test out a new media form. I do really like the look of stop motion with clay / play dough, and see myself likely wanting to do another project with this medium in the future.