
During the Narrative 2 Unit in Animation, we began learning how to actually animate our previously 3D modeled characters. We both learned how to do keyframe animations in Maya and use Mocap technology to map real life movements onto our characters. We also learned how to do different blend shapes so we could animate expressions and lip syncing on our 3D models.
3D Character Bio + Animations
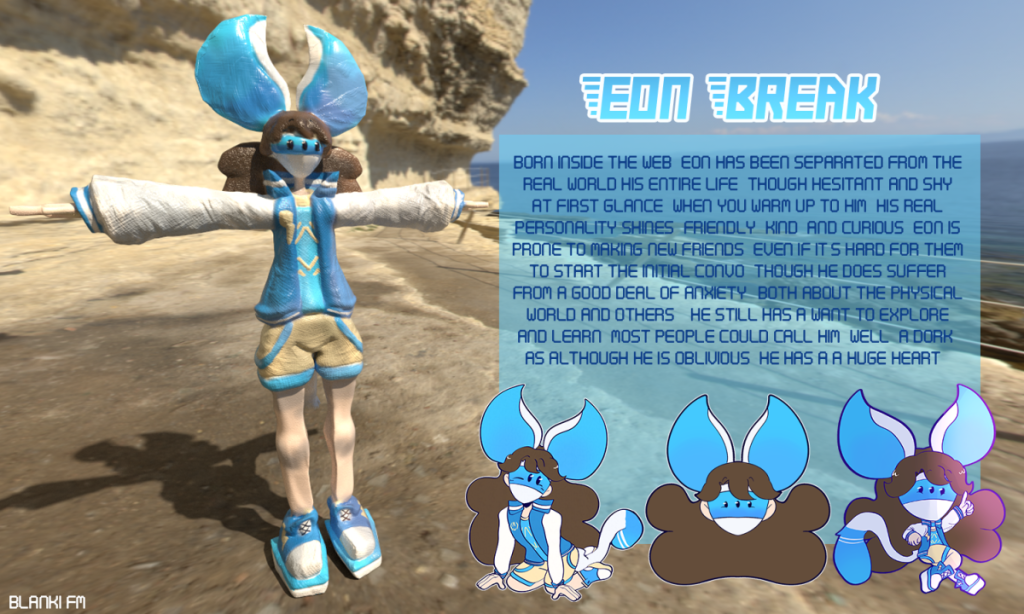
Before animating our characters, we made Character Bio’s with our finished models in Photoshop. Below is my character bio of my 3D model of my OC Eon. This assignment was similar to the character bio’s we did for our 2D characters that later became our puppets during Narrative 1.
For my Senior 3D Character poses, I chose to once again use my character Eon for my 3D model and then did various different animations to test out Autodesk Maya. Our class did a walk, run, and jump cycle so we would understand the basics of Maya’s animation software. We also did a brief motion test prior with 3 balls in order to get a hold of the weight of motion.
The main struggle I had throughout this process was getting the walk and run cycles to look right. I kept misunderstanding the movements of each foot and stuck to 2D animation techniques rather than adapting to 3D ones. This proved a substantial but important learning curve as I prepared to take on bigger animations in Maya.
Our next assignment would be learning how to use blend shapes in Maya in order to create lip sync animations. We did this via cutting a tiny hole in our characters mouths and then making various different models of each key mouth movement (a, e, i, o, u, etc) and then used the blend shapes feature to merge the models together into one that could be slided between different states. This also allowed us to implement various expressions, like smiling or closing the characters eyes. My lip sync animation was done to the song “Harder Better Faster Stronger” by Daft Punk, as I think their music fits Eon’s vibe well.
We also did some initial experiments with Mocap (or Motion Tracking/Capture) animation, in which a model uses a tracking suit to capture animation data via their movements and then superimposes it onto a rigged 3D model. Below is one default kick mocap motion I imposed onto my model.
3D Narrative Animation
The biggest project in Animation during the Narrative 2 unit would absolutely have to be the group Senior 3D Narrative Animation. This project required us to work in groups of 3-4 in which we made a 3D animated short using what we had learned throughout the year. My partners and I decided to create an animated short about a bunch of colorful characters applying for a job as a mascot of a toy store. They go on various challenges/trials in order to prove themselves worthy and this ultimately culminates in a fight. What happens next? That’s for you to see!
Below is our initial animatic of the animation. An animatic is essentially the skeleton of what’ll become the animation later on. Animatics are drawn out in order to plan what the final animation will look like and give basic tips to all members of the team on how to pose the characters, position the camera, etc. I was the one who drew all the storyboards for the animatic and my teammate Joshua edited the final thing together.
Of course, you can watch our final Narrative Animation “Mascot Mayhem” below as well.
Overall, what I valued most about learning 3D animation and software in Animation was being able to have a whole new world finally open up to me. I can now use 3D software in my day-to-day and even if I don’t have access to Maya in the future, I have the skills in order to do similar things with other programs or even on my own. I feel more confident in my understanding of 3D space and animation after this year which is especially important for the industries I want to work in.