The zenith project is meant to act as the peak of our skills in Freestyle–using skills we had developed over the past two years, we were given about one and a half months to further develop our skills through any project we wanted.
I created a digital sculpture for my zenith. This project was a lot of fun and helped develop a lot of skills for me, and I’m proud to show it off. Below, you can find a description of the process, my presentation slides, and text and audio versions of my zenith reflection.
Process
To make the final sculpture, I just started out with a 3D sphere. With symmetry turned on, I used the move brush (which just pushes or pulls the selected area) to expand the bottom half (to make a starting point for the jaw), create eye sockets, and create vague protrusions for the lips and nose.

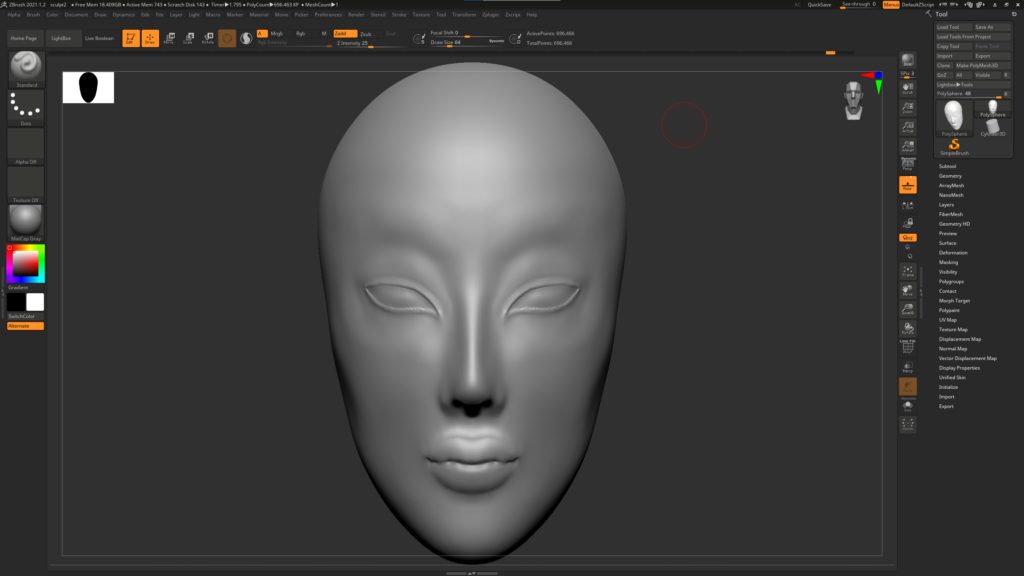
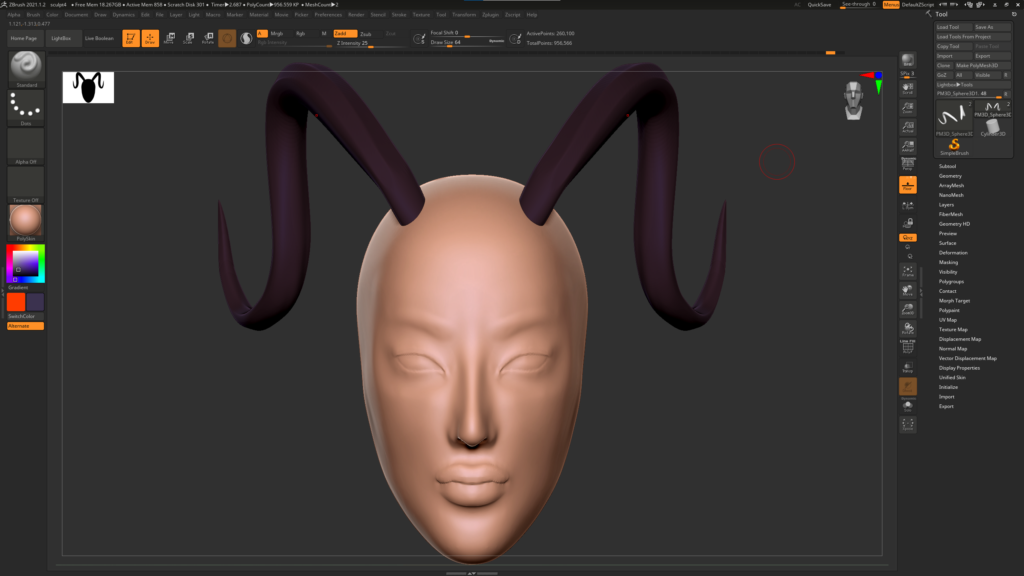
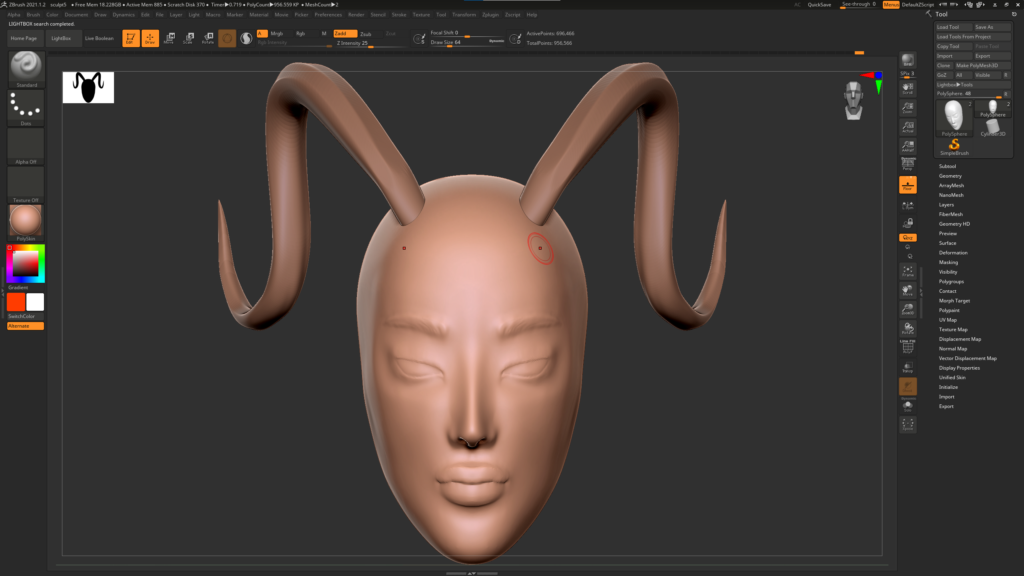
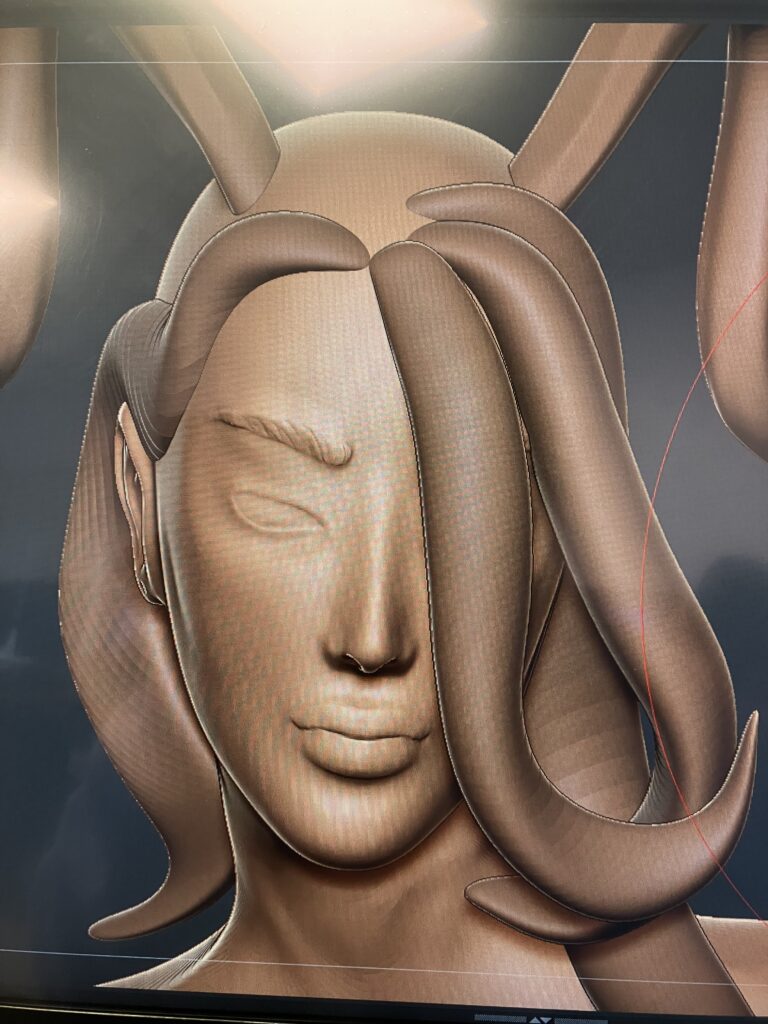
From there, I further refined the face using both the move brush and other brushes. I used the move brush to build up cheekbones, a chin, and a jawline, and used the standard, damstandard, and clay buildup brushes to create the lips, eyes, nose, and eyebrows. From the sides of the jaw, I created ears by expanding a selected area, hollowing it out, and building up material to add a helix, tragus, etc. (external structures of the ear (of course using reference. I can’t do that on my own.)). I also created horns, by adding a new sphere subtool (which are essentially separate parts within the same piece), making it into an oval, and using the move brush to adjust its shape.
After I was happy with the face, I masked a portion of the underside of her jaw which was the shape and position of a neck. Using the move brush, I expanded the area outward (creating the neck), and then further split the bottom of it into two other protrusions (the shoulders). I smoothed it out and began refining it, adding collarbones, shoulder blades, a sternum, and neck muscles with the standard and clay buildup brushes.
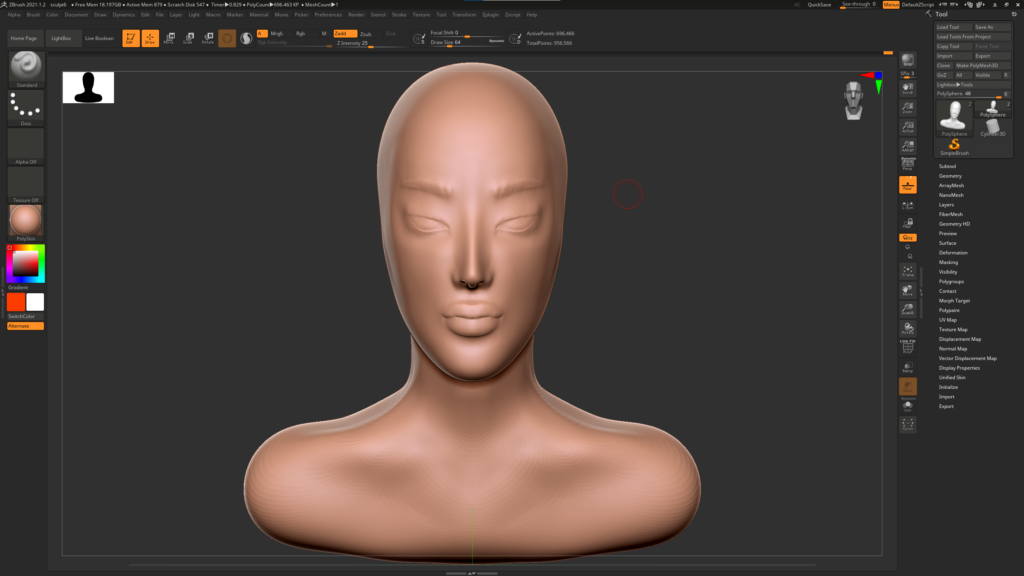
The current pose was really stiff, with the character just facing forward, so when I was confident with the face and body and was sure I wouldn’t need the symmetry tool anymore, I adjusted it. I did this by selecting the head region and using the move tool (which is different from the move brush) to tilt it, and doing the same with the neck and shoulders. This left some awkward stretching and building up of material, so I cleaned that up.
After that, I started working on the hair. I created each “piece” by stretching a sphere into a long oval, adjusting its shape with the move brush, and then going in with other brushes (mostly standard and clay buildup) to give the impression of texture. I added these pieces until her head was covered.
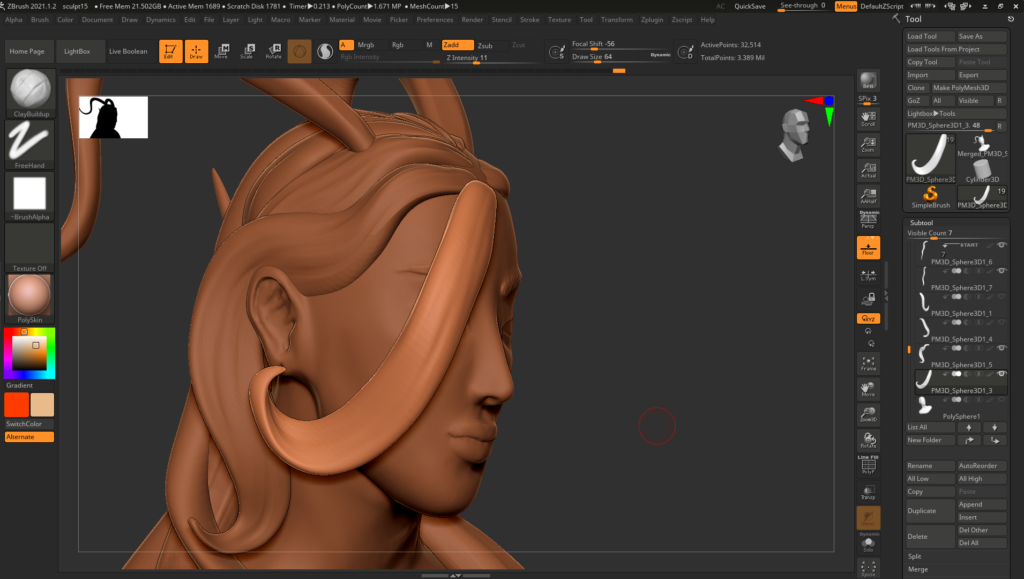
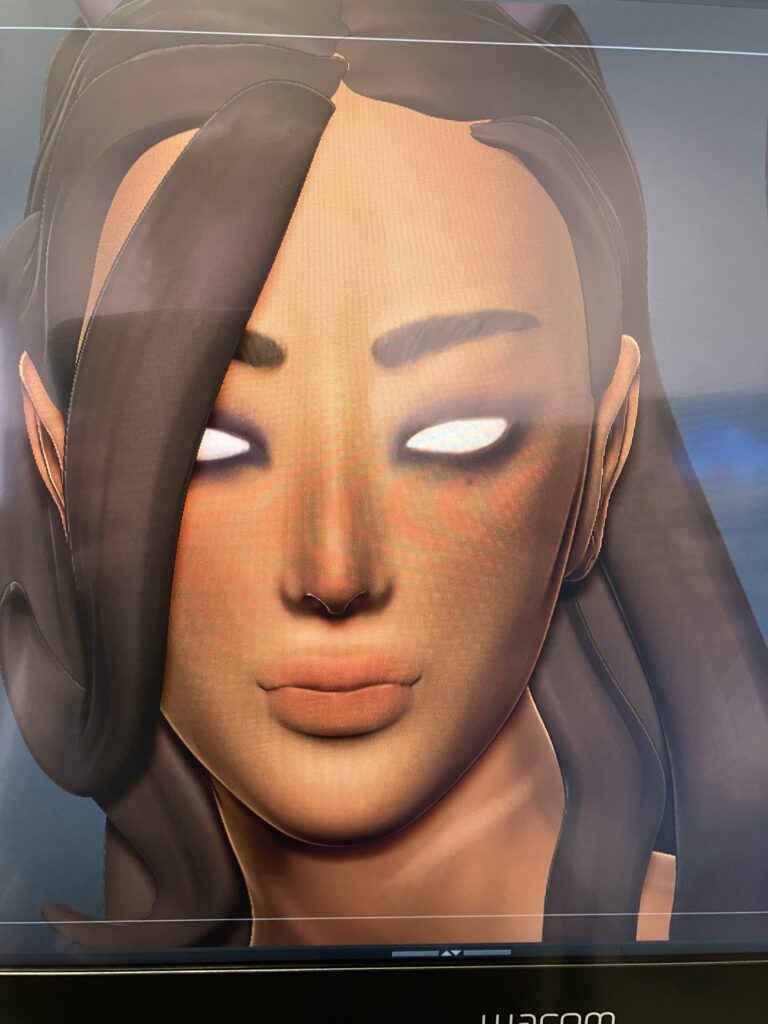
With most of the sculpture done, it was time to start coloring. ZBrush has a feature called Polypaint, which I chose to use–it doesn’t count the color as a texture, meaning it can’t be used for animation, but it also doesn’t require any loss in quality of the sculpt, and since I wasn’t going to be animating it, I wanted it in full quality and chose Polypaint. It essentially just works as a paintbrush–I turned on the colorize feature for the subtool I would be coloring, chose a brush, turned off Zadd and Zsub (which determine if the brush will be adding or subtracting material) and turned on RGB, which enables color. I also assigned different materials to different parts of the sculpt–for example, I used satin for the hair, and polyskin for the skin.
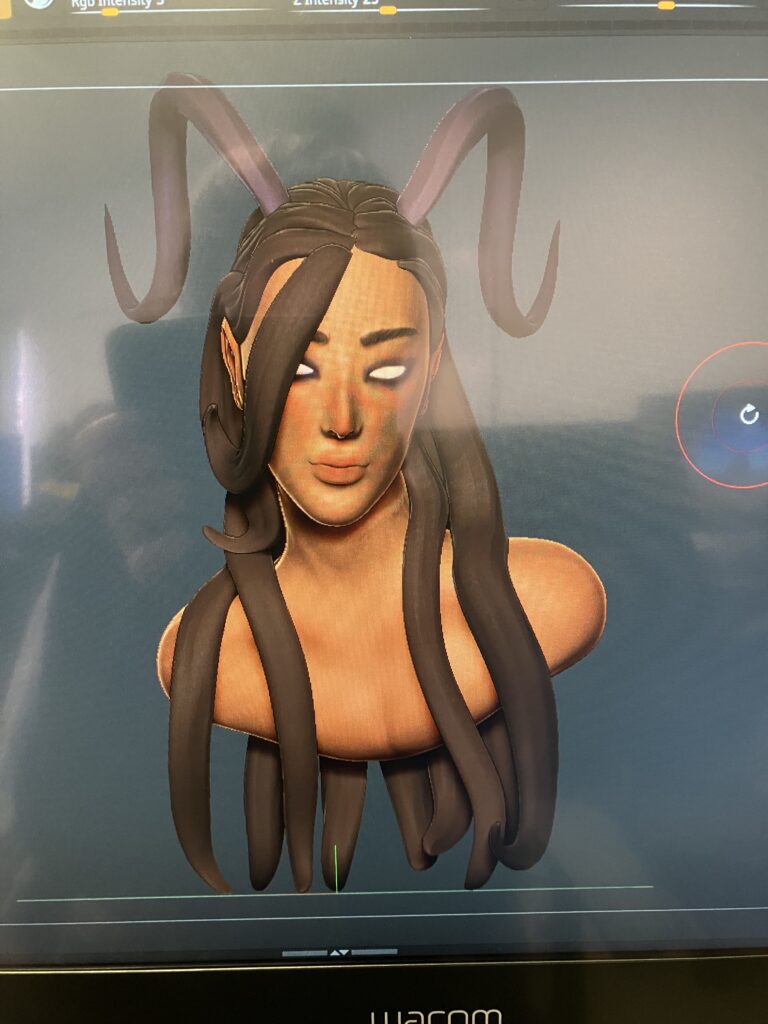
Eventually, I also got around to adding jewelry. I’d been putting it off, since I wasn’t sure how to make it. At some point, though, I figured out I could just take the some of the free jewelry models ZBrush offers and adjust them slightly to make them into simple rings, and then manipulate them to fit wherever they were on the sculpture. With that, I was done.
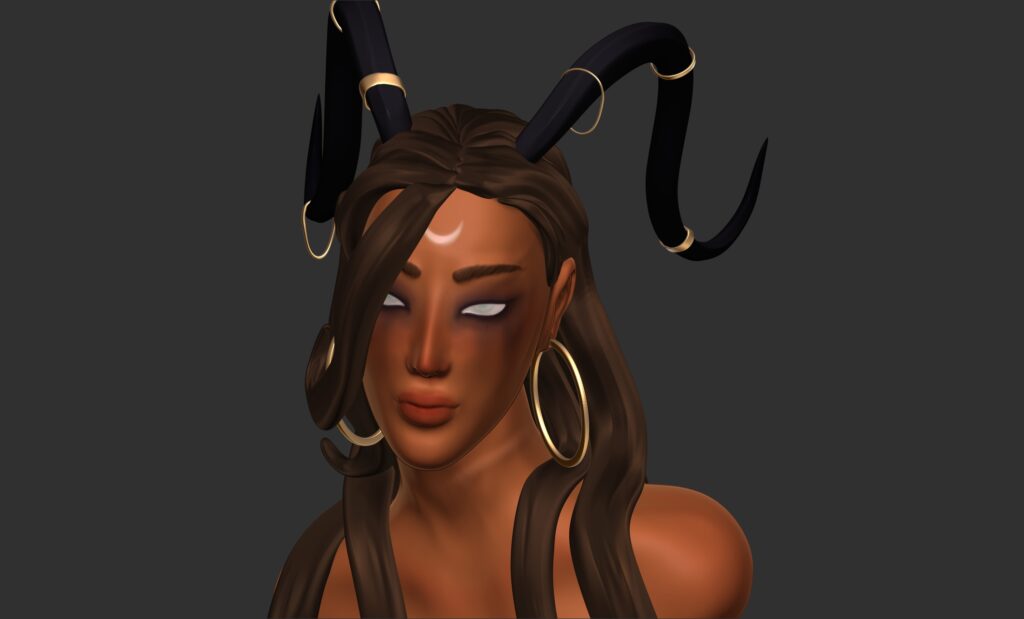
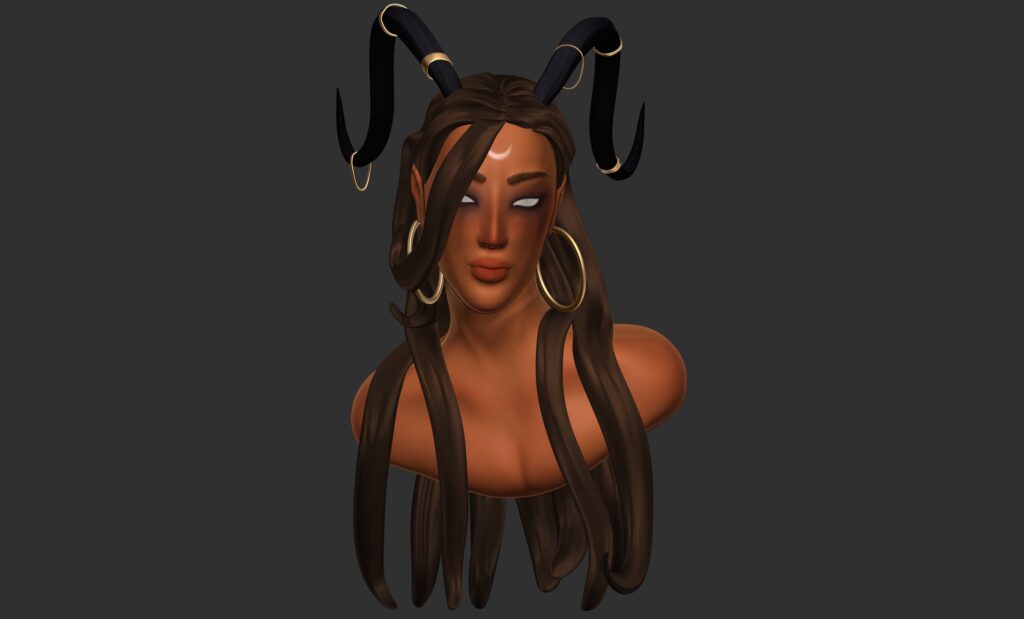
Unfortunately ZBrush broke before I could render anything else or make a turnaround video so this is all I have to offer as far as the final product goes.
Slides
For the last part of the Zenith project, we created either a video or a set of slides explaining the process to present as part of the zenith celebration. You can view mine below.
Reflection
For my zenith project, I decided to create a digital sculpture using Zbrush. In animation, we’ve used Zbrush on a few different occasions for 3D modeling, but I never got the opportunity to really dive into the program and create something I’m proud of. Despite that (and its nightmarish UI), Zbrush was a program that I found particularly compelling, and I wanted to explore and create with it more. Particularly, I was really drawn to the opportunity to essentially bring characters to life and depict them in a more interactive way. I’ve always been very interested in storytelling, which eventually became an interest in illustration and character design, and these led me to my decision.
I didn’t have any inspirations, and wasn’t sure what to make at first, so I started out practicing by sculpting a face and experimenting with making hair. This helped me learn a lot, and I felt a lot more comfortable starting what would be the final sculpture, which I chose to make of a character of mine. Throughout the process, I used online resources, which helped me learn a lot, and I continued to utilize those when I started on the actual sculpture.
Since I still wasn’t at all confident in my Zbrush abilities, I decided to sculpt a bust (rather than a full body), and continued to use online resources. Of the 21st century skills, I think I improved most in my technological literacy. Though, in the grand scheme of things, I’ve barely begun to learn how to use Zbrush, for such a difficult program, I feel much more confident in it and am proud of my progress. I think I’ve also developed better self-direction skills, as I’ve had to seek out information and techniques myself and learn how to use them. Though I’m not sure I’ll continue to use Zbrush, I am interested in continuing practicing digital sculpting, and I’ve been glad to develop the skills needed for that over the course of my zenith project.
As far as the project representing a culmination of the skills I’ve developed at Freestyle or being my “ultimate” Freestyle project, though, I wouldn’t entirely say I succeeded in that. There are no projects I’ve made in Freestyle that I can fully, confidently say I love, and that also applies to my zenith project. Though I’m proud of it, and it’s definitely one of the best things I think I’ve made in Freestyle, there are too many errors I see in it to call it an actual “zenith”. Still, I believe this project helped me develop a lot of helpful and important skills I can use in the future, and I’m glad I got to experience that while making something I enjoy.