Introduction
Zenith: the final elective-project for seniors. Up until I saw a badminton teammate post on her Instagram a photo of a pale sky with ‘zenith’ pasted across it in Arial font, I had no idea that Zenith was a word not unique to the Freestyle project. I appreciate the astronomer’s definition of the word, on Google, to be “the point in the sky or celestial sphere directly above an observer.” This also defines my experience creating this project because I was able to use the skills I’ve accumulated to successfully self-direct my learning and progress.
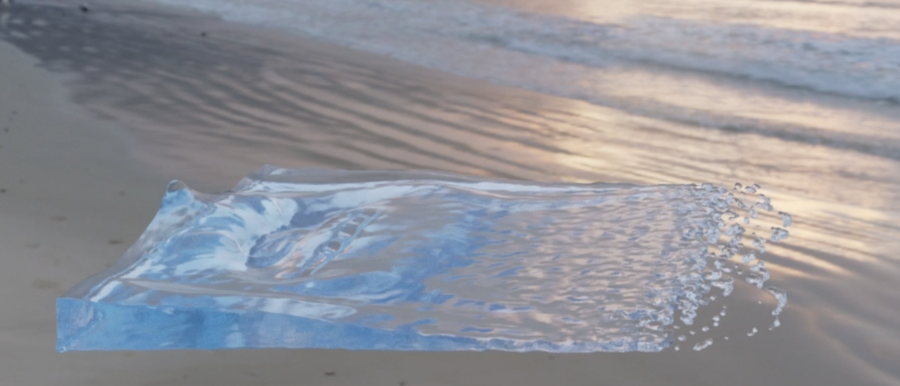
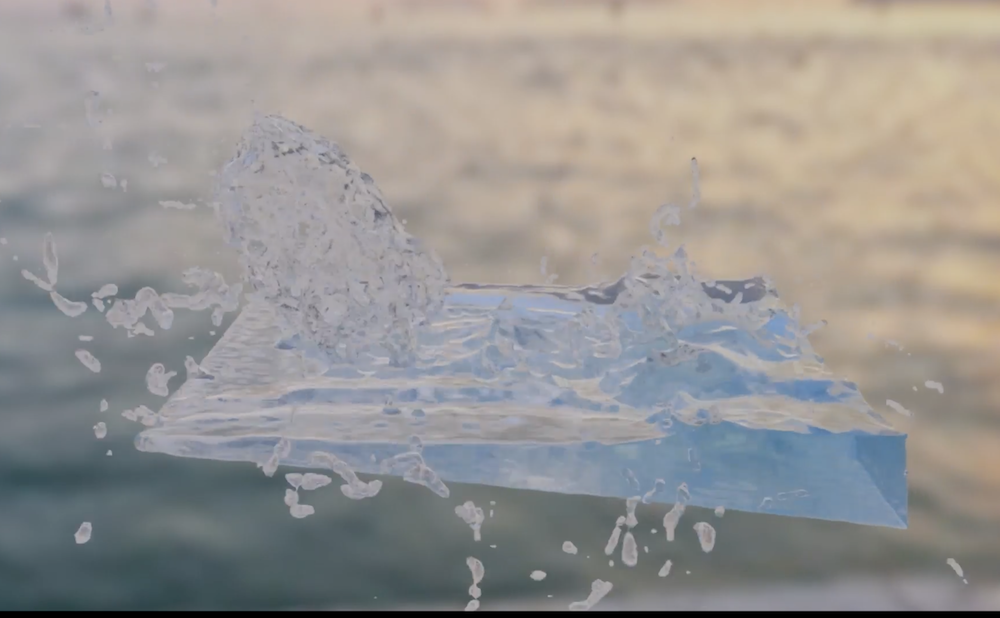
Animation students could choose to create a 2D, 3D, or combination-of-2D-and-3D project. Having worked in 3D all year, I wasn’t quite done exploring Autodesk Maya, the modeling application we use. For my Zenith project, I explored how to use Bifrost Fluids within Maya to create simulations showcasing different liquid flows.
If you’ve checked out my Explorations page under Junior Year Projects, you know that last year I chose to look into how to create 2D vapor effects in animation. Sharing the theme of water and form, my Zenith project feels like a full-circle project.
Final production
This week of May 11th, I made a video showing my final render compilations!
Below is a video of the class presentation I gave to share about my project and creation process. Feel free to watch it now, or read all of the Creative Process and come back to it.
Creation Process
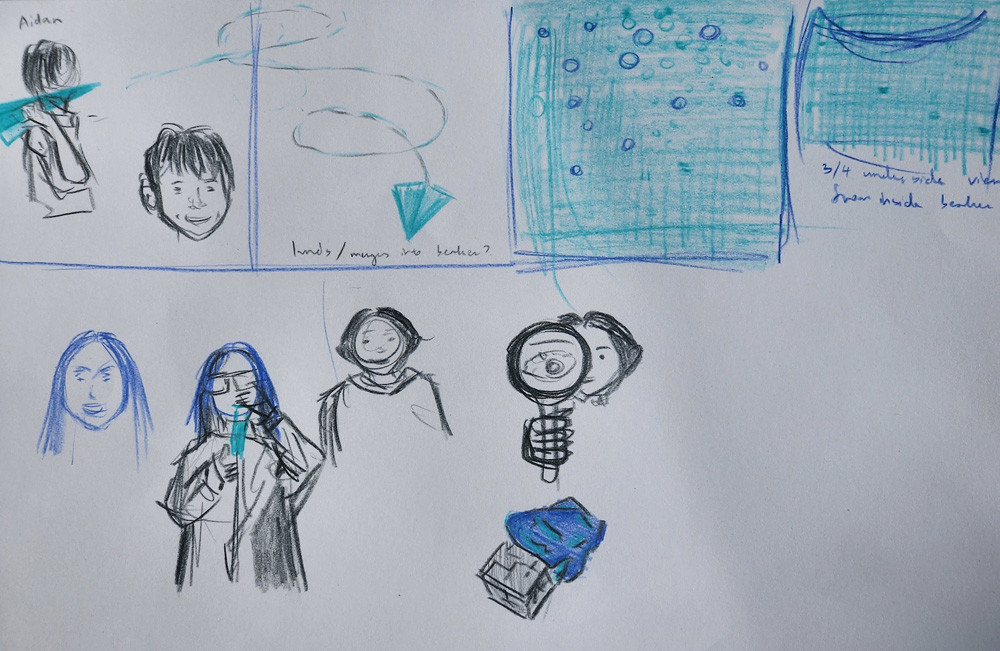
My project evolved quite a bit. And I created many side things during the process. For months, I was liking the idea of creating a 2D animation for the Zenith project that stars the stories of my teammates in Science Olympiad. For example, I could show my friend Aidan, who competed in Wright Stuff (an airplane building event) last year, releasing his balsa wood and mylar model into the air; Carolyn looking up from a chemistry lab test tube; or Avni peering at an irregularly shaped lump of mineral through a magnifying glass. The picture on the left side below this block was the storyboard I created for that idea.
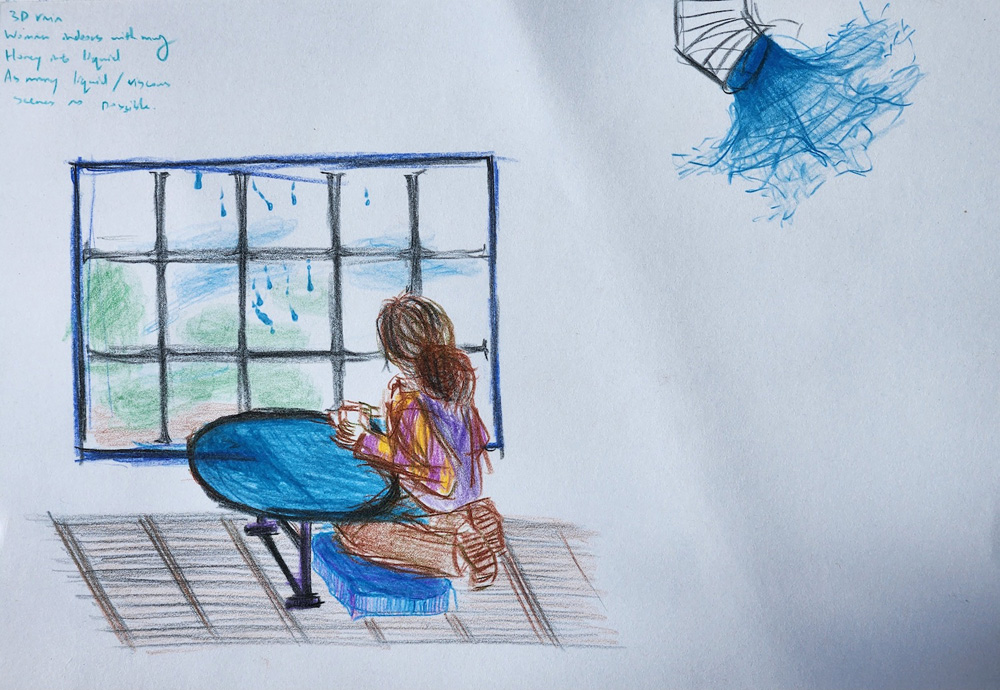
I decided I could save that idea for another project, at another time, and began thinking more about what I could do with specifically liquid motion. I had some other ideas about possibly creating a rainy day story, showing outdoor pipes releasing gushes of rainwater; I’d also have indoor scenes showing more behaviors of liquid, such as viscous honey sinking into a mug of hot tea, liquid dish soap falling onto a sponge, etc. The picture above to the right is one scene I imagined for this story.
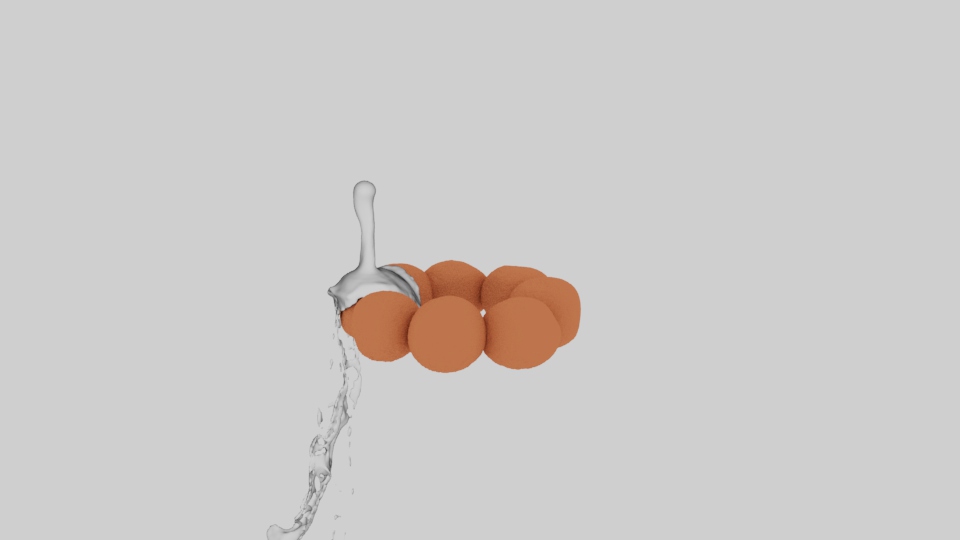
Ultimately, I decided to focus on the technical aspects of using Maya Bifrost Fluids. I focused on creating scenes that show a semblance to real-world fluid motions by the laws of physics. I found resources to help me learn how to create what I visualized, like the Academic Phoenix YouTube channel. My animations were inspired by dessert advertisements (Lindor chocolate, syrup being poured over cakes, etc.), as well as simulations of phenomena in nature such as waterfalls. I intended to create an immersive experience through the visuals and the audio combined.
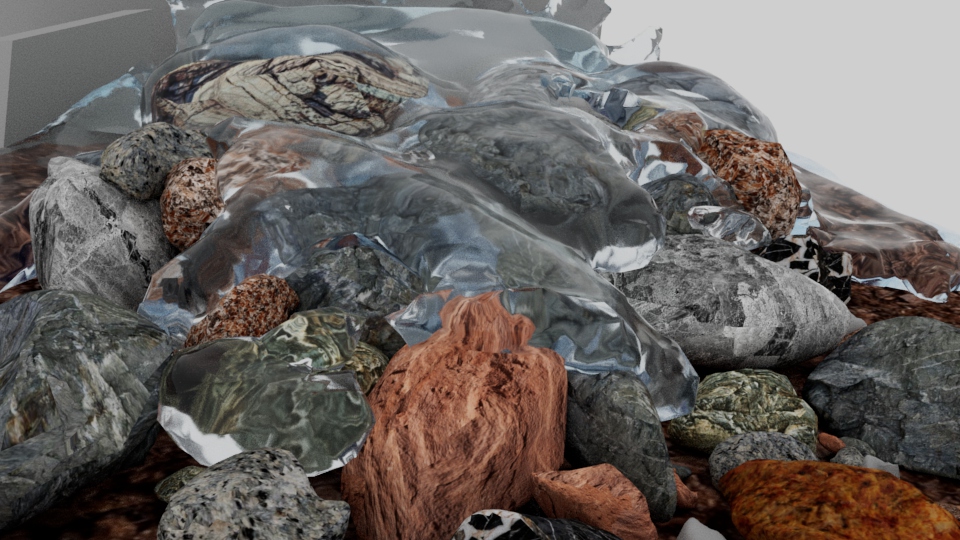
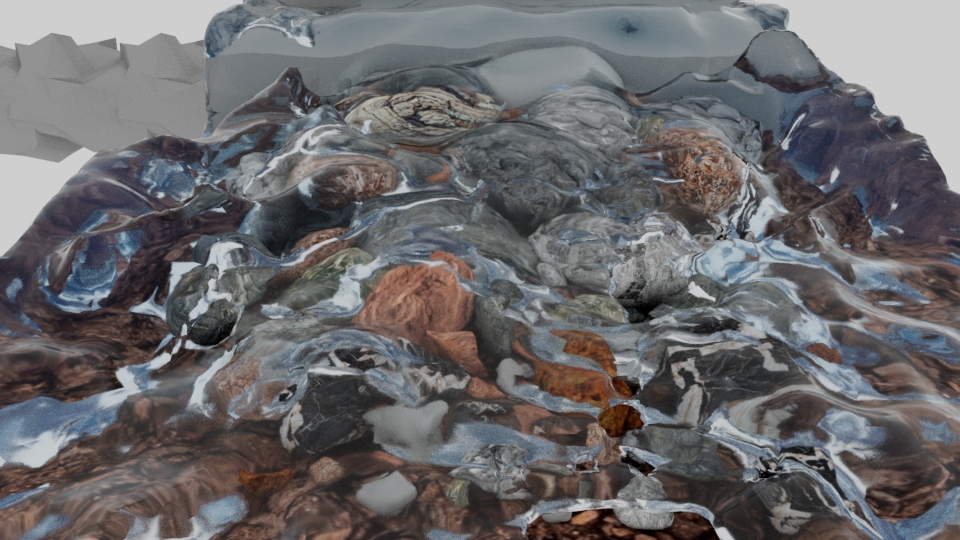
Because I save absolutely everything, I now have a great collection of behind-the scenes-images. Below are for the river rocks sequence seen from the Arnold Render view.
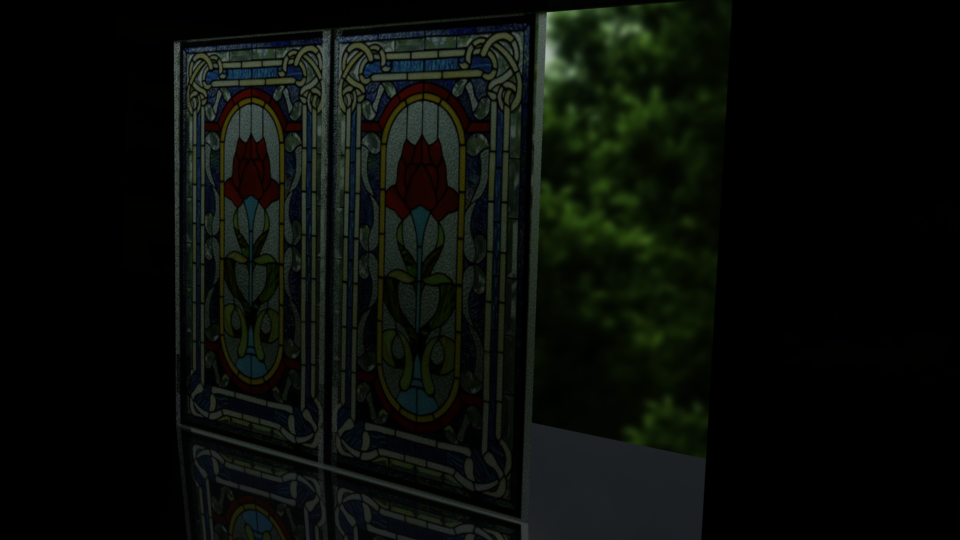
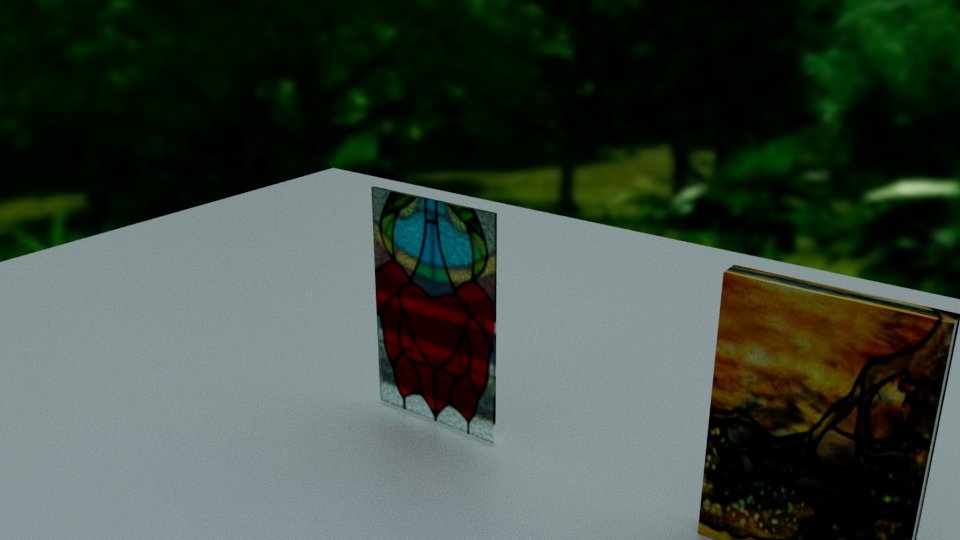
During the time my scenes took to render, I watched video tutorials by Academic Phoenix to pick up on more skills in Maya. One fun skill was learning to understand the difference between the transmission and opacity properties when assigning materials to models. When changing transmission, I can create stained glass windows. Using changing opacity, I can import black and white images onto a model (a plane worked best), where only the white part would show. In this way, you can create thin things like grass, leaves, strands of hair.
.
Through designing and creating this project, I’ve developed better problem solving skills. On my Zenith Proposal PDF below, if you go to page 4, you’ll see the list I wrote to keep track of skills that I wanted to learn, as well as more tutorial resources and inspiring examples found from around the Internet.
.
Zenith tutorials
I decided to make video tutorials to show the process behind how I created my Zenith animation sequences for the mochi donut, the waves, and the splash. Please watch by clicking on the image related to the sequence.
.
.
.
.
.
Reflection
After completing my Zenith production, I wrote a reflection essay about my experience and thoughts and recorded it.
I forgot to include this in my reflection: Thank you so much to CamillaR for teaching me how to use area lights, and to NicholasT for showing me how to place HDRI images onto Skydomes!
Thank you for learning about my Zenith project!