Funny Compositions
Before we could make a surreal composition to match our English research, we had to learn composition. With our own images, we were encouraged to use Photoshop to produce humorous compositions from our own images. They did not need to be that surreal, or have rhyme or reason. They just had to be silly. I found some photos off my phone, and used those.
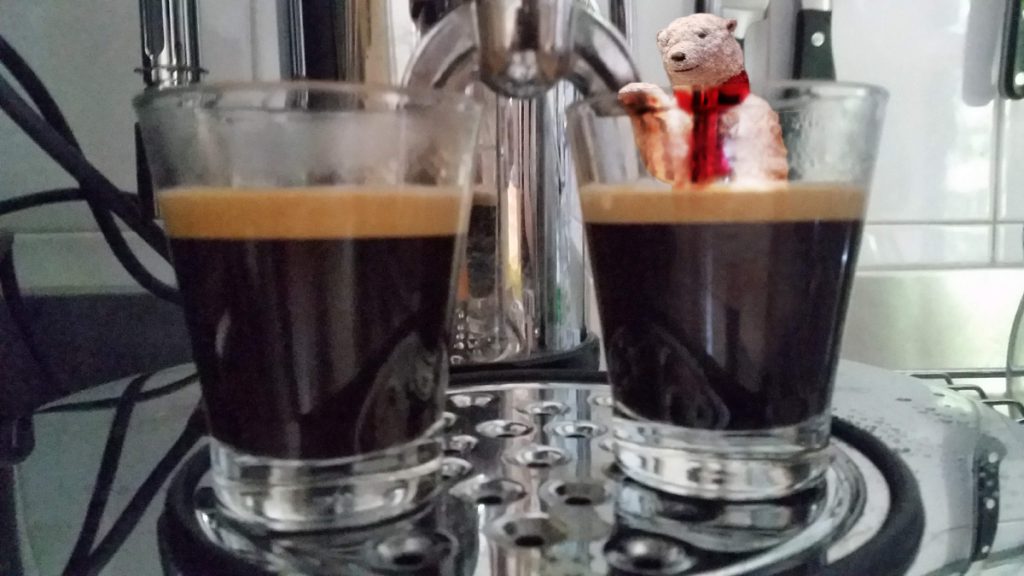
The first one features two images, one of an espresso machine and one of polar bear statues. I put the polar bear in the coffee. It was interesting trying to overlay the coffee over the bear so that it would look a little bit more plausible.
The second one is a room in a house with chairs and windows. Because of the windows, I had the freedom to put weird things outside. I chose a giant moon and one of my stuffed lions. I also tried changing one of the engravings on the chairs, again preserving enough of the original texture on the new shape.

Behind the Scenes: Funny Compositions
Here are a couple snapshots of how my funny compositions look in Photoshop, with the layers panel showcasing all the parts.


Motion Graphics
This short video is the culmination of learning many techniques in After Effects. I learned about various motion features and ranges to set where they are, and then made this as just a demo with everything crammed in. It’s not that pleasant, but was an important toolbox for other productions.
Behind the Scenes: Motion Graphics
Here’s the project file for my motion graphics. It looks fairly interesting because of the color-changing element.

The motion graphics project was a great way to sharpen my skills, even if I wasn’t necessarily telling a narrative with this one. I kept using After Effects after, so I’m glad the practice made it more familiar and easier later.
Multi-Layered Art Project
The most involved Narrative project in Digital Media was the multi-layered art project. This was based on my world building project in English, and I made a stacked wood art project based on a landscape we devised. I wanted something that would last, so I tried to make something less dramatic. Our world building theme was conceived as the juxtaposition of fantasy and science fiction, and I used the early image of a castle under a spaceship.
I began with an initial sketch on folded paper, as well as individual sketches for various layers. I then digitized all the layers in Adobe Illustrator:
If the images do not display below:
On a Mac, press ⌘ + (plus) then press press ⌘ – (minus)
On a PC, press Ctrl + (plus) then press Ctrl – (minus)


It was then cut, glued, and colored. Here is my final product:

3D Layers Assembly Timelapse
Here’s a timelapse of cutting, coloring, and assembly of my final piece. All set to some fun music!
I wanted my 3D artwork to be something I could have on the wall, so I opted for a landscape. My world building project’s premise was interplanetary, so we got to imagine the terrain and architecture of those areas. This piece is an early concept for our water-based planet, with its feudal monarchy represented by the castle. Paired with the spaceship out of context, it ends up as a work about eras, and about how the past and future are not mutually exclusive.
Visualizing how the layers would overlap was a fun and challenging exercise. While I was able to draw it on paper, it was still difficult to imagine whether or not the layering on the cliffs would be sufficient or otherwise look awkward. The waterfall broke it up positively, where layers would make sense, but it took a lot of adjustment even after I started working digitally.
3D Layers Digital Assembly Video
I also learned how to use 3D space and manipulate cameras in After Effects for this project, which is how I made a video showing off the colored version’s assembly virtually.
3D space in After Effects and using a virtual camera was very interesting, because different results could be obtained by moving either the objects or the camera itself. I was able to achieve a zoom effect at the end by linking together many properties of the camera, a credit to the amount of control I have with that software. All in all, it allowed me to have a polished result for both my physical and digital representations of the depth of a real scene.