During the conceptual project unit, we were challenged to take creative risks through poetry, music, art, animation, experimental film, and web production. This was to help each of us find our own personal style and aesthetic when creating art. We got the chance to use professional equipment such as DSLR cameras, Tascam audio recorders, Adobe apps (Photoshop, Premiere Pro, and After Effects), and Pro Tools.
What I value about the English and Digital Media classes at Freestyle is that the assignments you do in those classes are connected to each other. For example, with the poetry unit we made haiku and free verse poems in our English class, then recorded them and edited them in Digital Media. I think having assignments connect to a different class makes me feel more engaged with the assignment itself. I know that I’ll be producing what I write in English as an audio recording or a video, which encourages me to push myself to do better on the English assignment and vice versa. Overall I like how we get to continue to creatively build on our ideas in Digital Media.
Something specific that I like about Digital Media is that I get a chance to learn how to use more professional softwares that can apply more to what the other elective courses would use. I think that having this opportunity to learn about these softwares will also be very useful when I’m older because the line of work I’m planning on going into will most likely use these or something similar.
English
Haiku
For our haiku assignment, we were each given a different random a random topic to write our haiku about while also including something in it alluding to a season. A haiku is compromised of 5 syllables for the first and last line and 7 for the second (5-7-5). My topic was betrayal through friendship.
Poetry
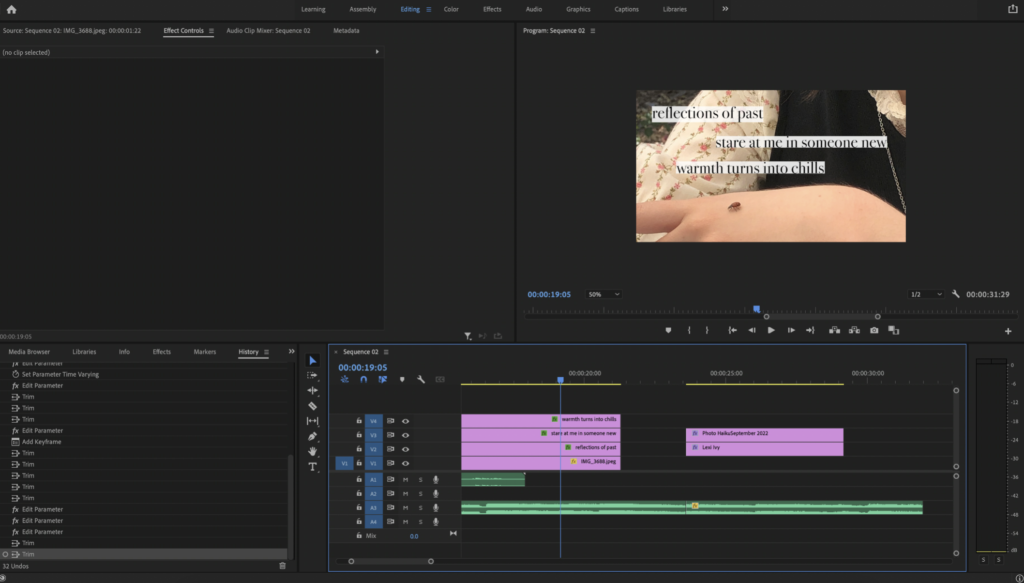
During our poetry unit in English, along with doing photo haikus we also created our own free verse poem and had full creative control over what it was going to be about and how we were going to format it. After we finished writing/ formatting our poem in English, we chose a photo that went along with the theme of our poem and put our finished poem on top of the photo during digital media using Photoshop.
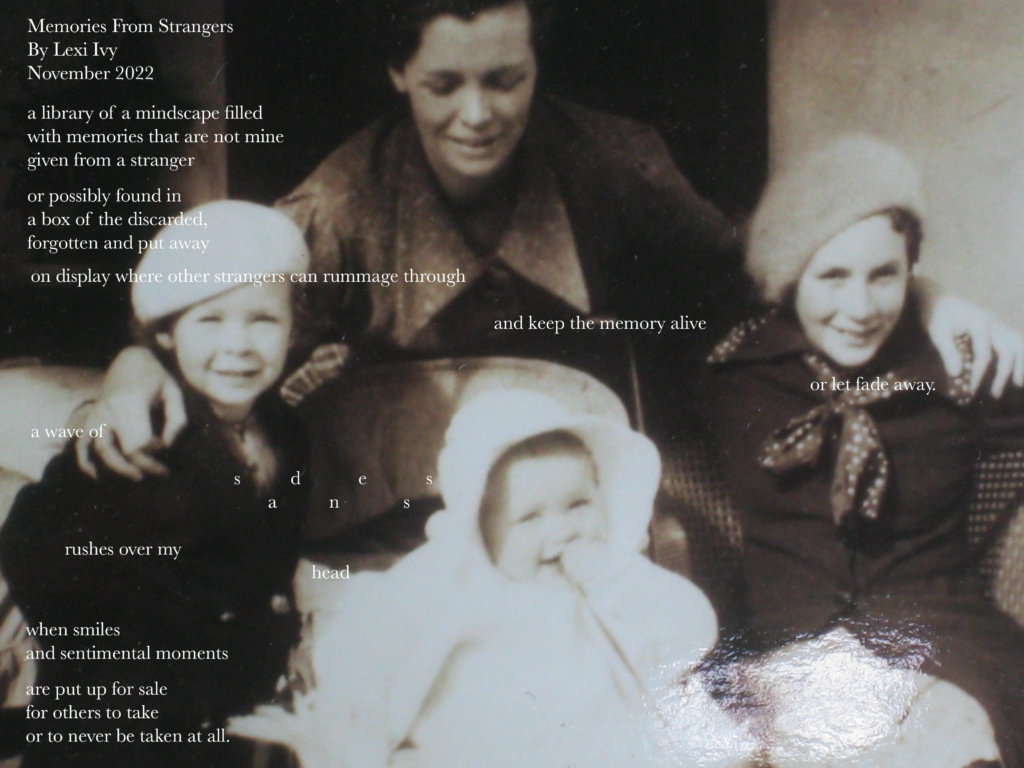
“Memories from Strangers” is a free verse poem about how I feel a little sad whenever I go to an antique store and see a box of family photos. But this poem was primarily inspired by the secondhand camera I got and the SD card still contained a lot of pictures from family events such as graduations, vacations, and holidays. Even though I’m writing from my experiences and how I feel, I think the speaker of my poem could be anyone who relates to it. In the first stanza, I use enjambment with some alliteration to emphasize the fact that the memories don’t belong to the speaker. The speaker’s attitude changes from a more neutral tone to more sorrowful as the alliteration pattern disappears and the poem’s imagery becomes more distinct. Ultimately, the pattern of enjambment, alliteration and some imagery in this poem shows the sad tone. I wanted to make the reader also feel sad from the idea of seeing family photos in a second-hand store. Personally, when I see them I feel bad for the person in the picture for having the picture of them donated instead of being kept by the person who had it.
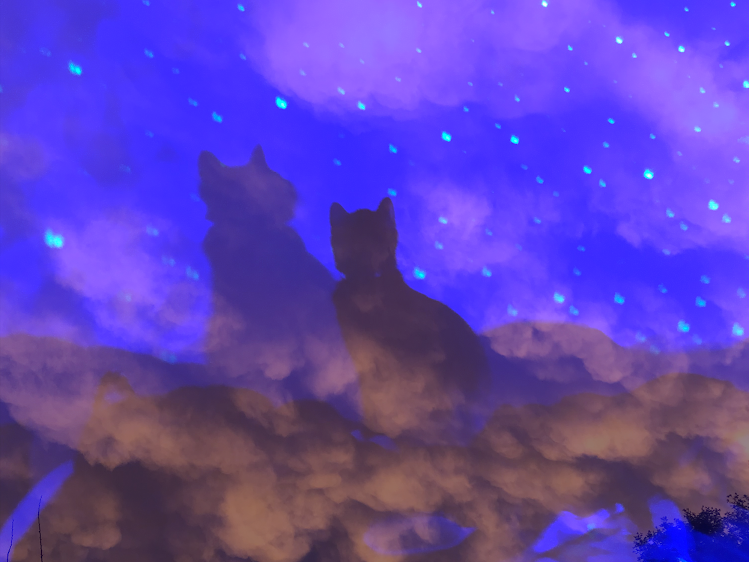
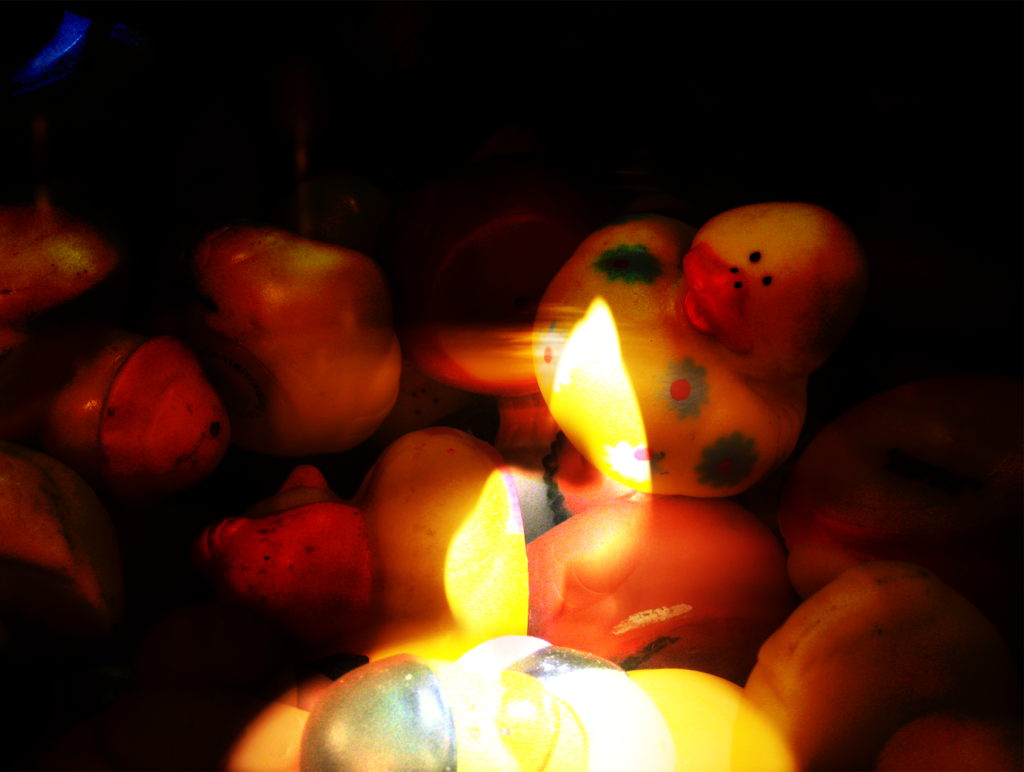
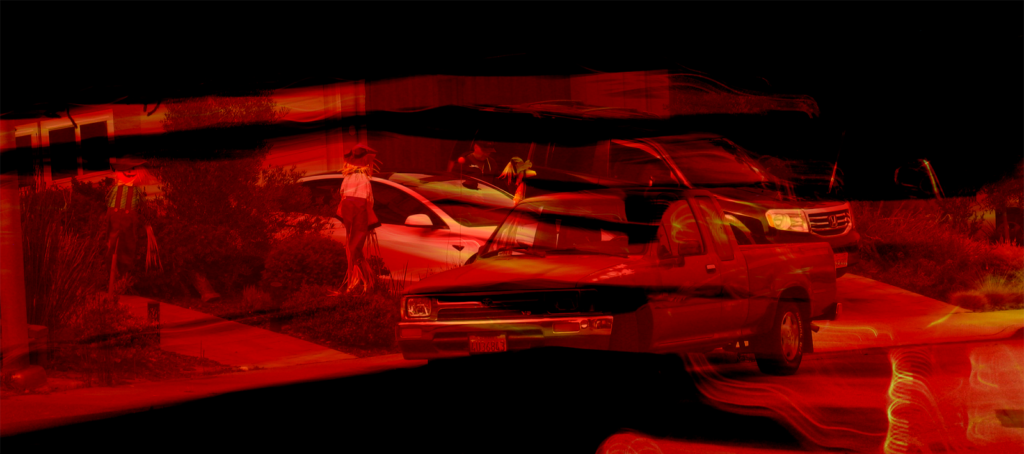
Photoshop Blend Mode Editing
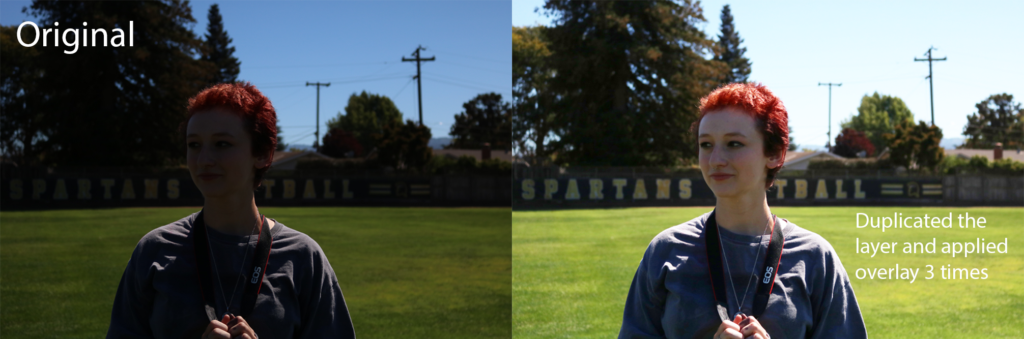
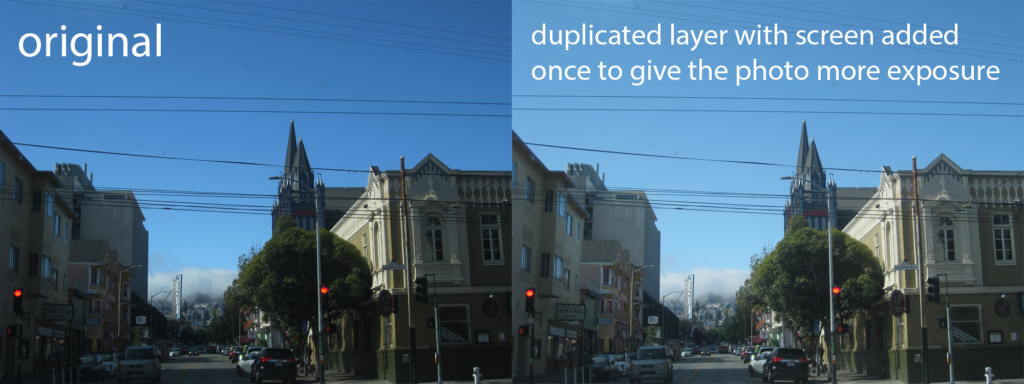
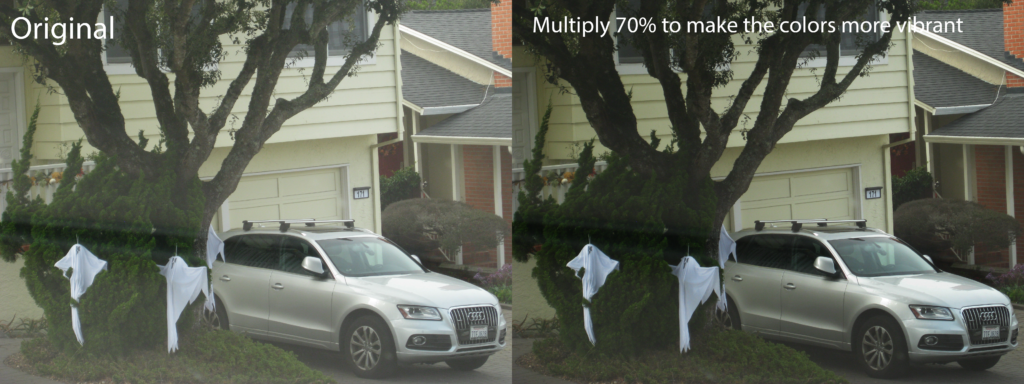
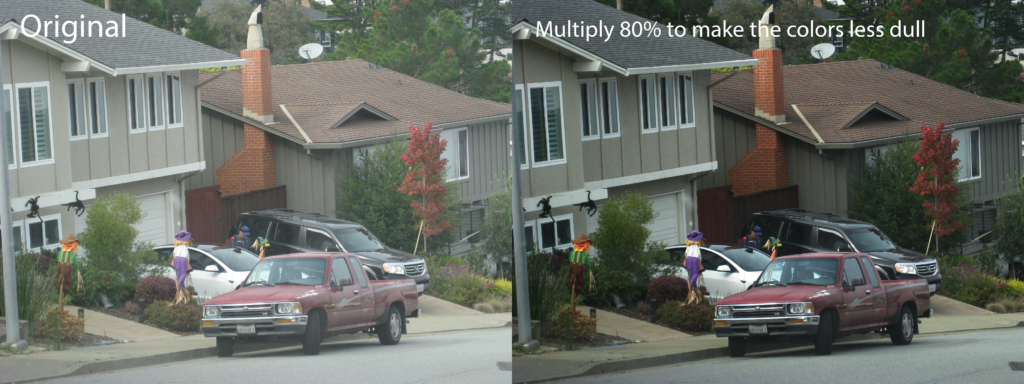
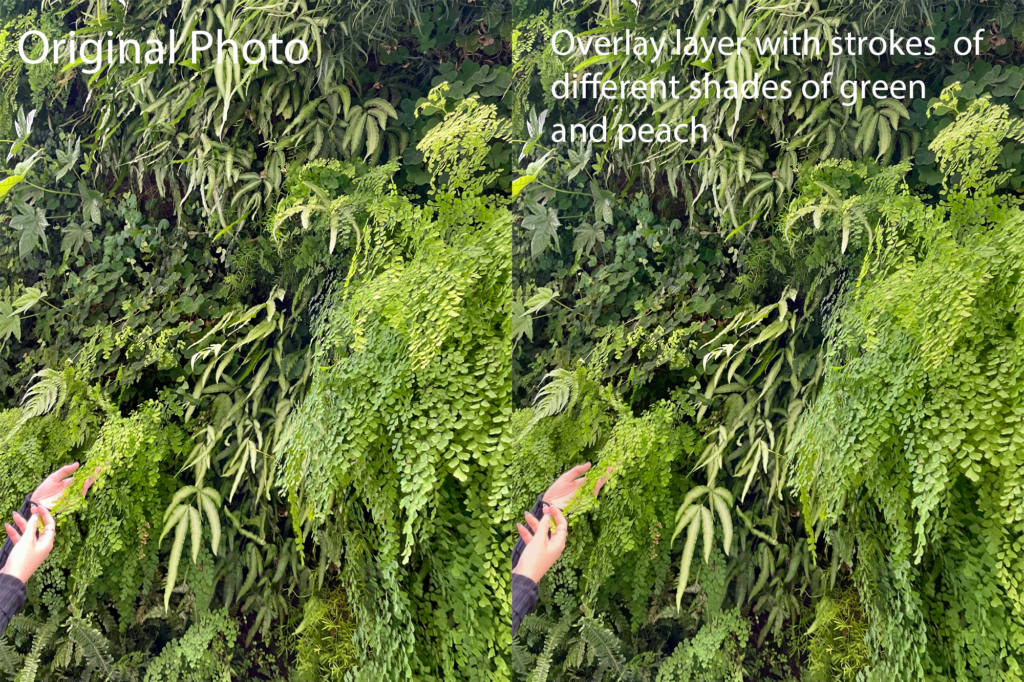
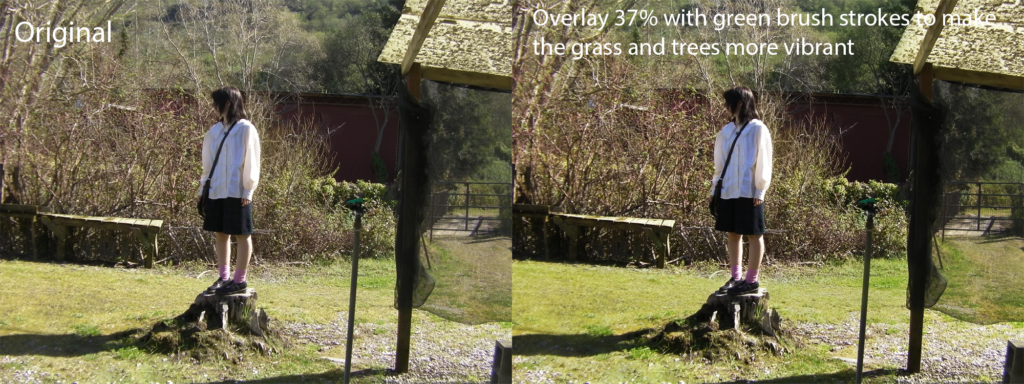
The creative blend modes assignment for digital media required us to explore how to use the blend modes section of Photoshop to either improve a photo by doing something like making it more saturated, less dark/ darker, etc. The modes we had to use were SCREEN (makes a dark, underexposed picture brighter), MULTIPLY (the more you multiply an image the richer the colors get), and OVERLAY (saturated the colors). We also were able to apply all of our knowledge about these different modes to blend multiple pictures together.
I think that having the knowledge of how to use blend modes is really important, especially with editing pictures because sometimes if the lighting isn’t right you can use the blend modes to fix it and get it how you want it. I think once you get a basic idea of how the blend modes work, they’re really easy to use when editing pictures.
Screen Blend Modes
Multiply Blend Modes
Overlay Blend Mode
Blending Multiple Photos + Creatively

* Unfortunately I currently cannot access the photos with the explanations of how I edited them but in the meantime here are just the finished products
Animation
Introduction
So far in Animation, I’ve learned so much about the logistics along with just how time-consuming it is to make an animation. The type of animation (digital, paper, stop motion, etc) along with how detailed it is also depends on how long it takes to reach a finished project. You could spend weeks animating and only have a few seconds done.
What I’ve learned through the animation process is to simplify my work due to having a short amount of time to get the project finished. For example, I had a character design for a stop-motion puppet but for the sake of time had to remove some items while still making the same character. What I value about being an animation student is that we get to learn how to animate in multiple ways instead of solely focusing on digital/ stop motion/ etc.
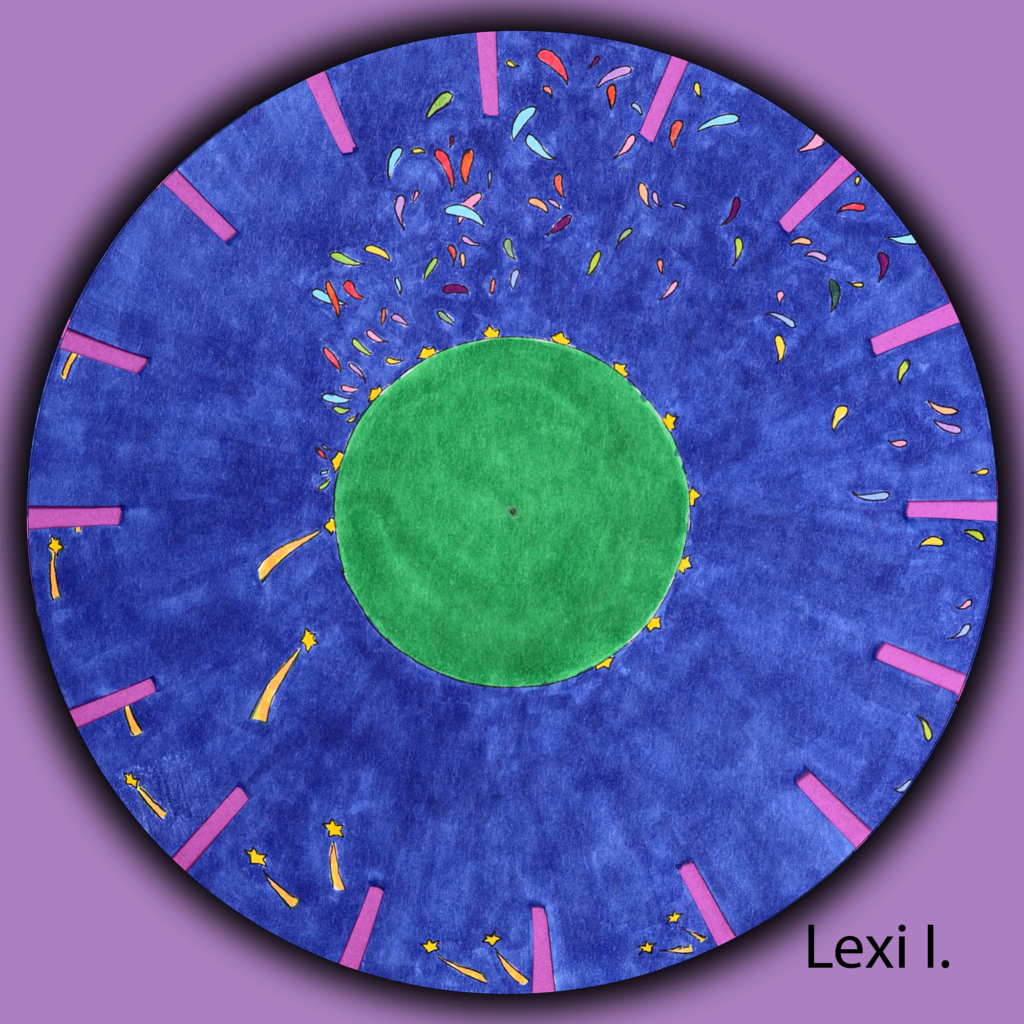
Zoetrope
The first animation we made for this class. We had to draw 12 frames of animation on a strip of paper (like film for a movie/ pictures) and when spun in a wheel, it looked like it was moving.
Phenakistoscope
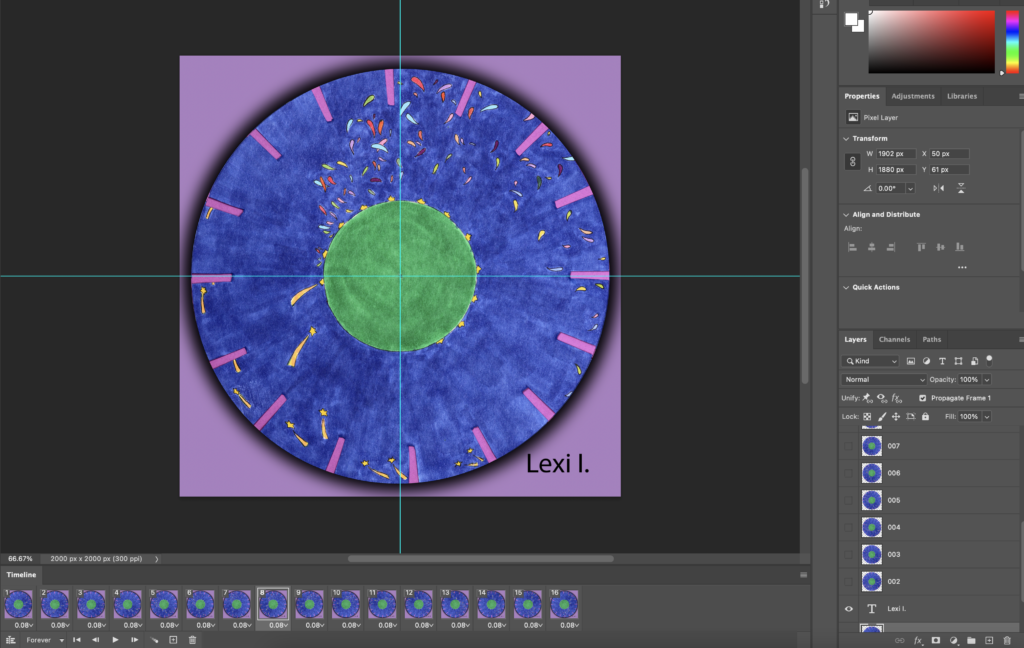
In Photoshop, I used a picture of my phenakistoscope and rotated it 16 times to create 16 frames of animation, making it move in a circle.
Flipbooks
90 frames of animation (90 pieces of paper). Video 1: the individual frames were taken as one-by-one pictures on DragonFrame (stop motion animation software). Video 2: me physically flipping through the flip book.
Exquisite Corpse Flipbook Animation
Each student made at least 70 frames of animation that all intertwined with each other – a shape that one student stopped with another started with. Frames were taken in DragonFrame.
Direct Technique Animations
Paper cut-out puppets are used for stop-motion animation, every time you move the paper to make a new frame you take a picture.
Moving objects around and taking a picture each time to create a stop-motion animation.