Introduction
The Zenith project is the final project for seniors to showcase to the rest of Freestyle before they graduate. This project is done in the elective classes where you get to show a skill you learned within your elective. The word Zenith is defined by the Oxford dictionary as, “The time at which something is most powerful or successful.” using this definition, I think it makes sense that our final project as seniors is called the Zenith project. When we came in as Juniors, we were still in the learning stage of our elective, but as we head closer to graduation, we head closer to leaving the learning stage and are able to use our new found knowledge for future jobs, college, or hobbies.
For my Zenith Project, I decided I wanted to try toon shading a 3D model. Toon shading is a way to color and shade 3D models which makes them appear 2D. I think this effect is interesting since it combines both 2D and 3D aspects. I got inspired to do toon shading for my Zenith after watching the YouTuber Cody Gindy talk about how to create a painterly effect in Blender. I’ve always found this effect really cool and interesting from seeing it applied in media such as, Trigun Stampede, Legend of Zelda, and Genshin Impact to name a few. As I watched more videos on people creating toon shaded models the more I wanted to create one myself.
When I started working on this project, I wanted to create a new 3D model of a character using the program Blender. I realized I might not have enough time to get a whole character done so I was aiming to get just the bust modeled. I barely got through the head and I didn’t really like how it looked so I settled with modeling a fish. Although I would still like to model a character in the future, for the time I had to create this project, I think choosing a fish was the best route for me.
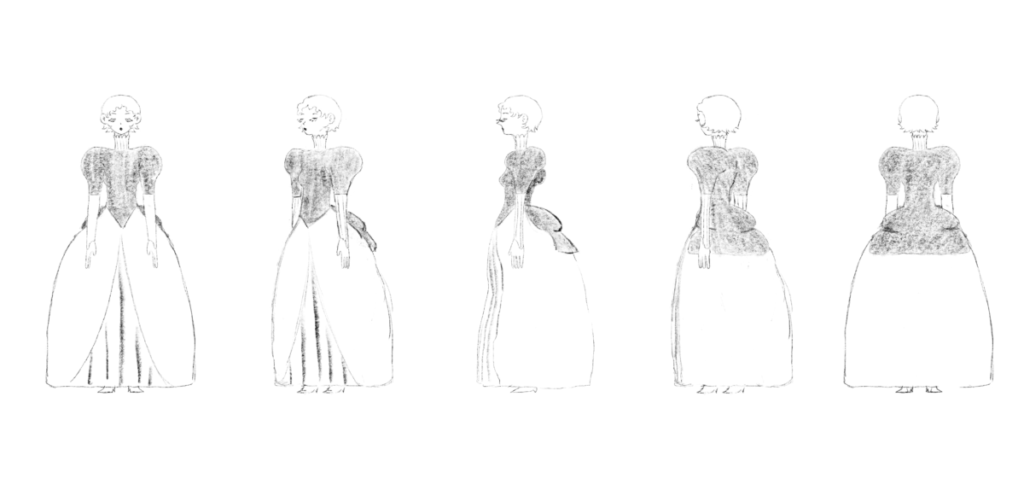
Original design for the character I was going to 3D model
This project was challenging for me because I decided to use a program I’ve never used before (Blender) and try toon shading which is a technique I’ve never done before. Also, at the start of the year, 3D modeling was a big challenge for me since the models weren’t coming out as I hoped. I decided to use Blender instead of a program we already learned how to use due to there being more resources on YouTube about how to toon shade using Blender as opposed to Zbrush or Maya. Although I’m using a new program, I’m still able to use my knowledge of 3D modeling and how their programs were set up to make the process of learning Blender easier for me.
Process
Modeling
A feature I really liked about Blender was in the vertex editor mode, I would select a vertex, or even a group of vertexes and hit g to freely move them with my mouse. I also liked how there was a sculpt mode within Blender because it made it more convient to work without having to go back and forth between programs such as Maya for geometric modeling and ZBrush for sculpting. Although I really liked this aspect, I didn’t like how the sculpting itself seemed to be dependent/ revolve around the vertexes. As previously mentioned, my original idea for this project was to create a whole new character model which I designed before this project started, but it didn’t take long before I decided I needed to go a different route.
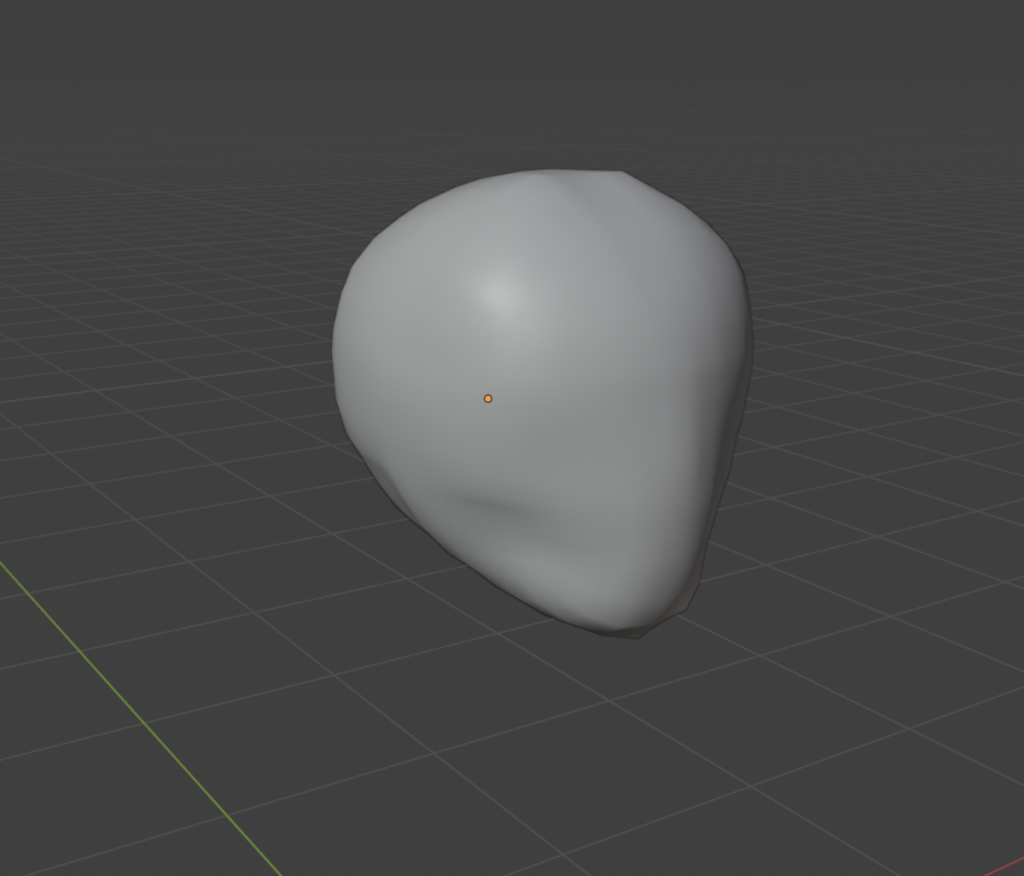
Since I’ve never modeled in Blender before, I had to do my own research on how to navigate the program. I found a tutorial on how to model in Blender by the artist Eve Sculpts on YouTube which I found really helpful and followed as I made my own model. To create this model, I mainly used the vertex editor and the sculpt features which I accessed by clicking tab. I added my reference image I made into the scene and started with a rounded cube to start my modeling process.

Toon Shading
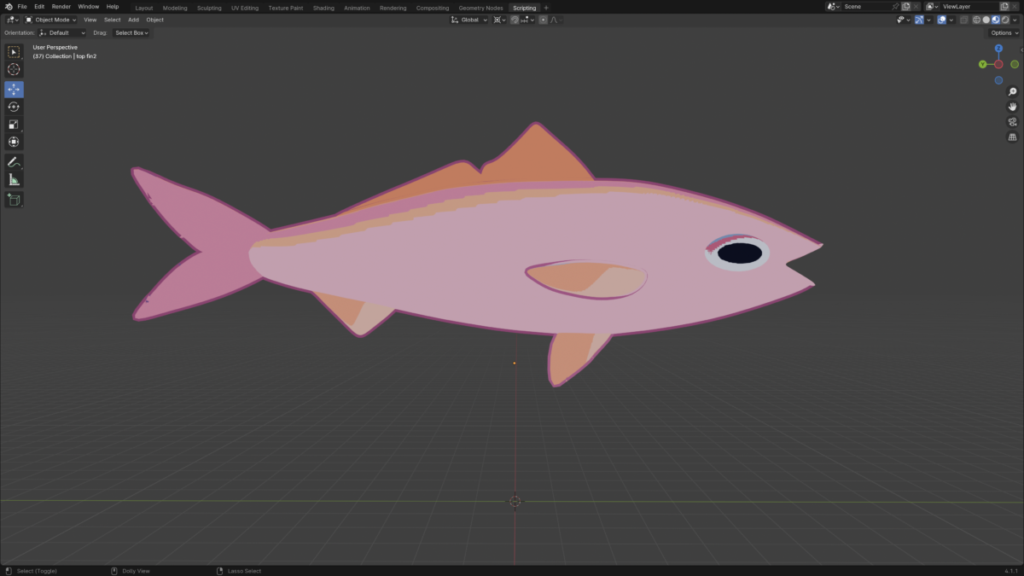
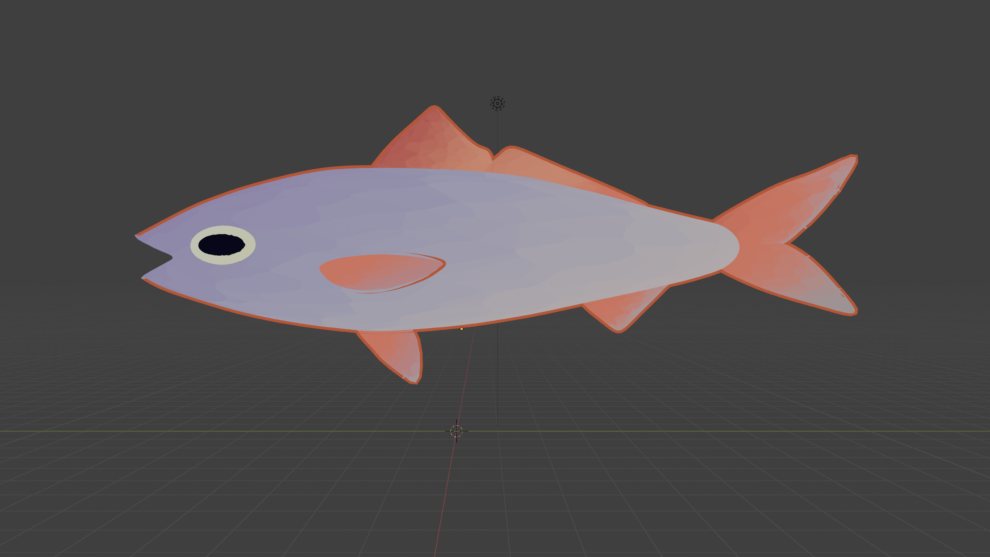
For the toon shading process, I mainly focused on cell shaded and painterly styles. To give the model some more dimension, I added in some shader nodes to make it look like it has line art. During my process of toon shading the models, I faced a few difficulties. The first one being when I followed the video by Cody Gindy on how he toon shades his models, there was something I did wrong on my part during the modeling process which caused it not to work. I also tried to cut corners a little bit and combined all the model layers together so it’d be just one single layer. When I added the shader nodes to this, it was applied to the whole fish and I couldn’t pick specific parts to shade. This didn’t necessarily look bad, but it wasn’t the look I was going for. But I went back to the file I had saved before I combined all the layers and that’s how I got my finished products.
Cell Shaded
The first toon shaded model I made was in a cell shaded style. I created a short(er) strand of shader nodes with the key components being the color ramp which I controlled the what the colors are and the mapping node which let me control more specifically where the colors are. Something I found really cool about this was when I moved my view of the model the colors moved with the model, but not in a constant way like it would be if i just painted directly on the model.

Painterly
I still wanted to create a painterly model and I found a different way to create a similar effect in a different way. This was a longer string of nodes than the cell shaded model but still had some of the key nodes such as color ramp and mapping; but along with this was a voronoi texture node which is where I think the painterly effect comes from and you’re able to control the size and amount of strokes generated. What I think is cool about this painterly effect is that the colors kind of shine as you rotate the model which really reminded me of a fishes scales.

Final Project + Reflection
Overall, I’m really happy with how my project turned out and would want to experiment more with toon shading and modeling in Blender. I would want to try toon shading a model or a scene next since there’s more parts and dimensions to it than a fish. And although I had many errors along the way, I think it helped with my learning process of what works and what doesn’t.