Photo Blog Fourteen: Center Frame Portrait

Color burn 50% to create a cartoon-like effect.

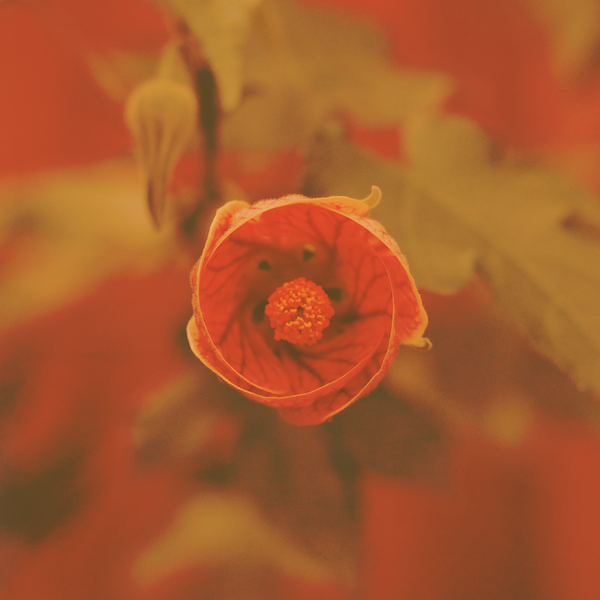
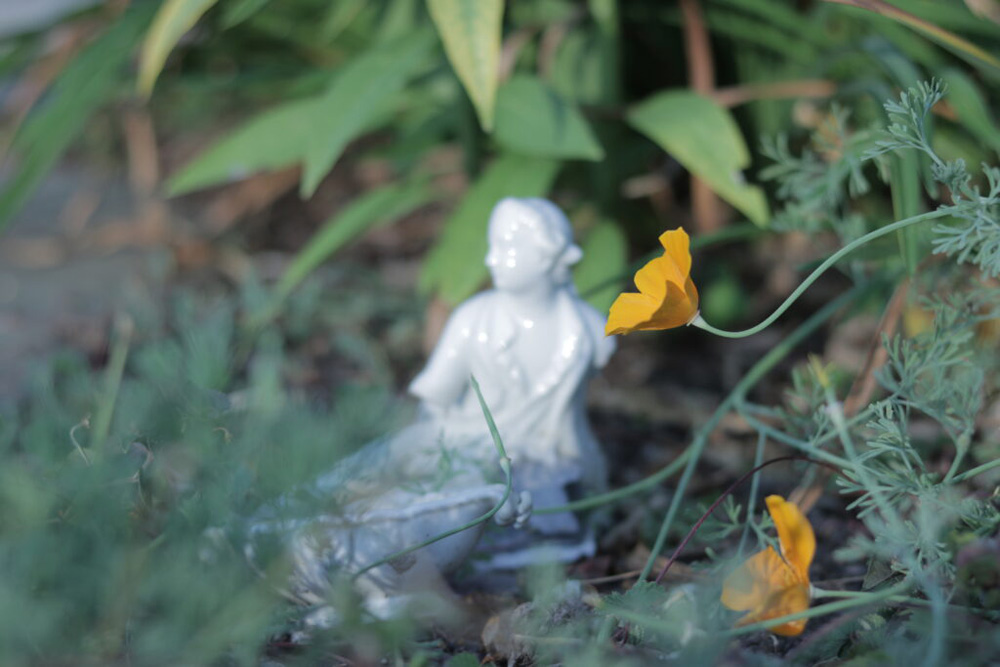
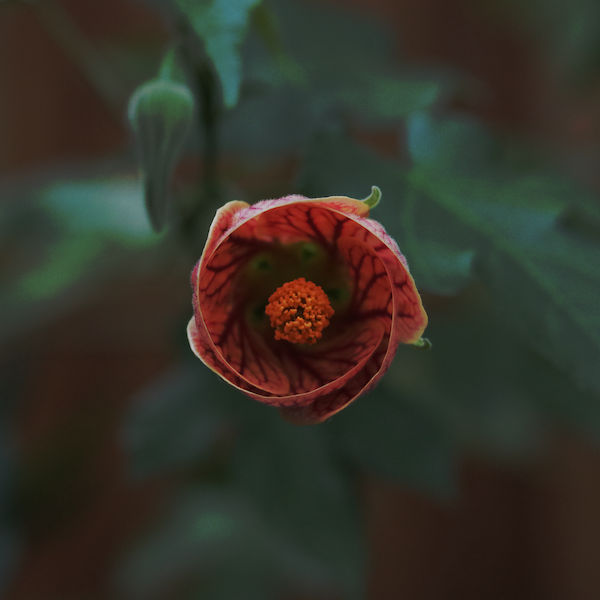
For this photo prompt, I felt that I could achieve a good center frame portrait by using subjects such as flowers and shooting down toward the subject. They are naturally suspended, and all the stems are concealed beneath the face of the flower. Although the color burn blend mode might not often be used for maintaining a realistic look, I like how it takes advantage of the graininess from using a high ISO and enhances the shadows to create a pop art element.

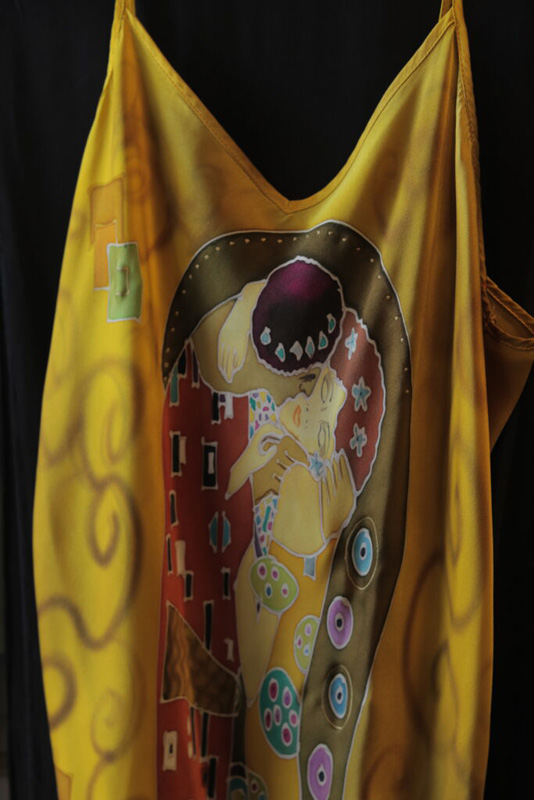
Here is another version that looked cool to me! I used a 72% opacity layer of orange color placed below the color burn layer.

Bring on the orange!

Photo Blog Thirteen: New Beginnings

My cat, 龙龙 (lóng lóng), tired out after some excitement.

Our former cat passed away in August last year, and we’ve been lonely for a cat since then. 3 weeks ago, my parents and I went to an animal shelter on a whim – and ended up adopting this boy! Having him in our life – even just for a few weeks – has changed many things for the better, especially starting off this new year. When editing the original photo in Photoshop, I had fun experimenting with inserting color gradients to create different moods for the spirit of the photo. I utilized a tricolored gradient layer at full opacity, placed below a multiplied layer of the original photo at 100% opacity as well.

Photo Blog Twelve: Trash

A festive “tree” of bottles

What some see as trash, other may consider to be beautiful. This home close by my neighborhood created a tree from a variety of types of bottles, even matching holiday colors. I took the original photo at shutter speed 1/125, aperture 5.0, and ISO 100. I edited the photo in Photoshop by using the magnetic tool to create a new layer of the bright bottles and placing this layer over a multiplied (100%) blend mode layer of the background.

Photo Blog Eleven: Balance

The lip of a wave receding away from the beach, below the McWay Falls

The ocean is a fascinating subject to photograph with its infinite range of shapes, textures, and light balance. I took this photo in monochrome mode at a shutter speed of 1/1000, an aperture of 11, and ISO of 100. This view is split into two different regions by the diagonal line formed by the wave, separating them as land and sea, as well as by texture: the foamy remnants on the beach offer a contrast to the dark gravel texture across the open sea.

Photo Blog Ten: Hometown

Traversing the Great Wall

The Great Wall has long been established as a must-see structure for both those who live within or outside of China. On this 2018 trip, it was the first time that my stepdad (in the white cap, on the left) met the other half of my family and became integrated in this part of my life. In this photo, you can see a range of ages in visitors, each of whom lead a unique and irreplaceable life. This photo results from editing in Photoshop by applying layers of dark brush strokes at 11% opacity.

Photo Blog Nine: White Balance

A porcelain lady, among poppies in a garden

.
The subject and angle in this photo makes me think of Thumbelina at rest; though, of course, Thumbelina would have arms. Although the subject in the center is the porcelain woman, I also love the in-focus poppy flower and stem from the sidelines. I used the Tungsten light white balance, which altered the composition completely from the natural orange sunlight. I think the Tungsten lighting, together with the subject being slightly blurred, helps to create a feeling of mystery and calm.
.

Photo Blog Eight: Leading Lines…

A dew-heavy network of webs on a misty morning

I’d woken up extra-early for a wrestling weight certification at Saint Francis, and it was still cool and misty when I returned home. I looked up, and I saw in the plum tree branches above my head this massive tangle of strong, white strands forming a spiderweb colony. Dew-drenched lines lead to a center point in each web, and the lines weaving together create heavy visual weight for the viewer. I edited my original photo in Photoshop using an overlay blend mode of 60% and a multiplied layer at 62% opacity.

Photo Blog Seven: Love Story

A top with Gustav Klimt’s “The Kiss”, painted on silk

In Half Moon Bay, there is a vibrant art gallery-shop crossover called Silk & Stone, featuring amazing works of hand-painting on silk, even wearable works made by Natasha Foucault. When I entered the shop, I gasped when I saw the golden top with a replica of Gustav Klimt’s “The Kiss” hanging above the door. I’ve heard some interpretations of this artwork which introduce the view that the woman is deceased, and The Kiss is a final farewell. Whichever perspective of the scenario, I think this represents true connection and appeals strongly to viewers’ emotion.

Photo Blog Six: Weight (or Mass?)

Seed pod on the sidewalk

I took a walk on a sunny Saturday and came across this magnolia seed pod. I always thought they were a type of pinecone! I’ve never seen one with as many seeds hanging from it as this one, and I chose to post this photo because I think the subject is very eye-catching. If you’re like my mom, the pod might catch your attention right away by creating an uncomfortable feeling: you want to remove the seeds and pick them off, but it’s out of your reach on the screen. I took this photo using a low aperture to create more focus on the subject and have the background as an afterthought.

.

.

Below is another view of the seed pod in color:

Seed pod, View 2

I edited this photo in Photoshop with using the Multiply blend mode at 45% opacity. I think that both the monochrome and color photos have impact on the viewer, and this color version creates more clues to the context of season. Emotion can be more vivid with colors (see John Logan’s Red!).

Photo Blog Five: Symmetry Landscape

My stepdad, looking toward the hills

This photo was taken at a farm which had a strawberry field. My parents and I stopped by after visiting Martin’s Beach and picked strawberries! They were delicious! I took my original photo at a shutter speed of 1/500, Aperture 5.0, and ISO 100. I edited this photo in Photoshop using an overlay blend mode at 39% opacity, with brush strokes to darken the sky.

.

Neat rows of the strawberry field

Here is another view showing symmetry on the ground. All the rows seem to collect onto a shared horizon line in the distance. My original photo was taken using shutter speed 1/500, Aperture 5.0, ISO 100. I edited this photo using the overlay blend mode at 62% opacity.