Funny Images
Introduction
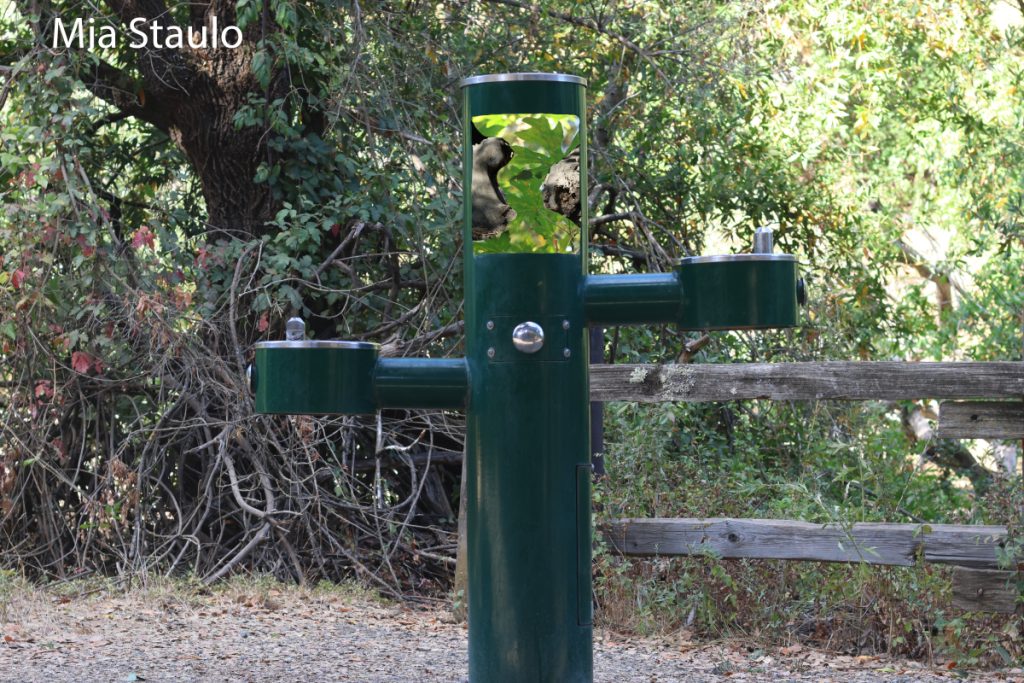
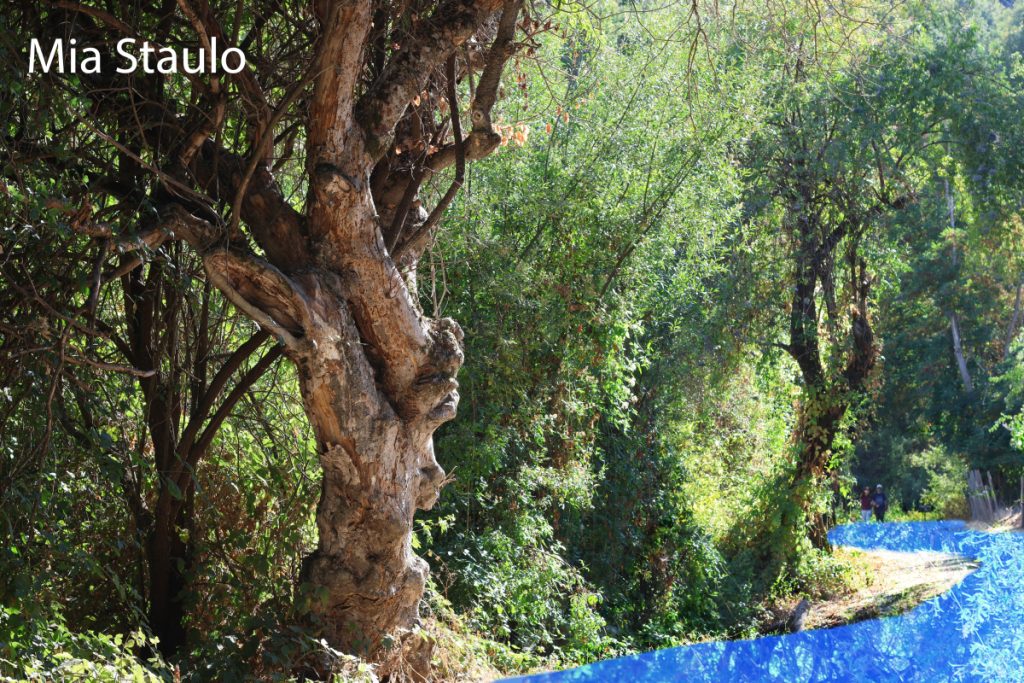
In Digital Media, we were asked to create two funny images using pictures you took with your camera and the Photoshop skills we learned. In the first image, I composited three photos: the background and water fountain, maple leaves, and the funny-shaped logs. This image is funny to me because its absurd and impossible in the real world. In the second photo, I replaced the pathway with bright blue. I made it look more like water by adding a reflection of the trees above with a lower opacity than the original image.
Product
Behind the Scenes
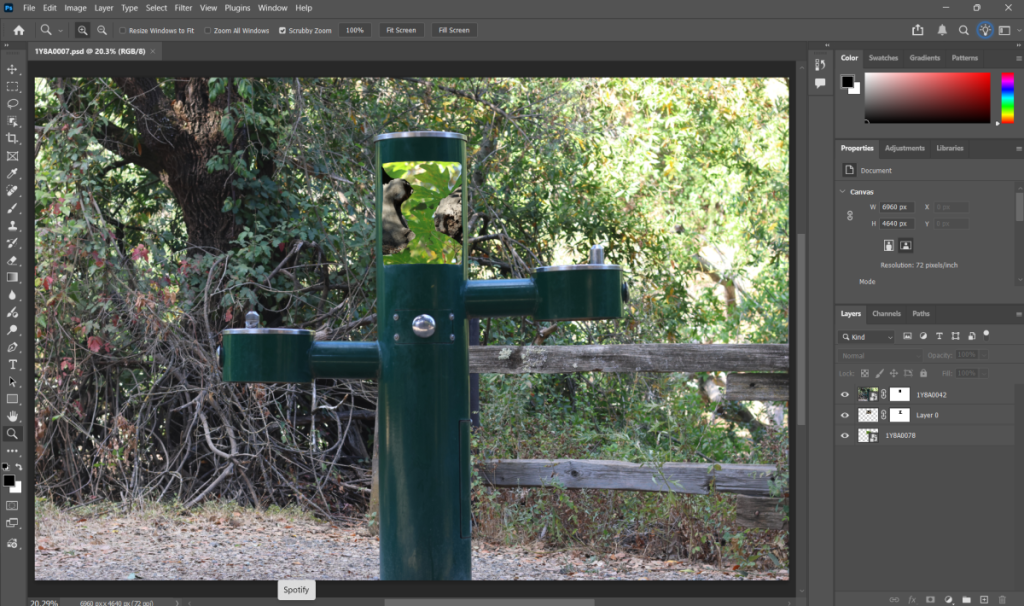
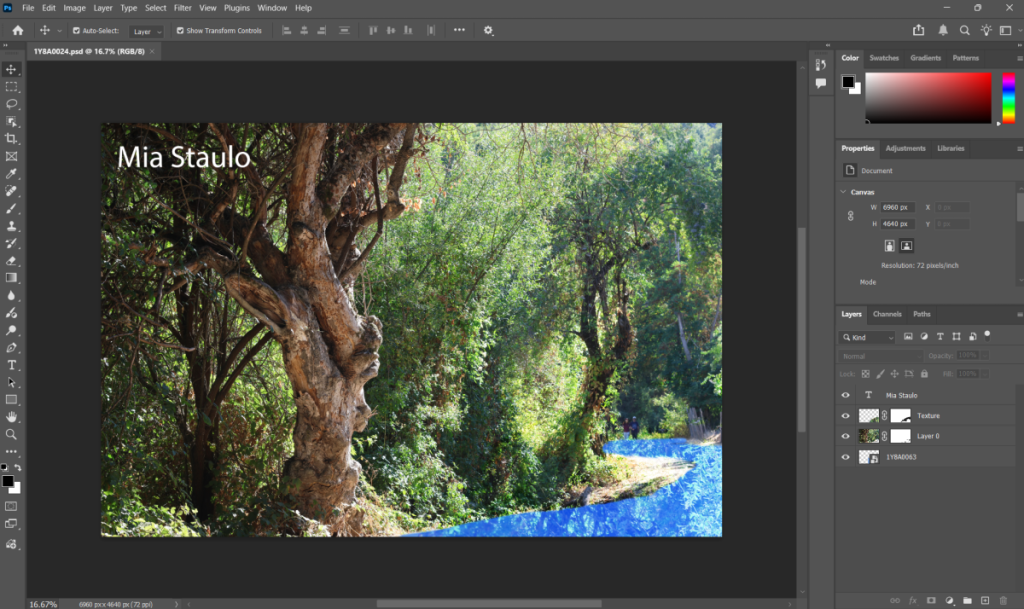
These are some behind-the-scenes screenshots from when I was working on these compositions in Photoshop!
Reflection
I struggled with this project at first because I didn’t feel sure of myself in my ability to make something funny. My final project outcome isn’t funny in a “laugh out loud” type of way, but I think it can still be seen as humorous, even though it doesn’t necessarily fall into that category. I enjoyed learning new Photoshop techniques that I got to apply to these photos, and I feel more confident in my ability to use Photoshop for fun in the future.
Motion Graphics
Introduction
I learned many new motion graphics skills in Digital Media using Adobe Illustrator. Prior to this year, I had never used After Effects, so it was a bit intimidating at first, but this project helped me to become familiar with the tools and special effects.
Video Project
This is my final video! I decided to make it to Scott Joplin’s The Entertainer, and the bar at the bottom moves with the music.
Behind the Scenes
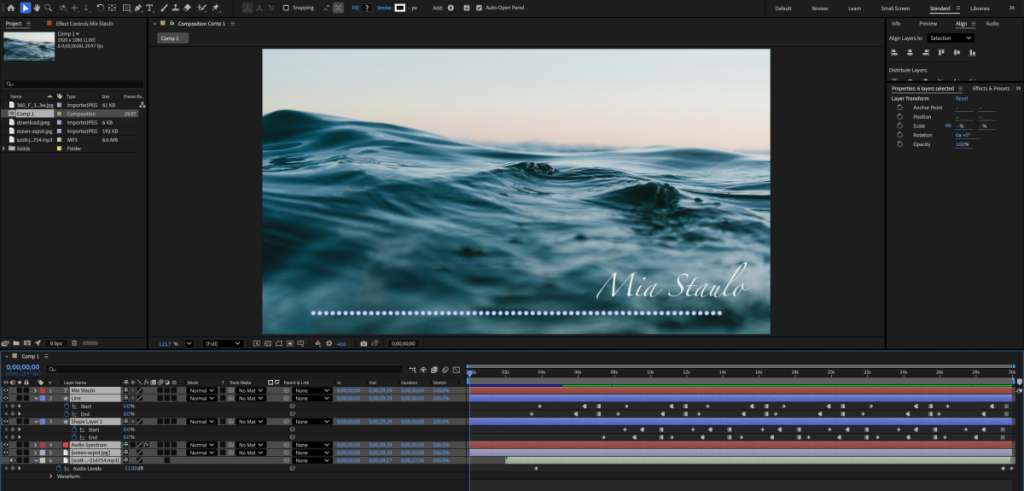
Here is a behind-the-scenes photo of the After Effects interface. You can see all my keyframes for the animations.
Reflection
Creating simple motion graphics was challenging but fun. It was a great introduction into animation and After Effects. It helped me to feel comfortable keyframing lines and shapes in After Effects which helped me a lot in projects that I did later on in my senior year!
Multi-Layered Art Project
Introduction
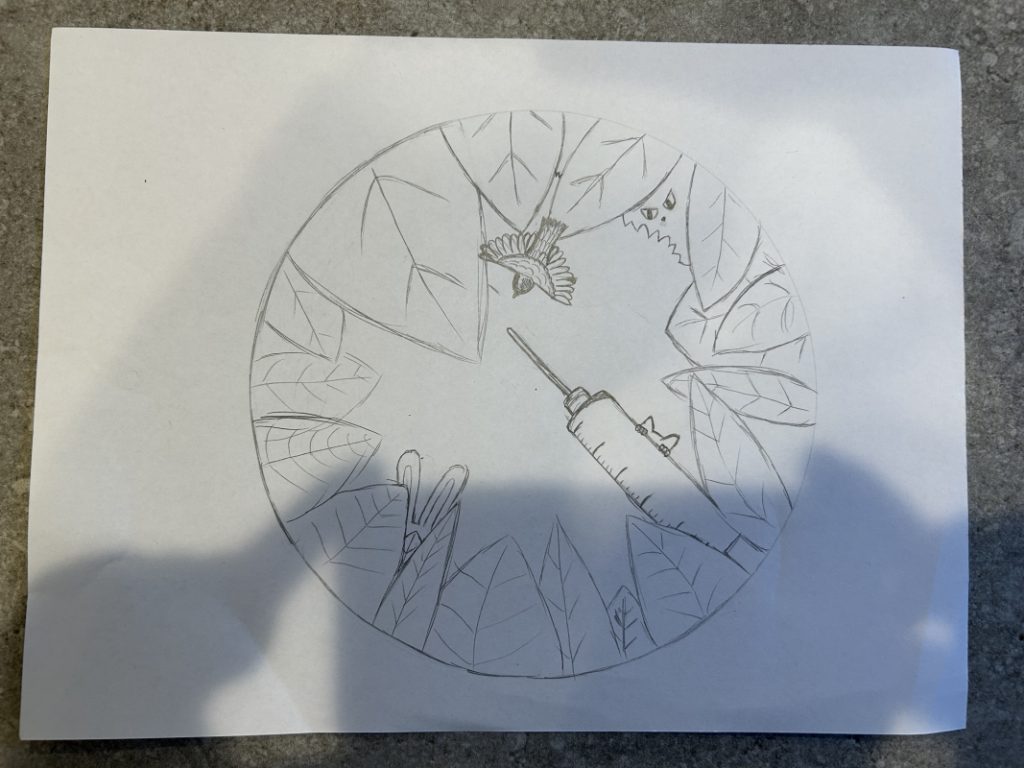
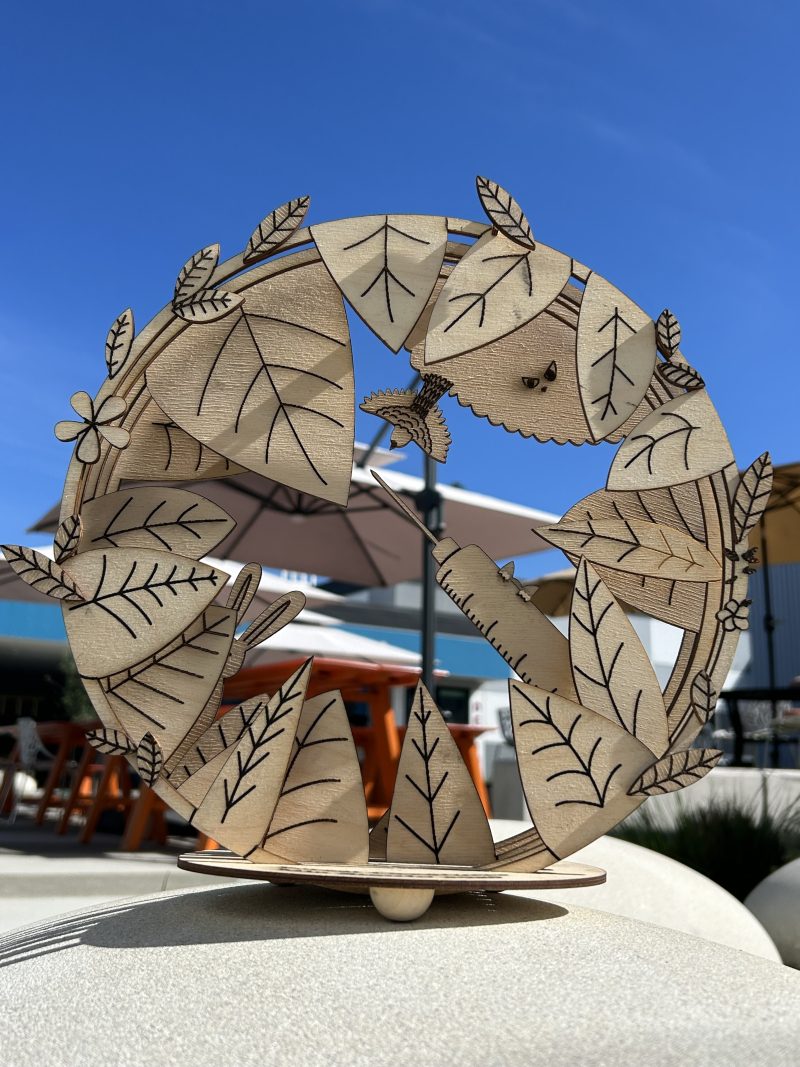
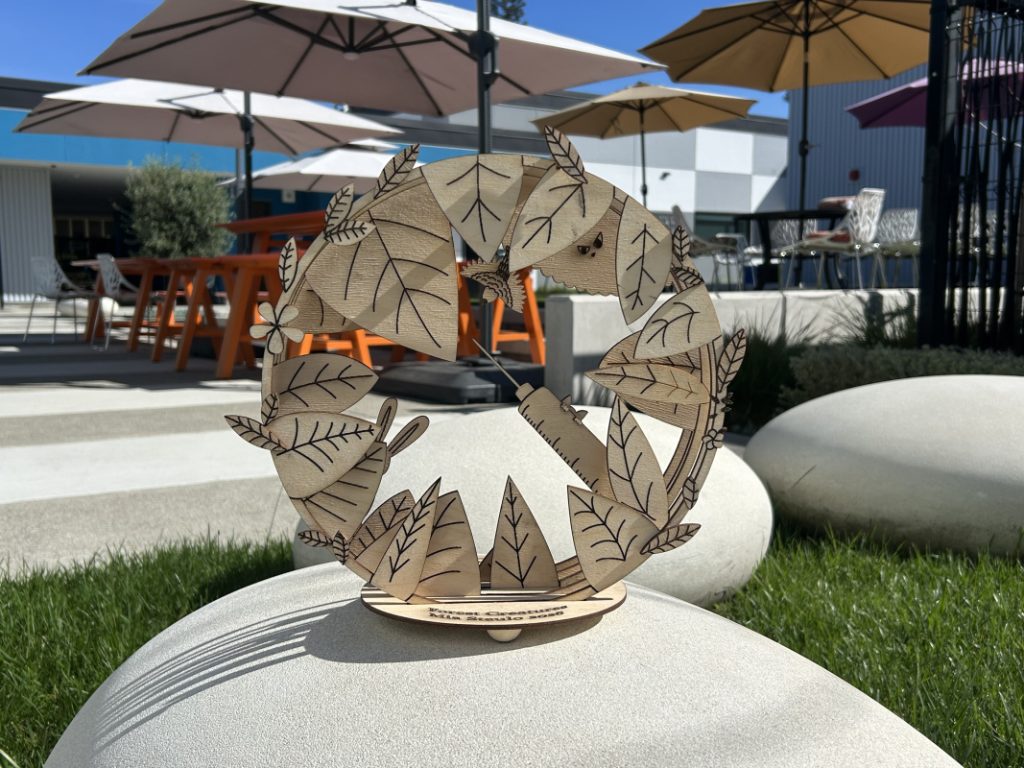
For my Multi-Layered Art project, I chose to do a ring art. My worldbuilding project was about a cult in the mountains of Japan where people undergo cosmetic surgery to turn themselves into animals. I based my ring art around this concept, which is why I included a syringe as the main subject of the art.
Process

Final Product
Videos
Time-Lapse Process Video
After completing the project, I made a video with time-lapse footage of the wood getting cut and laser-engraved, and then a fast-forward video of me assembling and gluing the pieces together. I included music and a final physical product clip showing the project in 3D space.
3D Space Video
This video project was to display the digital art with layers. I learned how to create a moving digital camera in After Effects to show the 3D aspect of the art and to create a digital light source that allows the art to cast shadows against the background. Learning how to create 3D work in After Effects and show it in a video with a camera that you make in the space was mind-blowing and very cool.
Artist Statement
I chose the ring art for my multi-layer project in Digital Media because I liked the look of it. I wanted my art to have more depth in its layers than a stacked wood art, like a real forest with leaves and bushes does.
My Worldbuilding project was about a cult where people get plastic surgery to turn themselves into animals. The story takes place deep in the mountains of Japan, and I wanted to create the feeling of the natural scenery but also the eeriness of the cult, which can be seen with the syringe and scary eyes in the bushes.
Creating a faux 3D analog art piece was challenging but also very fun. It was especially exciting getting to see my digital artwork get laser cut into a real physical form. It felt like it really came to life in wood. Using After Effects to create a 3D space video using a digital camera and lights was very hard, but also very rewarding once I finished the final product. This project helped me to grow a lot technically in my ability to use Illustrator and After Effects creatively, and my knowledge of technical skills and ability to apply them. Artistically, I learned to take a story I made and turn it into a work of art that can be laser-engraved and assembled. This project was very fulfilling, and I am very happy with the final result.