Introduction
The Zenith project is our last production class project as Freestyle students. It’s a chance to show off some of the skills we’ve learned over the past two years, often by exploring a new medium, and celebrate all that we’ve done. Zenith is a very long project, so the products created by Freestyle students are always really big and exciting!
For my Zenith project, I really wanted to try sewing clothes. It’s something I’ve been interested in for years, but have never gotten a chance to actually do. I also knew that I wanted to create an original design, and not just follow a pattern. This would also allow me to better show off my design skills!
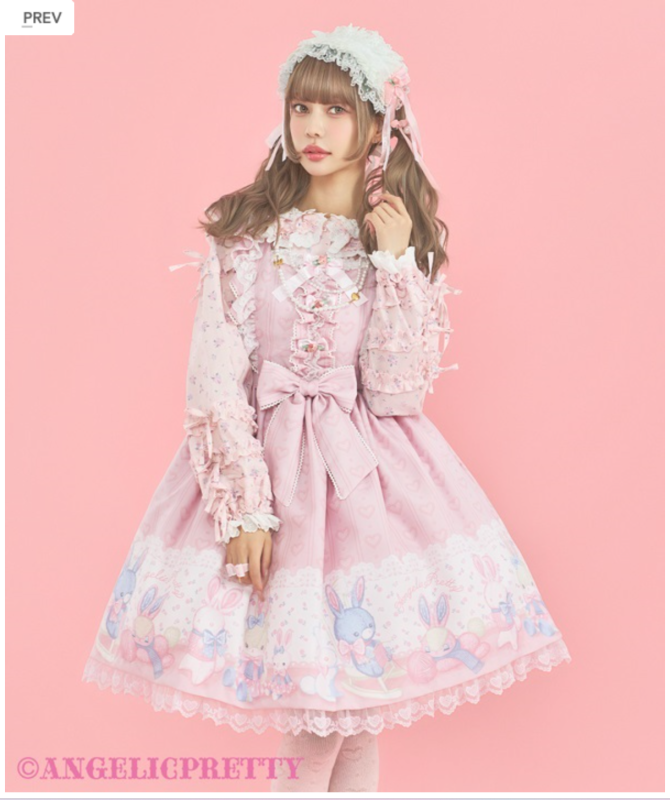
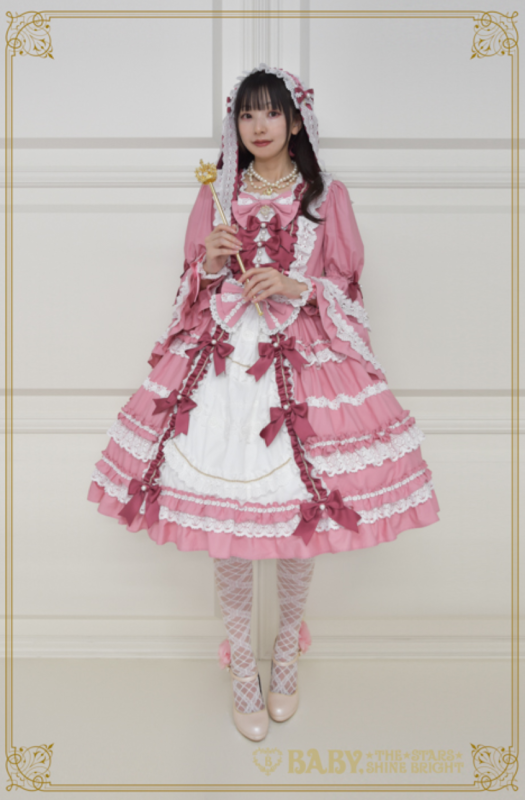
I decided to sew an outfit in the EGL fashion style. EGL is a Japanese fashion style that draws inspiration from Rococo and Victorian fashion. It’s a very modest fashion style that features a lot of frills, lace, and bows. A very important part of the fashion is the cupcake or sometimes A-Line silhouette of the dresses and skirts. Here are some EGL fashion outfits that I used as inspiration for my design! EGL fashion has a few main substyles, but my favorite and the one featured below is the “sweet” style.
My process
Because I don’t have any experience sewing clothes, I started with a bit of research to get some footing before I was ready to design my own dress to create. I mostly watched YouTube tutorials that detailed the full process of creating EGL fashion pieces. Instead of actually following the tutorials, I used them to gain an understanding of what components go into the creation of such garments.
As I mentioned before, one of the most integral parts of EGL fashion is the shape of the skirts. This was the part I was most worried about going into the project, especially since I wanted to create my own pattern. Luckily, the process of creating an EGL skirt is actually very easy. In its simplest form, and EGL skirt is usually just a gathered rectangle of fabric! Gathering is a technique that creates ruffles in fabric by scrunching it up on the top. In order to create my own pattern for a gathered rectangle skirt, I did a little bit more research and came up with these two “rules”
- The length of the fabric for the first tier is 3x the measurement of your waist
- The length of the fabric for an additional tier is 1.5x the length of the previous tier
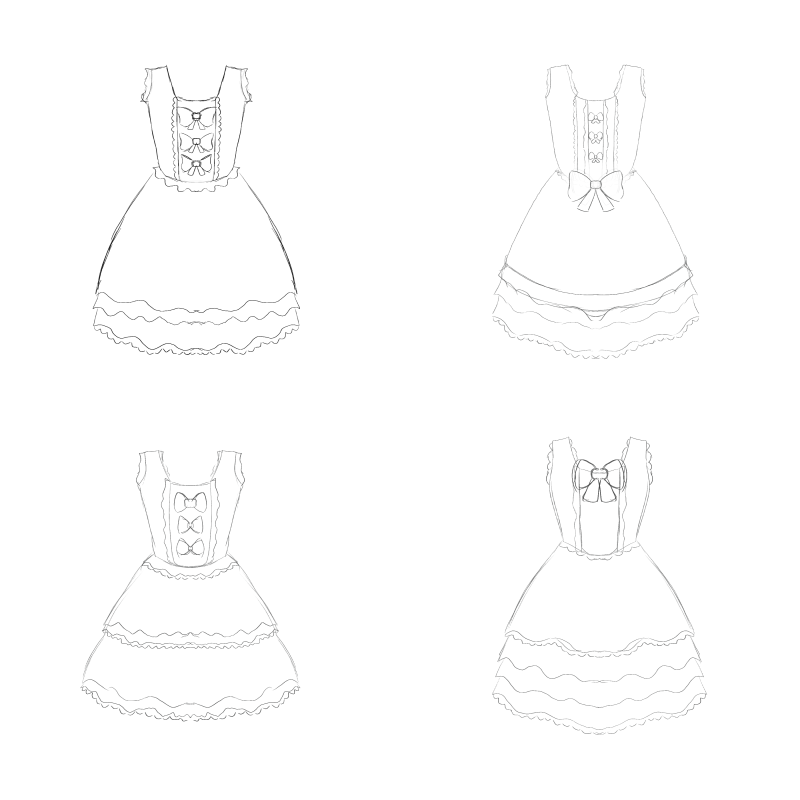
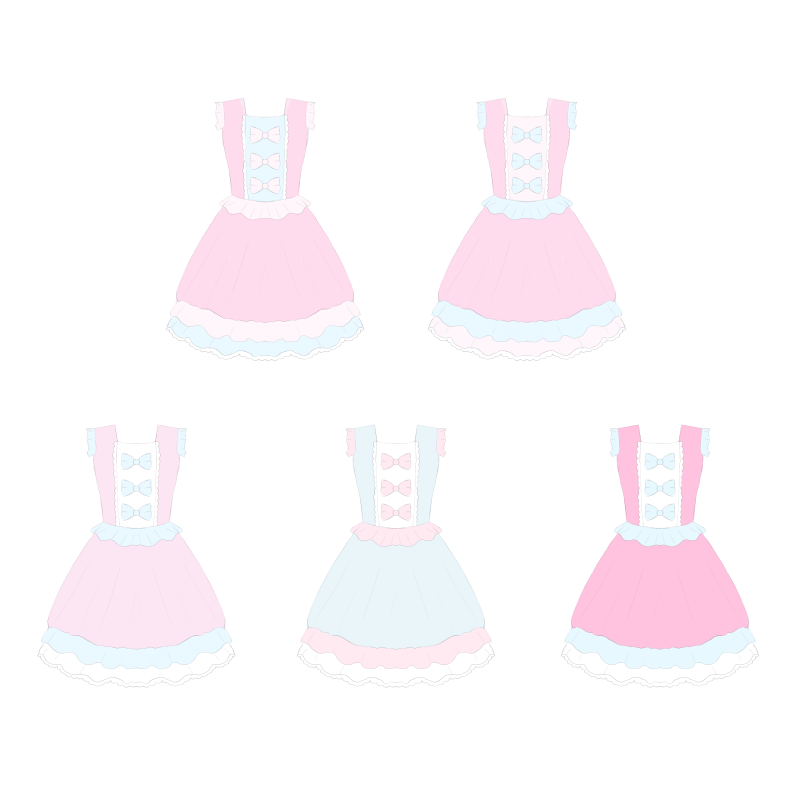
With this in mind, I was ready to create my design.
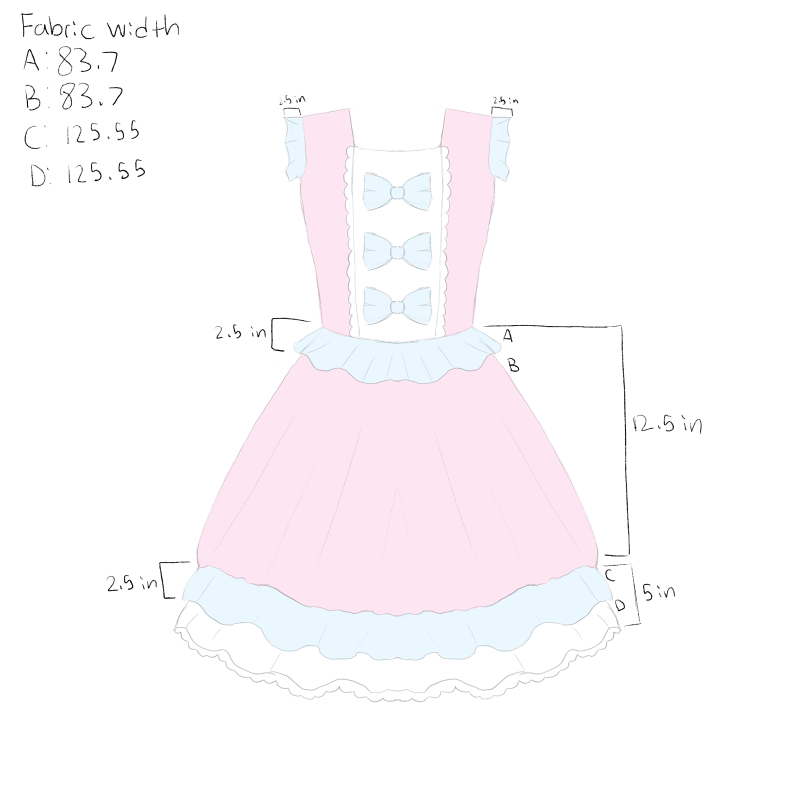
I bought my fabrics from Stonemountain & Daughter Fabrics in Berkley. An employee there directed me to the nearby store Lacis, which is a lace museum/craft supplies shop. I purchased my lace there, as well as a few other tools such as a marking pencil.
I started by drawing out all of my shapes onto the fabric. For the bodice pattern, I used a free pattern from Sarah Spaceman that I modified to fit me. I cut everything out, and began by sewing the pink skirt layer
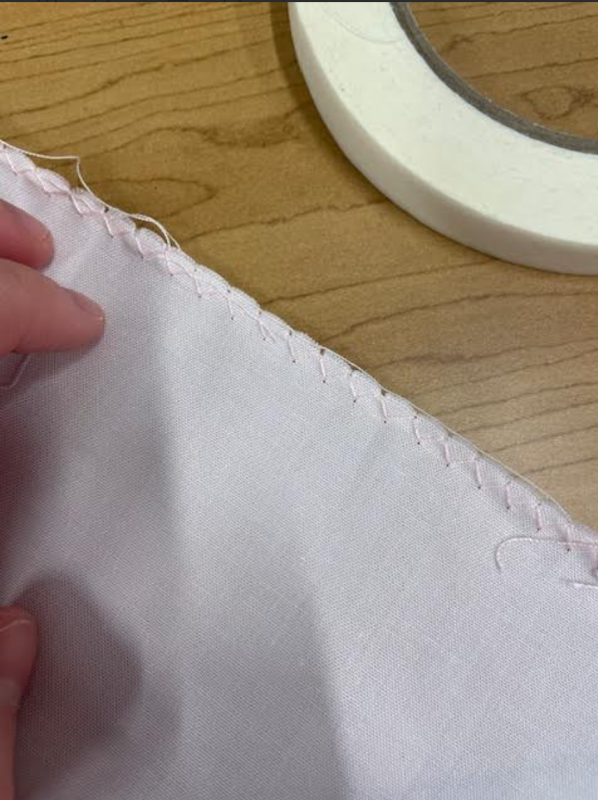
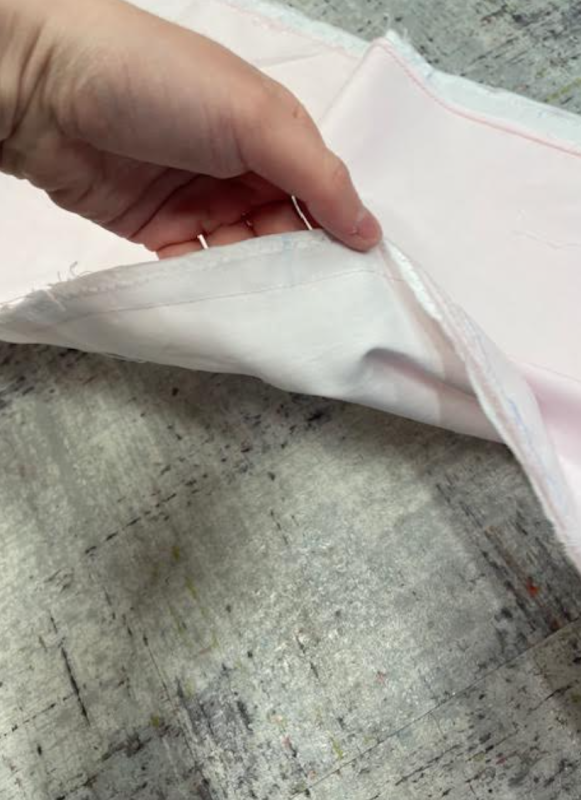
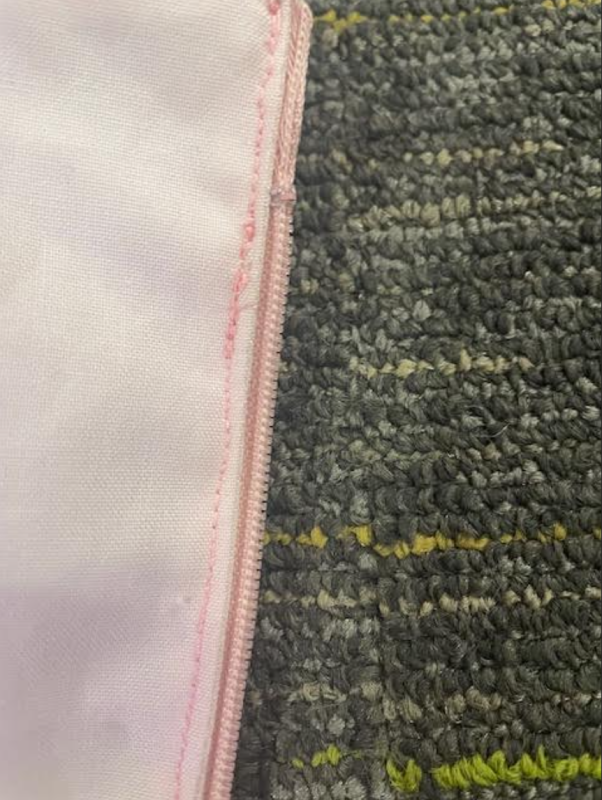
I sewed a zigzag stitch along all the edges of my pink fabric panels. This is done to prevent the fabric from fraying. Then, I attached the two panels together and pressed the seam open. I decided that the fabric was too sheer, so I cut out four panels of white fabric to create a lining for the pink layer. I sewed the lining to the pink fabric, and moved on to the ruffle layers on the bottom

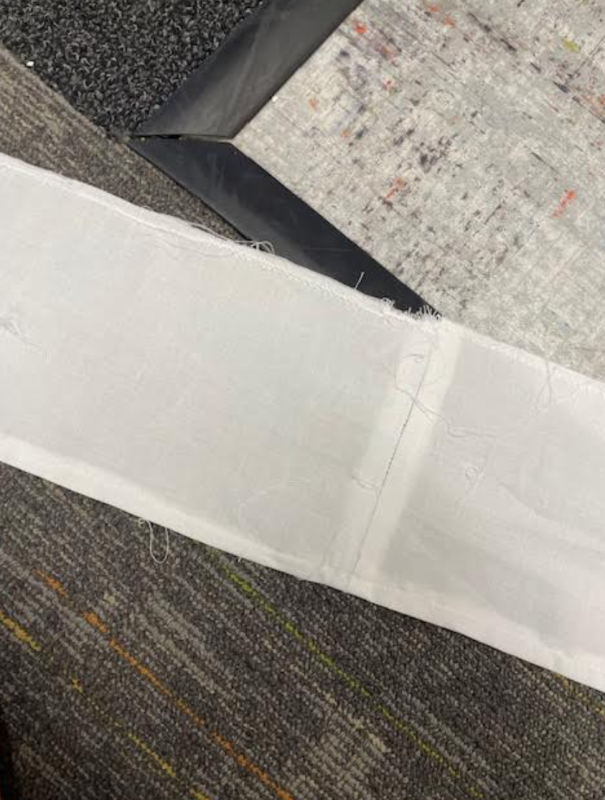
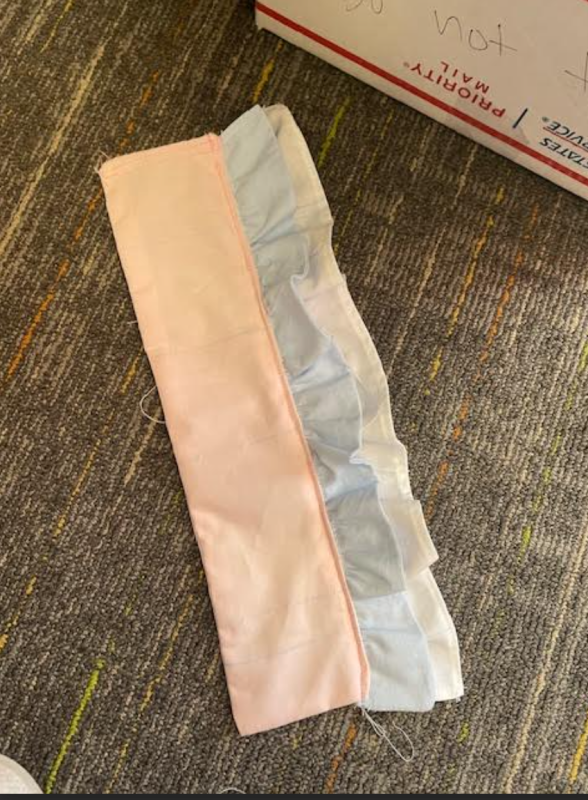
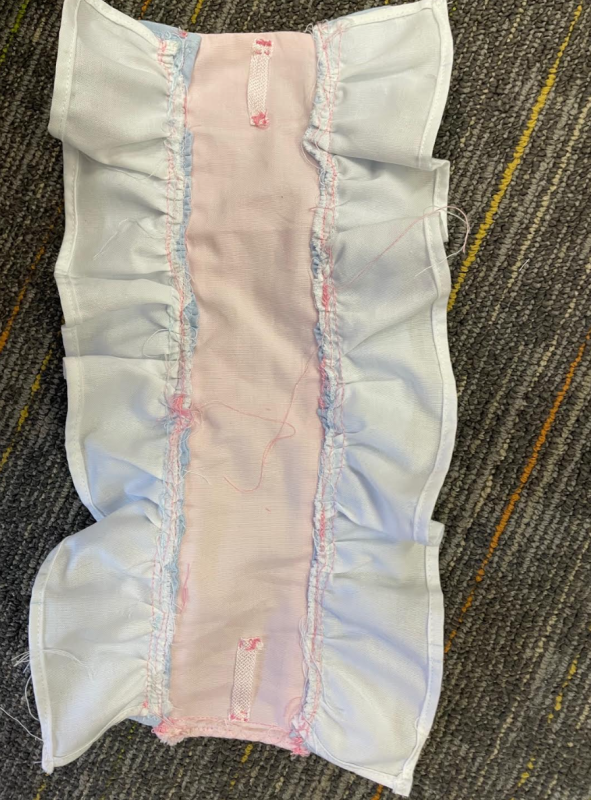
I used the zigzag stitch technique on the white and blue layers, and sewed the two white and two blue panels together to create two very long strips of fabric. Because the edge of the fabric would be visible on the final dress, I hemmed the bottom of both fabric strips. I also sewed the lace trim to the bottom of the white fabric

Then, I had to gather the fabric. Gathering is done by sewing a wide stitch along the top of the fabric, and then pulling on the top thread to scrunch everything up. You have to push and distribute the gathers along the length of fabric as you go. This proved to be very tedious and time-consuming, and the thread in the gathering stitch ended up breaking, resetting all of my progress. Instead of trying the same method again, I decided to use a little trick that I picked up from one of the videos I watched. If you sew the tension of your stitch very high on the sewing machine, the fabric will actually scrunch itself up and do the gathering for you! This worked perfectly, so I repeated it on the white strip and sewed the two together

I sewed the bottom ruffle layer to the white fabric. Because I had reduced the length of the ruffle layers by 1/3, they lined up perfectly with the pink layer.


Next, I had to gather the pink layer. At first I tried the method to gather it using the machine. For some reason, this didn’t work at all. I think the fabric may have been too heavy, but I’m not sure. Because this didn’t work, I decided to try the doing-it-by-hand method. I did two rows of gathering stitches instead of one, which is recommended for a few reasons. Unfortunately, my thread kept breaking. I tried with this method about three times before deciding that it probably wouldn’t work. Next, I attempted to go in small sections, so that if the thread broke I wouldn’t lose all of my progress. This seemed like it was sort of working, but it was incredibly messy. After making a decent bit of progress, I decided to measure the length of the pink fabric and do some math to check if it was actually getting gathered enough. My findings? It absolutely wasn’t. If you recall, The pink fabric needed to be reduced to 1/3 of its original length. This method wouldn’t cut it, and as I mentioned, looked really bad.
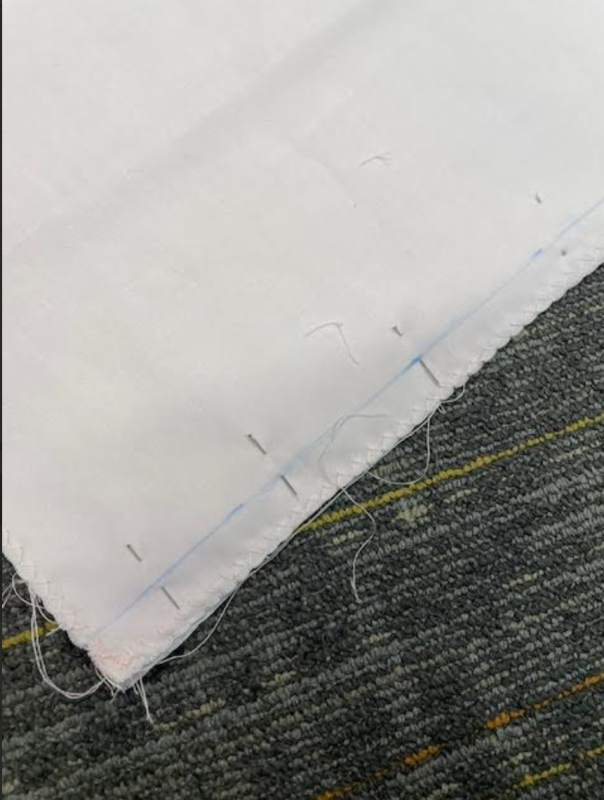
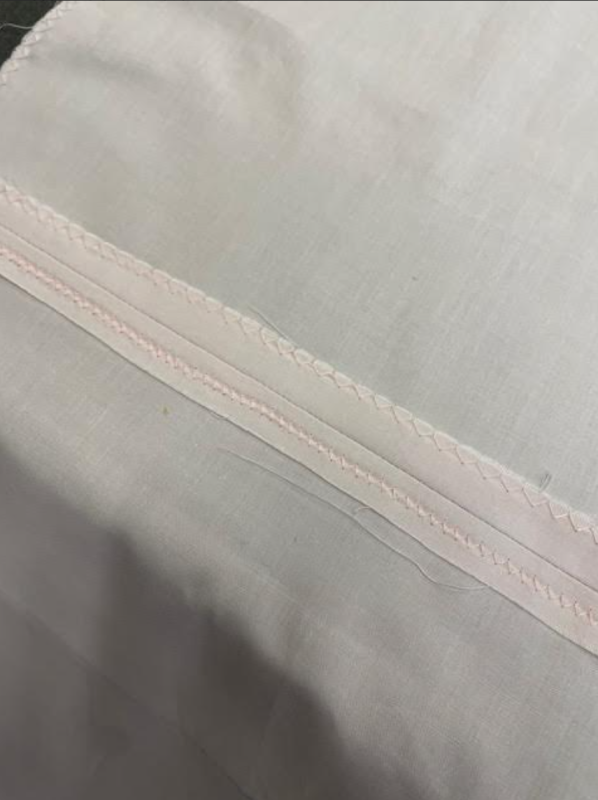
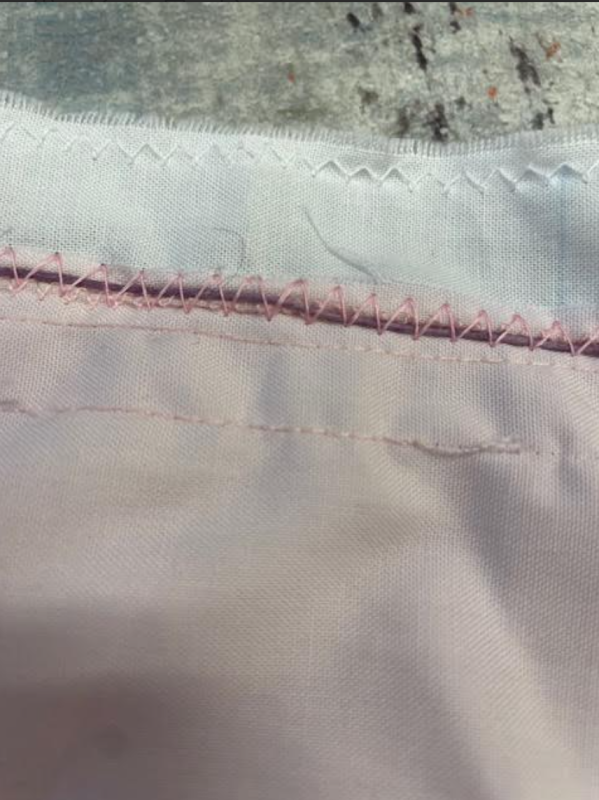
After Spring Break, I came back to the project and decided to try a third method of gathering. Instead of using the top thread to gather the fabric, you can actually sew a waxed cord to the top of the fabric using a zigzag stitch. The zigzag stitch creates a channel that you can pull the cord through to gather the fabric. Once I had attached the skirt to the bodice and locked the ruffles into place, I would be able to remove the cord by just cutting it out of the zigzag stitches. This method worked incredibly, and I was able to easily gather the fabric to the correct length in only about five minutes!


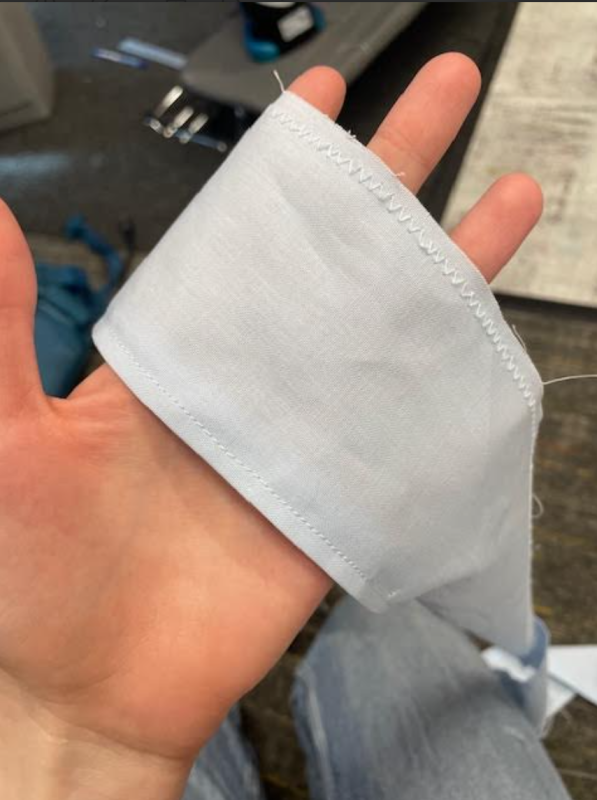
I took a break from working on the skirt and started on the bodice. Using the modified free pattern, I cut out both a lining and pink layer for each panel. I lined up the pink and white layers and sewed along all sides except for the bottom. The bottom is kept open so that the fabric can be turned. Turning the fabric puts all of the seam allowance on the inside. This is very important to having a product that actually looks good, and because I was putting the raw fabric edges on the inside of two layers it would mean I didn’t have to do a zigzag stitch. I repeated this for all the panels, and sewed the panels together


The next step was the zipper. I have always heard that zippers are hard to sew, but I wasn’t quite sure why. The main struggle I faced was keeping the zipper from slipping out from the fabric. Also, for some reason, my sewing machine kept jamming the entire time which was very annoying


Next, it was time to actually assemble the dress! I sewed the gathered rectangle into an actual skirt by hand and then sewed it onto the bodice. I had to sew the skirt to the bodice with the right sides together to hide the edges of the fabric, and it was a bit difficult to line everything up correctly. After sewing around the connection between the bodice and skirt, I had a dress!


In the original design, the bows were supposed to be blue, but I had mistakenly cut them out on pink fabric. This seemed pretty bad in the moment, but I ended up changing other parts of the design which allowed me to compensate for the error.
To create this style of bow, You need to make a tube of fabric by laying two long strips on top of each other, sewing on three edges, turning it, and then sewing it shut. Then, you cross the edges over and tie a thread down the middle to cinch it into a bow shape. Here are photos of the process


I lay out the three bows on the white panel of the bodice, and decided I didn’t really like the look. I had also decided that I didn’t like the top blue skirt layer or the shoulder ruffles. I decided to change my design up in the following way:
- Only use one bow on the top.
- Use the extra fabric intended for the skirt layers and shoulder ruffles to add a blue layer to the bow. In addition to reducing fabric waste, this will help to re-balance the color palette of the dress due to the pink bow
I created the blue layer for the bow and added it to the bodice! I tried it on, and ended up needing to bring the bodice in by a couple of inches. I also decided to add a lace-up effect on the front panel with some pink ribbon.

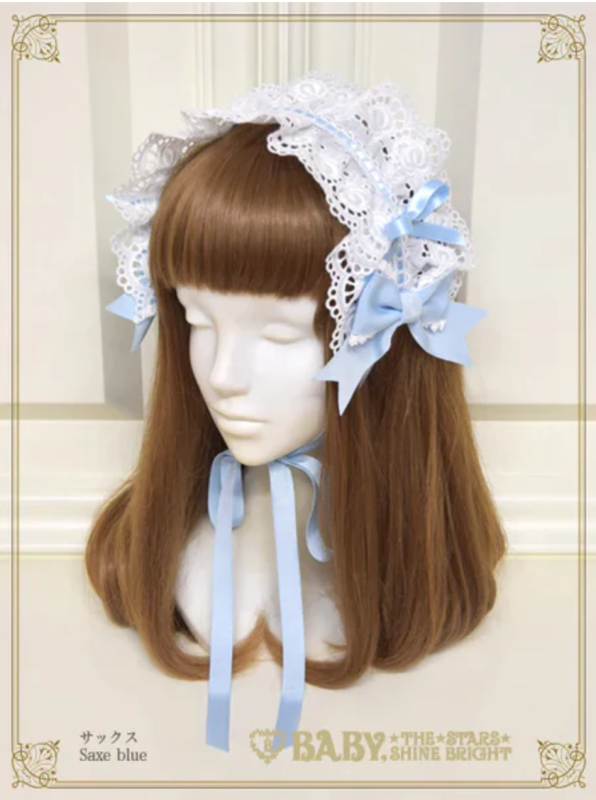
I knew that I would have extra time, so I planned to create some accessories. The first accessory I created was a headpiece. Here’s a photo of the style of headpiece I wanted to recreate. It’s very common in EGL fashion.
I found a free pattern and tutorial online, but I didn’t really end up following it.
To create my own, I sewed two rectangles of pink fabric together for the base. I used a pretty much identical process to the ruffle layers on the skirt to add the blue and white ruffles to the headpiece. I used ribbon to create some slots for bobby pins so that I can actually wear it. I also used the extra two pink bows on the sides.


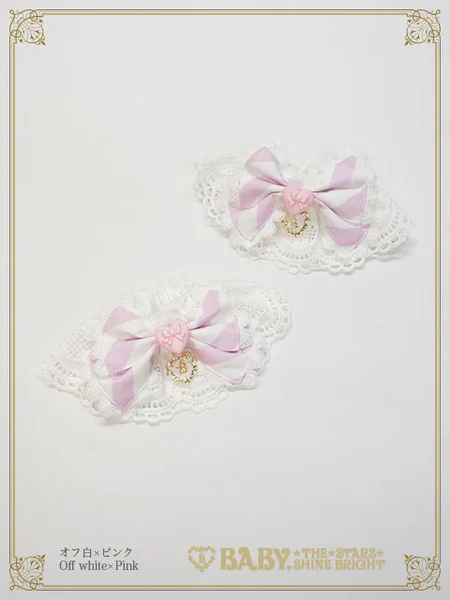
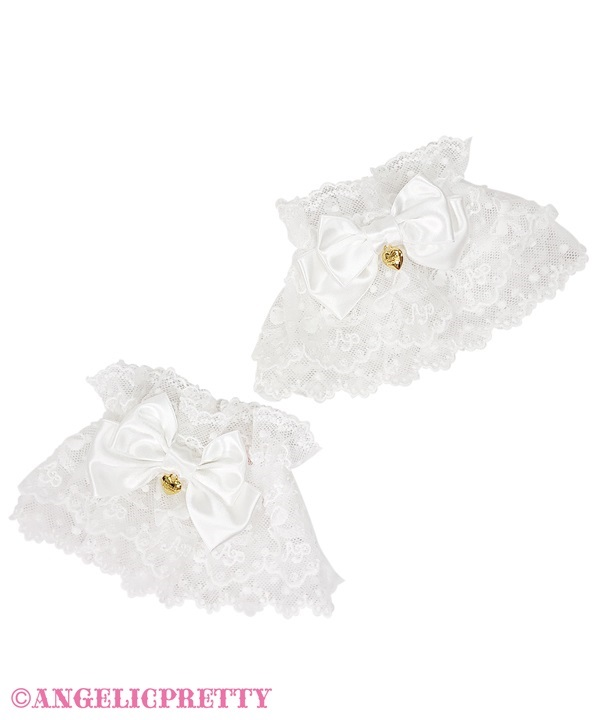
I had even more extra time, so I decided to create another accessory. I felt confident enough in my sewing skills at this point to create my own design and pattern with no tutorial for reference. I decided to create a wrist cuff accessory, similar to these examples.
Fun fact: These were originally worn to hold really long, flowy sleeves into place, but are now used as a general fashion accessory.
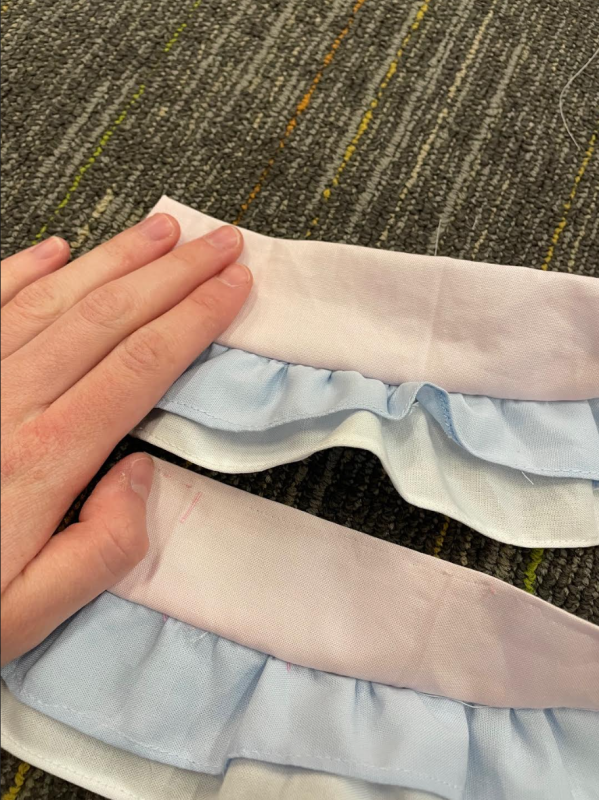
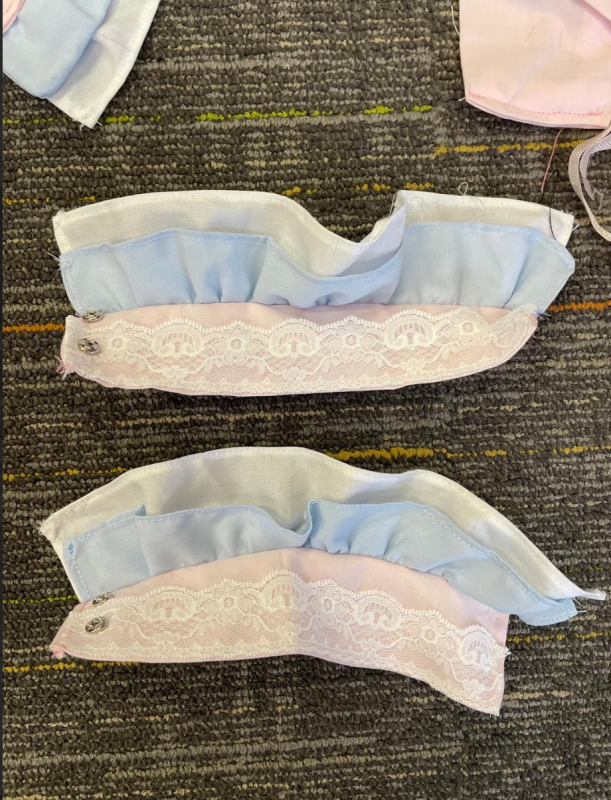
I drew the pattern out for the base by wrapping some paper around my wrist and drawing out the shape I wanted. I measured the final length and used the 1.5x rule to create a pattern for the ruffle layers. I’m not sure how this type of accessory is typically worn, but I planned to use snaps to close them. I also decided to add the remaining lace I had to the bottom.


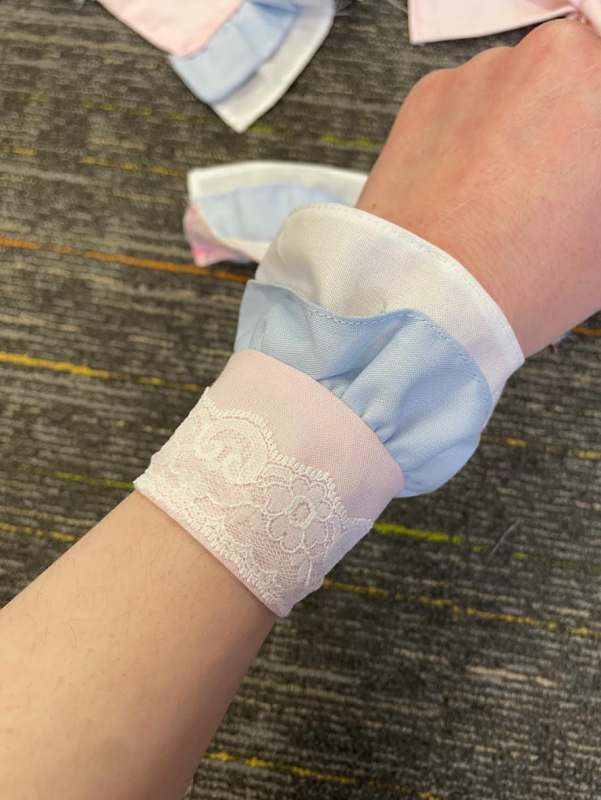
I think this came out super cute, and they really complete the outfit!


Reflection
Read my reflection here
For my Zenith project, I knew that I wanted to do something that would challenge me to learn a new skill and allow me to create a really cool product that I’m proud of. So, it felt like the perfect opportunity to sew! Of course, creating fashion also ties in very well to numerous skills I’ve learned in Design class.
I’m already quite familiar with this style of fashion, but in order to come up with my own design, I had to look at things a little more closely than I usually do. I looked at a ton of inspiration photos, trying to figure out how different layers of color and lace are often assembled. Obviously, I also needed to do research on how exactly to turn my design into a pattern, and those patterns into an actual dress. This part felt the most overwhelming at first, but I started to notice patterns in the different methods used in various tutorials and felt very comfortable when it came to the designing process.
This was not an inherently collaborative project for me, but it was nice to have support and advice from my peers. I was able to get the chance to talk to some people who actually know about sewing, and they gave me really good feedback.
I think the biggest 21st century skills that I honed throughout my Zenith project was risk taking. Jumping into an entirely new medium with the goal of creating an original design was very daunting, but I’m proud of how I was able to face and solve problems throughout the process and adapt my plans when I needed to.
I feel very satisfied with how I fulfilled both the Zenith project and my own objectives over the past few months. I’ve gained tons of new skills, and the things I created are definitely my freestyle productions that I am most proud of.
It’s been really great to see my own confidence and skills grow throughout this project. In the beginning, I tried to follow my plan as perfectly and closely as I could. Whenever things didn’t go perfectly, it was stressful, and I had to dedicate a lot of time to solving whatever issues had arisen. But time went on, I became more comfortable with adapting as I went. When I made mistakes such as cutting out the fabric for the bows in the wrong color, I took opportunities to rethink and even improve my design. By the end of the project, I felt comfortable enough with sewing to create my own plans and patterns without needing to sketch out a design first or consult a tutorial.
I think that this project really gave me a lot of confidence in trying new things, and I’m very excited for whatever skills I’m going to learn next.
Or watch it!