Introduction
“How can I use unconventional forms to express myself?”
This is the question we were faced throughout this conceptual project, this project was meant to help us find creative ways of expressing ourselves through various forms like poetry, music, art, animations, and web production. In order to express ourselves freely, we all had the opportunity to learn how to use a wide variety of equipment and apps including a DSLR Camera, Tascam Audio Recorders, Adobe Photoshop, Adobe Premiere Pro, Word Press, and Avid Pro Tools.
What I value the most about being part of Freestyle is the amount of resources we have access to and the freedom we have to be as creative as we feel. In fact, I don’t think I will find anything similar to what we do in Freestyle. Throughout this unit, I have learned quite a lot about myself and how I can improve to better express myself in different forms of aesthetics.
Haiku
In our English class, our first project was to make a haiku. We learned about the structure, haikus have three lines: the first contains 5 syllabi, the second one contains 7, and the third one has 5 again. In class, we had analyzed various haikus from different poets to understand them better. We also took time to practice creating haikus with given prompts. Everyone was given a concept statement to which we had to write a haiku. My concept statement was:
” I am exploring the feeling of boredom through looking through macro lenses.”
It was difficult for me at first to write my haiku since I already had an idea of what I was supposed to include, yet there were so many possibilities to find the right one. As soon as I had a few rough drafts, I kept modifying them and asking for feedback from my fellow peers to make my haiku better. At the end of the day, I had a haiku that I was happy with presenting.
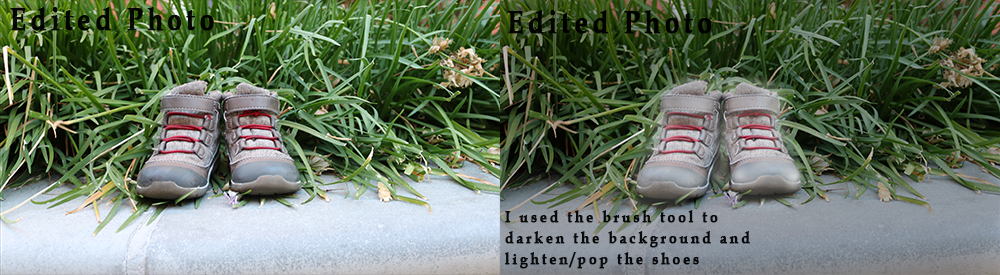
In our Digital Media class, we learned how to use Adobe Photoshop and Premiere Pro after we used our DSLR Cameras to capture an image that demonstrates our haiku. With Adobe Photoshop, I got the chance to increase the brightness of my photo and crop it to my liking. Then, using Adobe Premiere Pro, we made a short video of our haiku. After recording ourselves performing our haiku, we used keyframes and fade in/out in Premiere Pro to make it into a clean professional video.
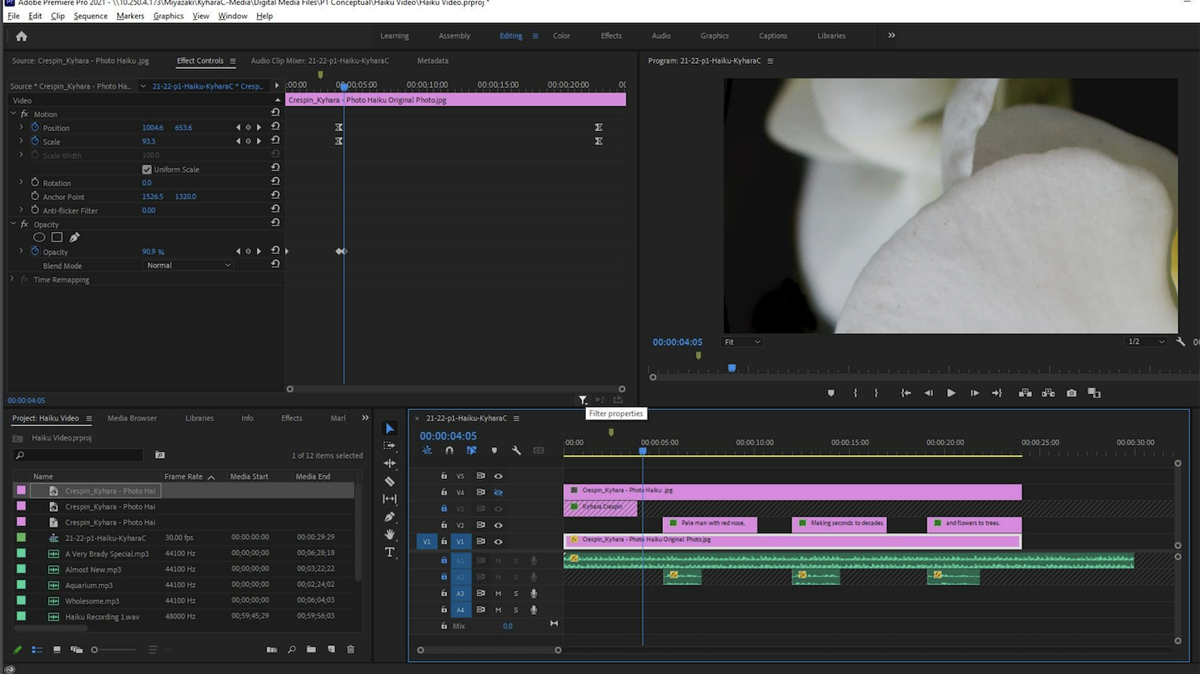
Process of editing my haiku video in Adobe Premiere Pro
In the making of my haiku short video, I valued learning how to add effects to my text like fading it in or out. I valued how much the editing process is a crucial part of making your work better on so many levels. Adding the right background music, the right color, and placement of the text, can change the mood and emotion you are trying to express.
Poetry
For our final project, as we end the poetry unit, we had to write a free verse poem that demonstrates a variety of poetic devices. Previous to that, we learned how to use figurative language by writing poems and revising other poets’ work. Poetic lineation was another factor that we learned by having a group activity during class. I decided to make a free verse poem that I had as a draft in my English notebook. The workshops from class helped me give and gain feedback to further develop my poem into telling a story from my life experience.
In Digital Media, we took the poem that we created and made a visual. Using our DSLR camera, we were tasked to capture a photo that best represents our poem. With the awesome help of Adobe Photoshop and previous editing practice, I was able to make my image stronger.
Listen to my free verse poem!
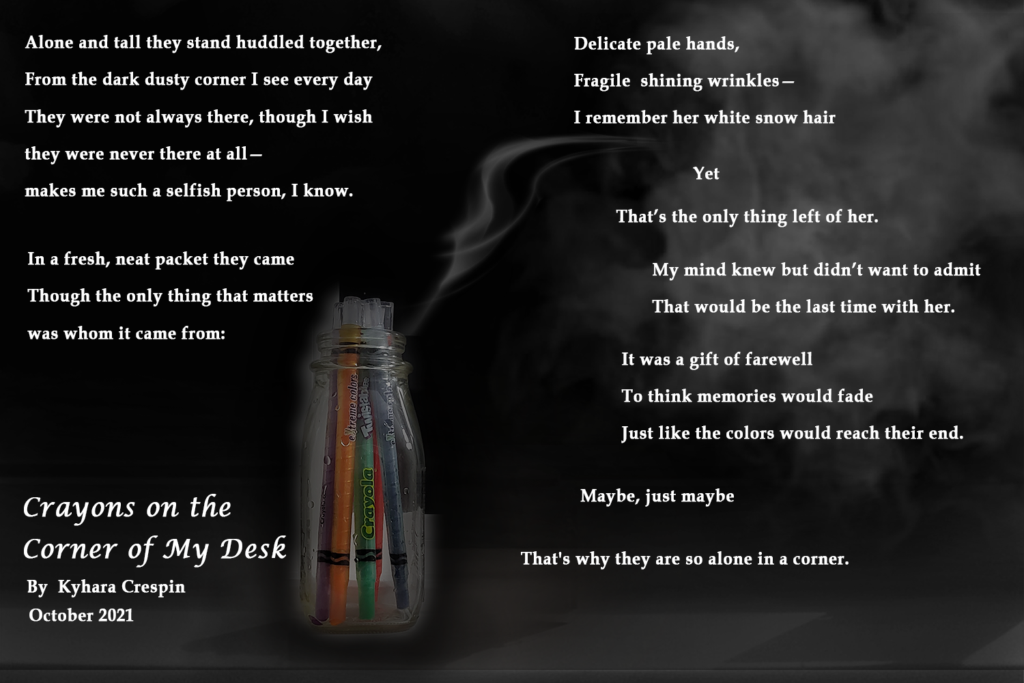
“Crayons on the Corner of My Desk” is a free-verse poem about grief and ignorance. Though the person described is not dead, the speaker is forced to stop meeting this person. As the speaker, when I look at my crayons, I remember the times with my tutor that helped me learn English faster. She was a big influence on my life, so it was hard for me to say goodbye. The speaker shows the reaction of not being able to process the harsh reality of ending such a close bond being ripped out of her life. I portray the idea of hiding her true emotions through denial. In the first stanza, I use description to introduce her crayons’ role which takes deeper meaning as the poem progresses. I use “tall”, “stand”, and “huddle” to say how the crayons are all standing in a container, together. Ultimately, the pattern of description in this poem is to show how the crayons symbolize the speaker’s relationship with her tutor; the seventh stanza explains how crayons connect to the tutor. The first line briefly explains the crayons were a gift from the tutor as a way to say goodbye. I used a simile to compare the last two lines, by that, I mean my memories with my tutor would no longer continue, “fade”, and I go back to how the crayons would be all used up, “end”, as a way to portray the bond that had broken off. The second stanza shows consonance in order to have rhythm. The word “though” and “know” have the same consonant sounds at the end making them flow together. The second line, “Makes me such a selfish person,” demonstrates the speaker’s selfish thinking. The thought of being selfish wraps around the idea of ignorance because without the crayons, the day of having to say goodbye would have not come. I add imagery in the third stanza to make a clear image of how the speaker’s tutor looks. I describe important features like “delicate pale hands” to demonstrate her skin is a lighter color. I let my readers know she was older by saying “fragile shining wrinkles” and “white snow” to describe her skin and hair due to how as we age, our skin gets wrinkles and our hair turns white. During peer review, my readers enjoyed how I connect the significance of the crayons to the relationship the speaker had with her tutor but suggested that I should use lineation to have long pauses to create flow and tone to emphasize these words that help clear my poem’s purpose. I adjusted this by adding end-stops and emjabs for line eight to give a dramatic response of denying the truth of not being able to be with my tutor by describing the feeling of ignorance before ending my poem. Even though I didn’t use a specific poet for inspiration, I believe that all the practice on a variety of poet’s works that focused on many poetic devices prepared me well to write my poem.
From this free verse project poem, I valued the time I took to tell a story I’m glad to share with my readers. In order to do that, I value the knowledge and practice with the application Adobe Photoshop and Avid Pro Tools. To bring my creation to life, I had to focus on both the visual and auditory to hook my audience into reading my poem.
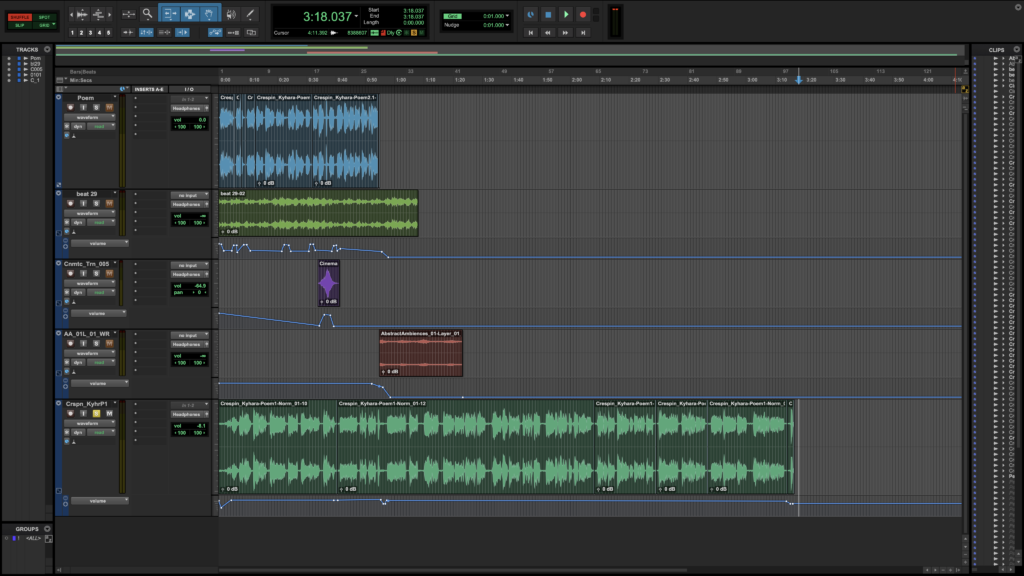
Behind the scenes of editing my free verse poem audio using Pro Tools
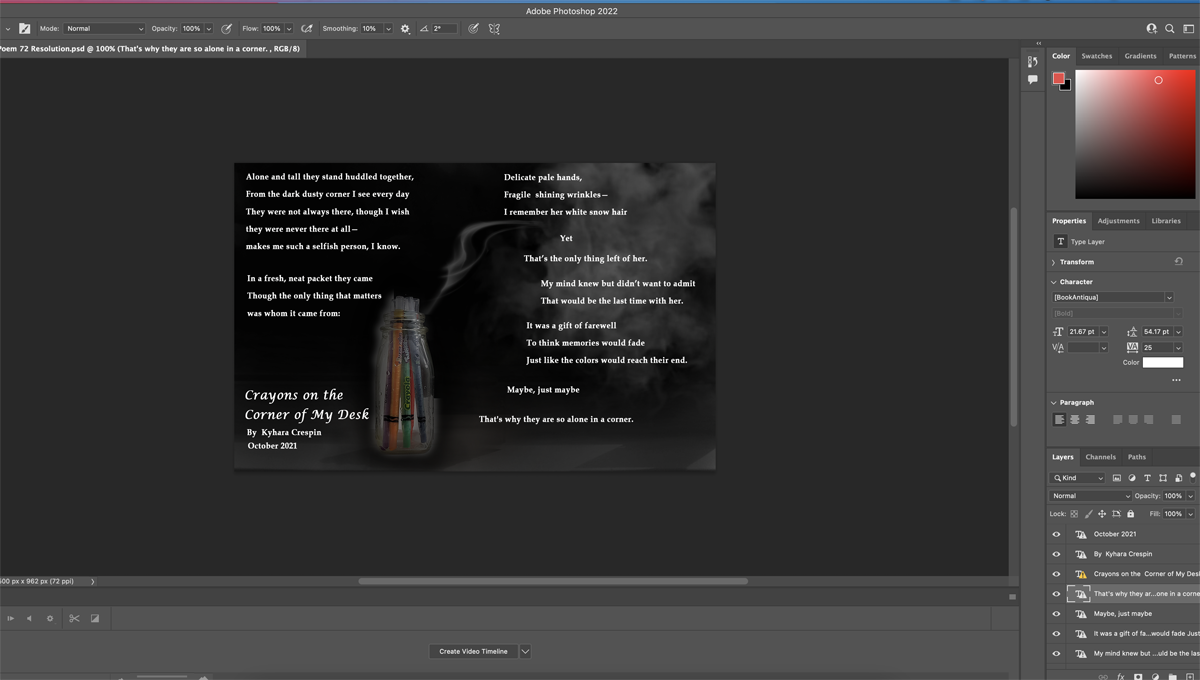
The process of tying my Free Verse Poem with Photoshop
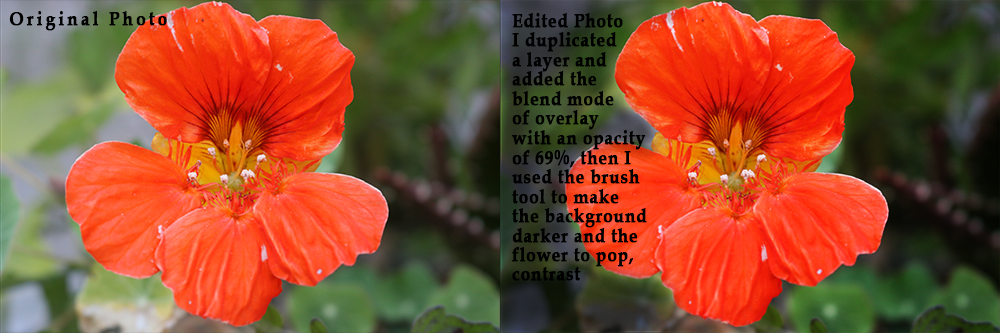
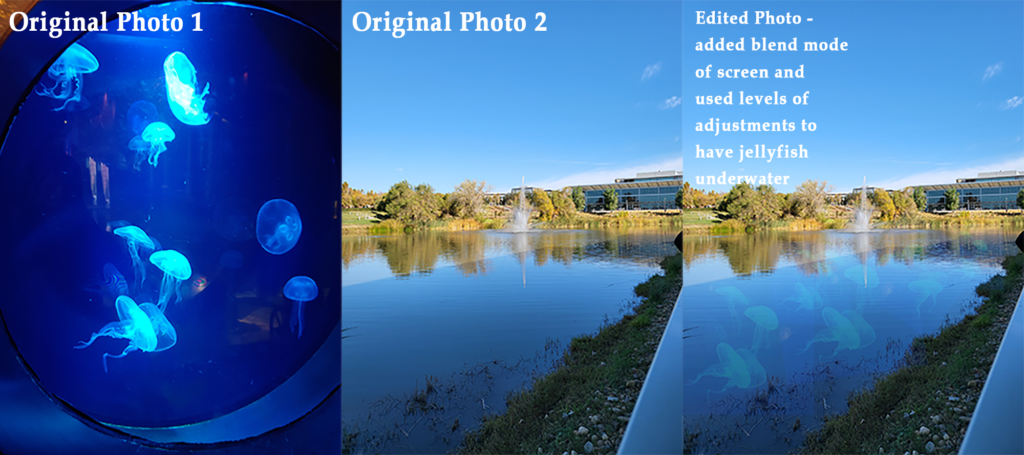
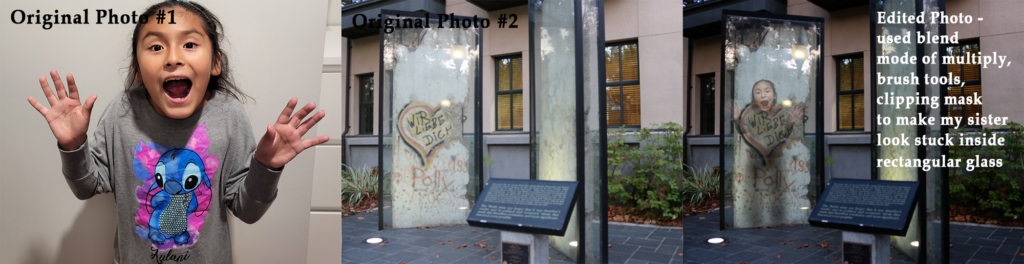
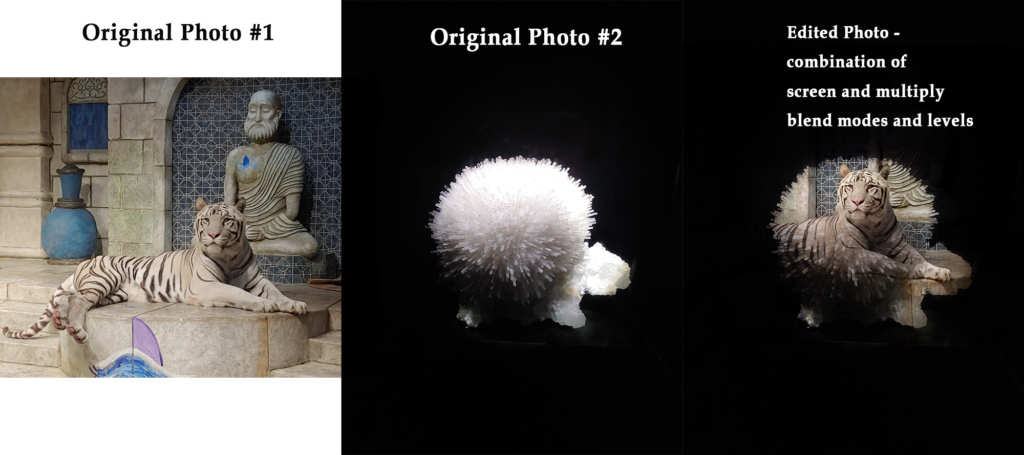
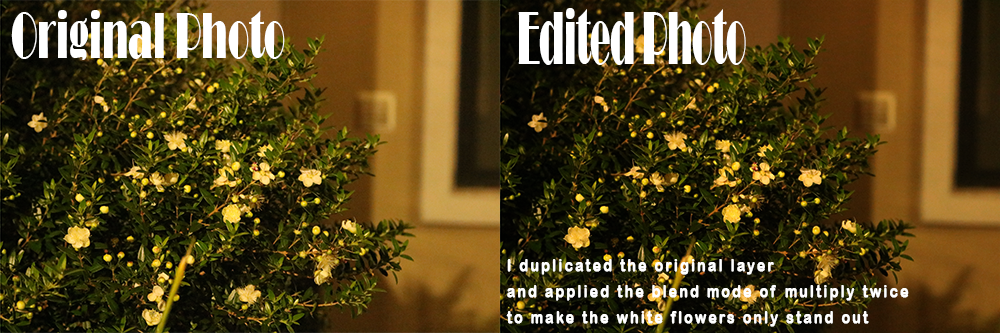
Photoshop Blend Mode Editing
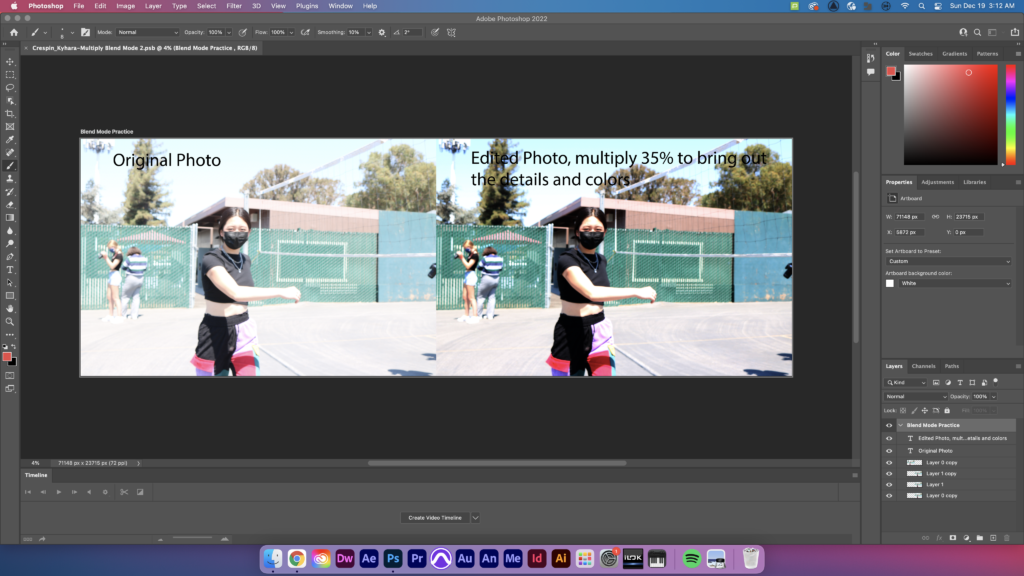
Throughout this unit, we have learned how to use many Adobe applications but the most common we use is Adobe Photoshop. Using Photoshop, we can edit the photos that we take using the DSLR Cameras given to us. What we learned first were the different blend modes we could use to make our pictures more interesting and clearly express our motives.
What are your thoughts about using Photoshop Blend Modes?
I think that using Photoshop Blend Modes is a very useful tool that I can use to make my pictures stronger in the sense of what I am trying to express. I’m glad that I have knowledge on how I can use the different blend modes like multiply, screen, and overlay which is great to freely play around with these through my photos. So far, the overlay blend mode is probably the most helpful one that I will want to use more in my future photo editing.
What did you value about learning Photoshop Blend Modes?
Through the process of learning Photoshop Blend Modes, I value the knowledge on how the different kinds of blend modes impact my images. I value that I can be more creative using these modes. Also, the process of how easy this can be applied to yet plays a pretty huge factor in photos.
Animation
Being an animation has been great so far because I have learned a lot about telling a story through the animations we have done so far. We constantly use a variety of apps like Adobe Photoshop, DragonFrame, and Adobe After Effects to help experiment with our creative ideas through different forms of animation. The equipment we have strengthens our ability to play around and use our freedom to bring our creations to life.
Zoetrope
The first project we made in Animation class was the zoetrope which is a cylinder-shaped tool that spins and can hold pictures. We were given a strip of paper with a certain length then we divided it into 16 frames (squares). Our main goal for this project was to tell a certain short story since it was 16 frames while using the principles of animation.
Phenakistiscope Wheel
For this early form of animation, we used a circular-shaped piece of paper divided into slices which were the frames that would spin. We all sketched our ideas into our paper, outlined them, and added colors to give a sense of mood and not stay dull or plain. Using Adobe Photoshop, with our final draft, we digitally turned the phenakistoscope to make our animation come alive. This was such a great experience since it was very helpful to use Photoshop into creating our final product.
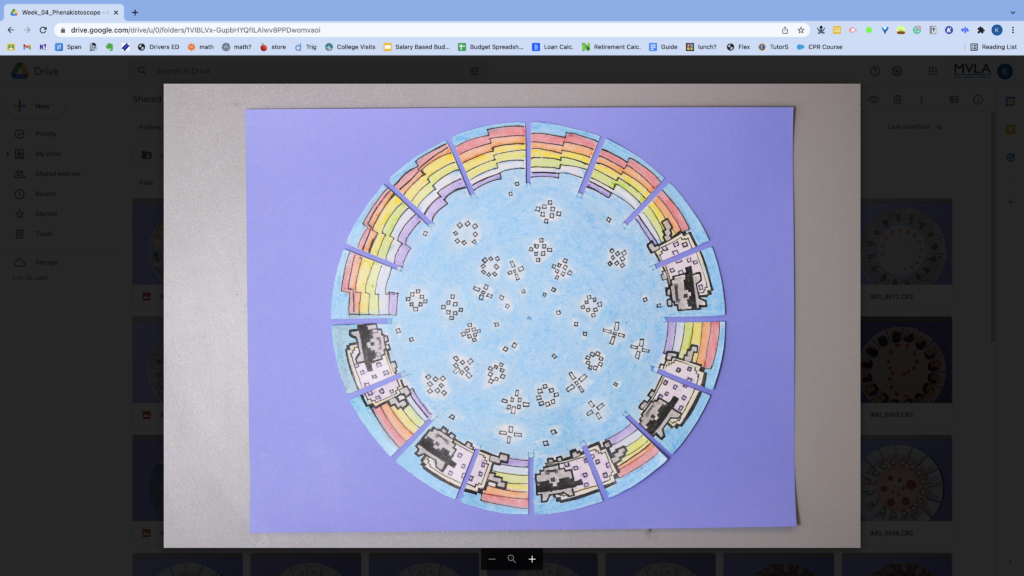
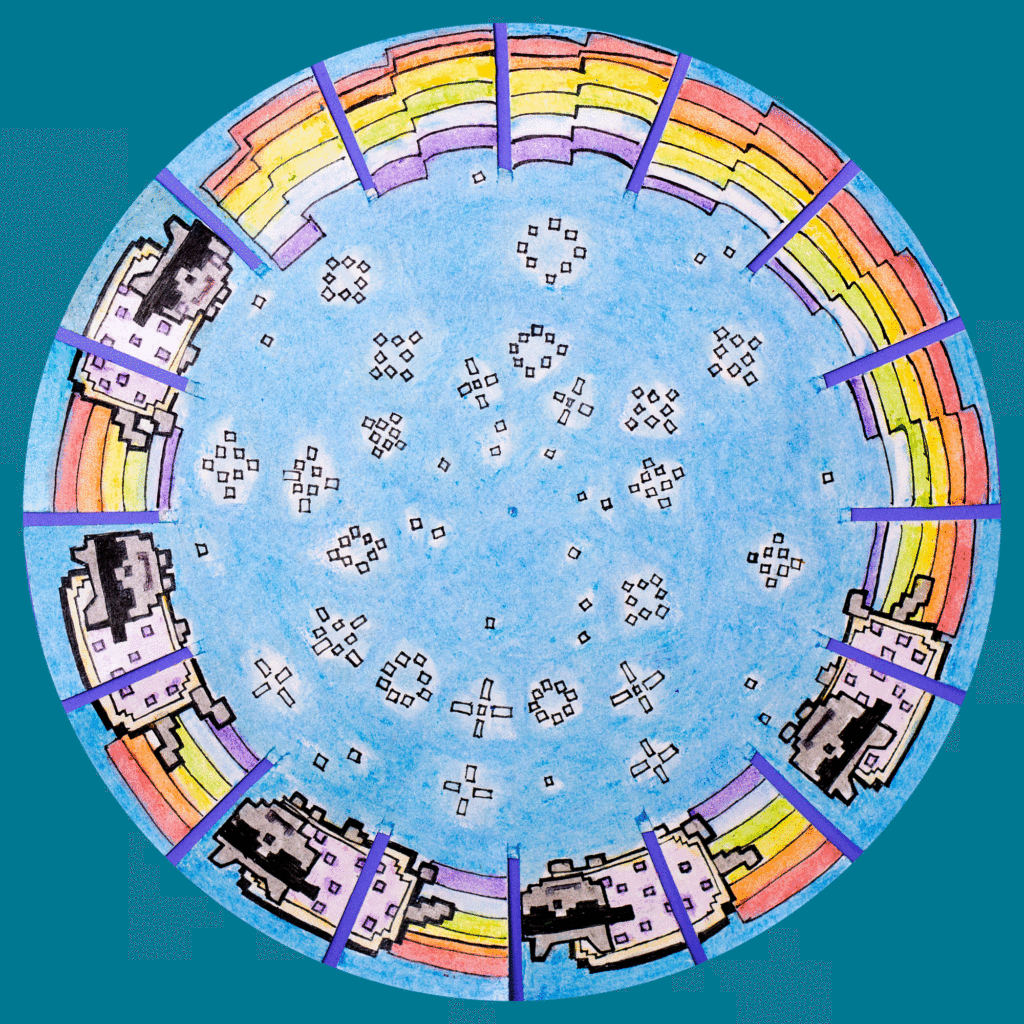
In Photoshop, we used the layers tab to create 16 layers rotating to one side. Since the background was quite distracting because of two colors that don’t match well, using the bucket tool, I was able to change it to a solid, eye-pleasing, and professional background. By rotating to the right for 25 degrees, once it was done, it was able to evenly spin. I didn’t know this was possible to do in Photoshop, so what I valued the most was learning about the features in apps like these that could be extremely beneficial to know.
Flipbooks
For this short unit, we did two flipbooks where we use the 12 principles of animation to tell a story. The first flipbook we made had 90 frames, most our sketches are on the right side of the paper since it made it easier to see as we flip it. After creating our stories and drawing on notecards to make a flipbook, we then use our DSLR Camera and DragonFrame to digitalize it. We take pictures with our DSLR while it’s connected to our computer and the app DragonFrame is open. Since each notecard is a frame, when we took photos of all the notecard, the end results were pretty. In the making of this flipbook, I chose to use two principles of animation, like squash and stretch and exaggeration to make my animation more exciting.
The second flipbook we made was the Exquesite Corpse Animation which consisted of 60 frames in total. So far, from the two flipbook animations we have made, this one is my favorite. What I really like about this is the idea of how we are making a long animation by connecting each everyone’s short animation. This was done by everyone picking a shape of their own, we would start our animation with that shape and end with the shape of the next classmate. Using our DSLR Cameras and DragonFrame, we were able to digitalize our flipbook animation to then letter connecting it the class’ animation into one.
Direct Technique Animation
In this Direct Technique animation, we got the opportunity to make this workpiece out of different materials instead of just drawing it with pencil and paper. I felt like this project gave us more freedom to create something that involves using other tools by critically thinking about how we would express an emotion. I decided to use a childhood favorite, Play-Doh, to make this animation because it’s very flexible, easy to manipulate, and has a variety of colors accessible. Not only was it fun to use while making this, but I also had past experience in clay animation. Making this brought back great memories and I always find play-doh and clay fascinating to see how it stretches making it super satisfying for my viewers to admire.