Multi-Layer Art
For the multi-layer art project, we had to create a scene that tied into our worldbuilding projects from English. My story takes place on a space station in orbit and explores the concept of being stranded away from Earth, despite it being so close. I chose to depict this through two hands holding “space” — various stars and planets surrounding Earth. My design is simple due to this project’s extreme time pressure. If I had more available time to create my design, I would have made it more complex with more layering, but it was impossible with the time frame we were given. Despite this, I am satisfied with how my completed project looks and I had fun designing and assembling it.
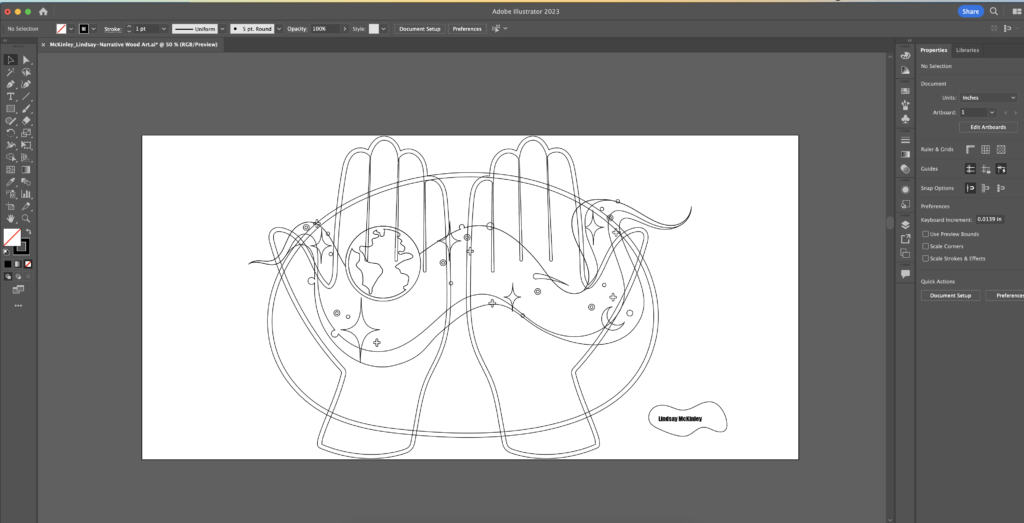
Design – Illustrator
When first starting this project, I struggled a lot with coming up with an idea. My narrative story in English was focused around space travel and exploration. When it came time to develop an idea for my multi-layer art project, I found it difficult to depict space.
I struggled a lot with what I wanted my design to look like and how I could implement the layered effect best. In the end, I settled on having two hands that appear to be “holding space.”


After sketching out my initial idea for my project, I began to plan out how I wanted the layering to work. In Illustrator, I used the pen tool to draw out each of my layers. I changed the colors so the layers that were the furthest back were the darkest and the ones that were closer to the top were lighter.
After Effects 3D Space
After finishing my design, I imported the Illustrator file into Adobe After Effects to help demonstrate the assembly process digitally. In class, I learned how to use 3D space, camera trackers, and lighting in After Effects.
This aspect of this project was definitely a learning curve for me. Adobe After Effects is not the most intuitive platform, especially when using 3D so it took a lot of trial and error to figure out what I was doing. I struggled initially with positioning on the z-axis and camera orientation, but after completing this project, I feel much more confident.
While making this video, I experimented a lot with different settings, which ended up helping me develop a deeper understanding of the program. Although it was difficult, I had a lot of fun learning this new skill.
The final step of the Multi-Layer Art project was to actually assemble the physical parts of my project. My design was cut out on wood using a laser engraving machine. After receiving the pieces, I sanded them and added color using felt-tip pens. Although I was using color, I wanted my project to retain the wood look, so I chose to use various shades of brown to add depth. I’m

Click to enlarge image!
Overall, I’m pretty happy with how my completed project turned out, and although it was challenging and rushed, I still think that the experience was very valuable