Introduction
“How can I use unconventional forms to express myself?”
The Conceptual Unit is one of the first things Freestyle students learn when they begin at Freestyle Academy. This unit was challenging, but the steep learning curve has allowed me to grow my skills with high-end technology extremely fast. The beginning of my junior year at Freestyle has introduced me to Adobe Creative Cloud software, which opens up nearly endless possibilities for creative projects. I have used the FA facilities to create poetry, music, art, animations, photographs, and even this website! Some of the specific tools I used to accomplish this included; DSLR Cameras, Tascam Audio Recorders, Adobe Photoshop, Adobe Animate, Adobe Premiere Pro, Adobe After Effects, Adobe Audition, Avid Pro Tools, WordPress, and Google Apps.
I greatly appreciate the opportunity I have to be an English and Digital Media student at Freestyle Academy, I have already learned so much in only one semester. English class allows me creative freedom in my writing that I have never had before, aiding in developing my ideas and stories. Digital media class develops my technical prowess in industry level technology, and expanding my skill set far beyond what I had grown used to previously. I’m looking forward to my time at freestyle, and all the things I will do with it.
Digital Media & English
Haiku Project
This project began as an assignment in my English class with directions to create a haiku based on two words. One word was a verb, the other an emotion. I was tasked with creating a poem following the traditional rules of a haiku while integrating my two word prompts, guilt and brushing hair. After finishing our poem, my class and I had to pair the poem with a photo we had taken ourselves. The photo needed to help convey the story our poems were trying to tell, in my case, to portray quite the somber mood. After submitting the poem as an English assignment, I was instructed on how to turn it into a short video using Adobe software. In Digital Media, we learned how to edit audio and video, insert music, and create visual effects on our Haiku Photos. The end results have been posted to the Freestyle Academy YouTube channel. You can watch my video below:
The Haiku project really opened my eyes to the possibilities available to me at freestyle. Being able to create a video with audio appealed to my brain, and it immediately started churning out ideas for animated videos and other endeavors. Essentially, I value this project because it was my first taste of what I could produce that was uniquely my own.

“Why Art?” Project
Instructions: Write a short introduction to the “Why Art?” Essay assignment in English. What did you read, discuss, and research to inspire you to formulate your opinion about “Why does art matter?”
After examining works like “red” a play centered around mark rothko, students analyzed reasons why art matters in the world. We were tasked with finding an artist and a writer that inspired us to find our own definition of the purpose of art and completing a project using these three key sources. Me and my peers each wrote and edited an essay connecting our opinion to the information we had gathered.

After turning is our written essays, students had to turn our essays into a slide presentation, memorize our content, and present to the class. Each student’s presentation was recorded, and then we edited our recordings into a video of our performance. The purpose of making a video was both to teach us more about using adobe premiere pro and to share our presentations with others.
Finally, we recording audio of ourselves reading our essay out loud, you can listen to mine below:
I valued this project because it blended the familiarity of writing an opinion essay and presenting it, with a completely new digital medium. The project was also on a subject I was somewhat passionate about (Expressing myself through art matters a lot to me). Additionally, I found it really interesting to hear my peer’s perspectives on why art matters, because everyone’s was unique. Being able to share my presentation with my family was another benefit of the project, as they would never have been able to see the presentation it if not for Freestyle.
Photoshop Blend Mode Editing
Photoshop is another app developed by Adobe to aid users in editing images an even some animations. I completed this assignment by editing photos I had taken to look better or to put a creative spin on them. Photoshop allows you to apply screen, multiply, and overlay layers to photos, which can improve the photo by changing brightness and color qualities in the images. You can also blend two photos in Photoshop by changing something called opacity and using a digital eraser. The point is, Photoshop is a very useful tool, I am glad I had the Blend modes Assignment to teach me how to use it.
Animation Elective
According to the Oxford Dictionary, animation is, “The technique of photographing successive drawings or positions of puppets or models to create an illusion of movement when the movie is shown as a sequence.” i chose animation as my elective because I hoped the class would teach me how to make characters come to life in a way live-action clips cannot. I have been making art for most of my life and I saw animation as a way to make my stories come alive. In this class, students learn to create motion with fast moving paper, stationary puppets, and eventually computers. Animation 1 begins by having students using more traditional materials to create animation, like paper and markers. I value my time in Animation class because it pushes me to put more effort into my work and spend more time on individual projects. I look forward to learning to work with digital animation programs and produce videos.
Zoetrope
A zoetrope is a 19th-century optical toy consisting of a cylinder with a series of pictures on the inner surface that when viewed through slits with the cylinder rotating, give an impression of continuous motion. For this project, me and my peers were told to create a long strip of paper with 13 frames on it. A “frame” is a single image in an animation. Frames create the illusion of movement animation is known for when strung together. The subject of our animation was our choice, and we were required to color it. Everyone’s was different, and I appreciated seeing my peer’s personalities shine through in their work.
Phenakistoscope
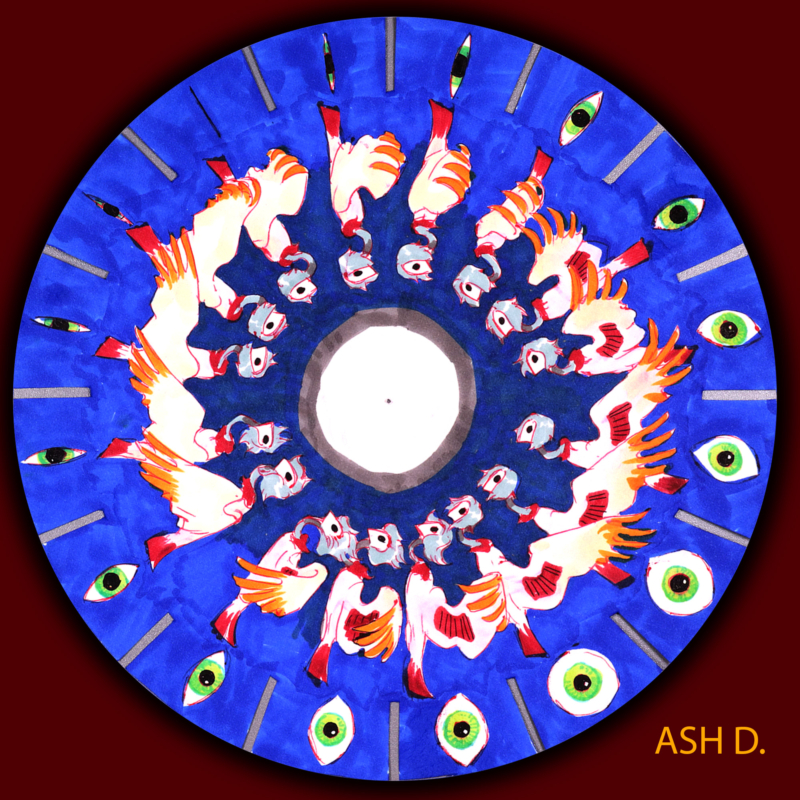
The Phenakistoscope project was similar to the Zoetrope one, in the way that both were made with paper and markers and revolved in a circular motion. However, the paper template for the Phenakistoscope was a circle. Each frame is in the shape of a wedge that is 1/16 of the circle’s area. After completing our phenakistoscopes, we photographed them and edited the image in Adobe Photoshop to create an animated GIF. Click on the image below and you can see my Phenakistoscope animate.

My First Flipbook
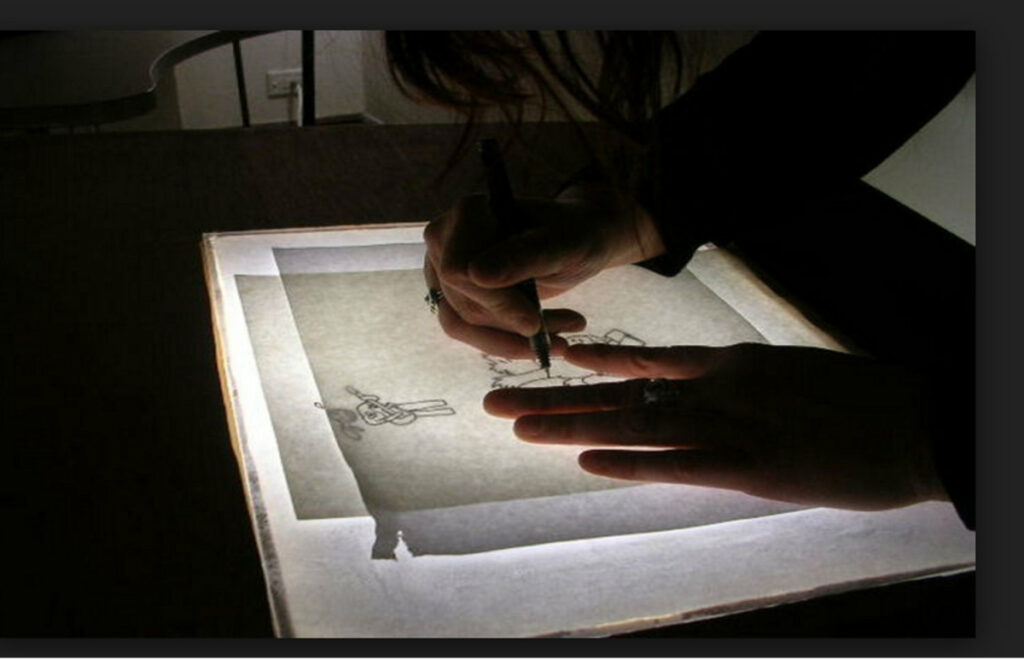
Filpbooks are a traditional (non-digital) form of animation that is still fairly common today. A Flipbook is, “A series of illustrations of an animated scene bound together in sequence so that an illusion of movement can be imparted by flipping them rapidly.” As an animation student, my first flipbook assignment was to make a colored animation on a subject of my choice that was 90 frames long. To accomplish this assignment me and my peers were given lightboards, a useful tool for drawing movement between frames correctly. Essentially, light boards shine light up through papers so that you can clearly see images even when they are covered by one or two layers of paper. Lightboards often look like this:

After completing our flipbooks on paper, students digitized them using cameras and an application called Dragon Frame. Dragon Frame uses a camera connected to a computer to create animations. Each photo the camera takes becomes a seperate frame of the animation. Then, the application allows users to string the images together to make a digital animation that can be exported and shared as a video file. My digital flipbook can be viewed below:
Exquisite Corpse Flipbook
After gaining familiarity with flipbooks through our previous assignment, animation students were tasked with making another flipbook that could link to our peer’s. To begin our exquisite corpse assignment, each student chose a shape. Essentially, If you arranged all the animation students in a circle, the ending shape of the person to your left would be your starting shape. Likewise, your ending shape would be the starting shape of the person to your right. In this way, the end of each student’s animation connects to the start of another’s. My part of the collaboration is visible below:
Stop motion: Paper Cutout Animation
The definition of Stop-Motion Animation is, “a cinematographic technique whereby the camera is repeatedly stopped and started, for example, to give animated figures the impression of movement.” My first attempt at stop-motion animation was based off of one of my favorite animated TV shows, Attack on Titan. This project required 90 frames of animation made with paper cutouts, though my animation is a little longer. I encountered some trouble with this animation, like moving the pieces of paper I was working with without disturbing pieces that were meant to remain still. However, I learned from the experience, and my next project turned out much smoother. You can view my first Stop Motion Animation project below:
Stop Motion: Object Animation
Our class’s second stop-motion assignment differed from the first because we were meant to use 3D objects instead of more 2D paper pieces. Because my last project turned out quite jittery due to the large amount of moving parts, I decided to do something simpler for this assignment. Essentially, I learned that the fewer moving parts, the smoother the animation tends to be. I like the way this project turned out, I think that the stop motion makes the clip move uniquely in a way that live-action film could not accomplish. My animation is visible below:


