Introduction
For our Conceptual Project, we were challenged with the question,
“How can I use unconventional forms to express myself?”
This unit, we created a variety of projects such as poetry, music, art, animations, films, and web production. With these creations, we discovered how to creatively express ourselves and the stories inside us. Through access to professional equipment and applications, we began developing our own technical communication skills that assisted us in creating these projects. For example, we learned to use DSLR Cameras, Tascam Audio Recorders, Pro Tools, WordPress, and an abundance of Adobe applications including Adobe Photoshop, Adobe Animate, Adobe Premiere Pro, Adobe After Effects, and Adobe Audition.
Being a Freestyle student, I value the rare and unique opportunity we get to have access to professional equipment. It’s really interesting to be able to get a preview into the professional industry in high school. I’ve enjoyed having almost total creative freedom to create things I am passionate about in Digital Media with equipment available to anyone, no matter their background. I’ve also valued being able to create and express stories in English and learning how to tell a message, as that is in important in creating projects for audiences.
Haiku
In English, we were challenged with writing haiku poems that related to a given concept statement. A haiku poem is a poem that has 5 syllables in the first line, 7 in the second line, and 5 in the final line. We also made references to seasons and our concept statement through imagery or figurative language. My concept statement was:
“I am exploring the feeling of contempt through being the sole voice of reason.”
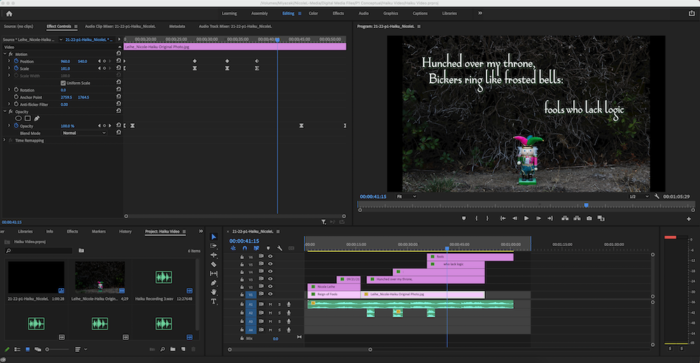
In Digital Media, we learned to use Adobe Premiere Pro in order to create short Haiku Videos. We learned to fade in and create keyframes with text and images in order to be creative with our Haiku Videos.
Poetry
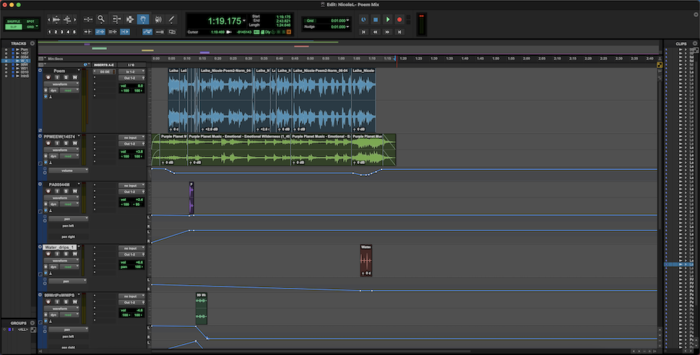
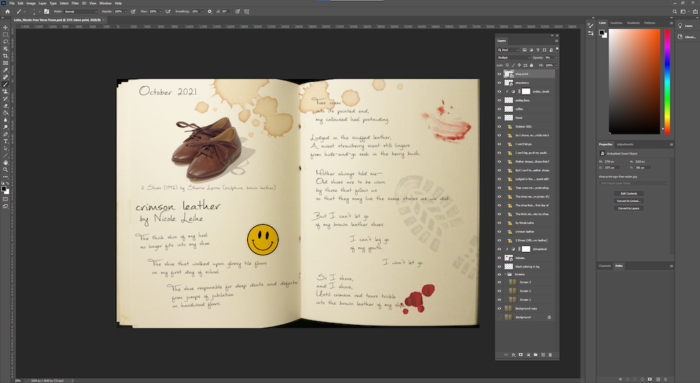
To finish our poetry unit, we learned how to incorporate different styles of figurative language and poetic lineation in order to create our own Free Verse Poems. I chose to tell a story with an Ekphrastic poem, a poem based upon a piece of artwork such as a painting or sculpture. Our poetry project was integrated into Digital Media as well, where we brought our writing to life. Using Photoshop, we created visuals for our poem. After recording our poems ourselves, we also learned how to use Pro Tools in order to edit audio. Through each process of creating our free verse poem in both English and Digital Media, we were able to bring our stories to life.
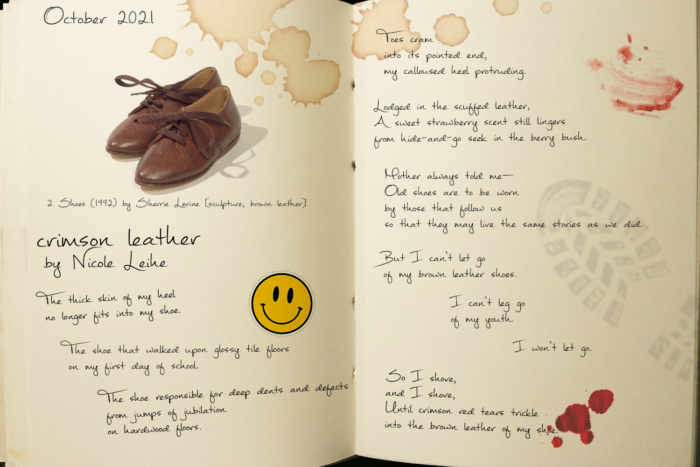
“Crimson Leather” is a free verse poem about the struggles of growing up and moving forward from your past. It reflects common themes of acceptance and letting go of one’s youth. The speaker in this poem, a young child, has grown out of their signature pair of shoes and is having trouble letting go of them. They are advised to sell them and pass them on to other children who may fit into them, but the child remains attached to their childhood memories associated with these shoes and continues to attempt to “live in the past”. In the first line, I use imagery with the line “The thick skin of my heel” in order to hook the audience’s attention immediately with something odd, that you typically wouldn’t see in a poem often. I also use similar grotesque imagery in the 4th stanza. With this imagery, an audience may be able to recognize the uncomfortable feeling and cringe, understanding just how terribly suited these shoes are. In the final stanza, I use metaphor and imagery to compare drops of blood to “crimson red tears”. This poetic technique demonstrates the juxtaposition of such a gory substance next to a seemingly innocent shoe. My metaphor also helps to emphasize a tone shift between the final stanza and the stanzas before it. In the previous stanzas, there is a somewhat reflective and sorrowful tone towards their shoes. However, the final stanza shifts into a more determined and aggressive tone, as the child refuses to let go of it. I included phrases of alliteration in order to bring a playful mood to the lines that describe fun childhood memories. I put end stops after lines that purposefully repeat in the poem, such as “The shoe-” and “I can’t let go of-” in order to insert moments of silence that give the reader a moment to truly take in the impact and gravity of those lines. Overall, the pattern of objective correlative with the speaker’s pair of shoes helps evoke emotions of nostalgia and grief. An audience will likely be able to relate, as this phase of reluctance is one that many people experience during their childhood. During peer review, my readers enjoyed the imagery in my poem, especially in the final lines. However, they suggested that I play with the formation of my stanzas, rather than aligning them all to the left. By singling out a few lines, I was able to manually place a larger impact and emphasis on those phrases. The offset of lines also represents the speaker’s thoughts trailing off and building upon one another. I also adjusted and added additional lines of imagery in order to improve my readers’ experience and understanding of what I am trying to communicate in this poem. I tried to emulate the dark/aggressive tone shift I encountered in “Bright Dead Things” by Ada Limon because as a reader, the sudden tone shift felt really invigorating and it brought me pleasure when I read it for the first time.
I valued being able to produce my poetry with both images and audio, as it allowed for what I had envisioned when writing it to spring to life. I also valued gaining new skills in using applications such as Pro Tools which can be helpful in future projects. Overall, I’m really proud of how I was able to visually express my poem creatively in a way that audiences could relate to. In fact, when my artwork was being displayed at downtown Los Altos, someone who had seen my poem told me of their own anecdote that allowed them to relate to and resonate with my poem.
Photoshop Blend Mode Editing
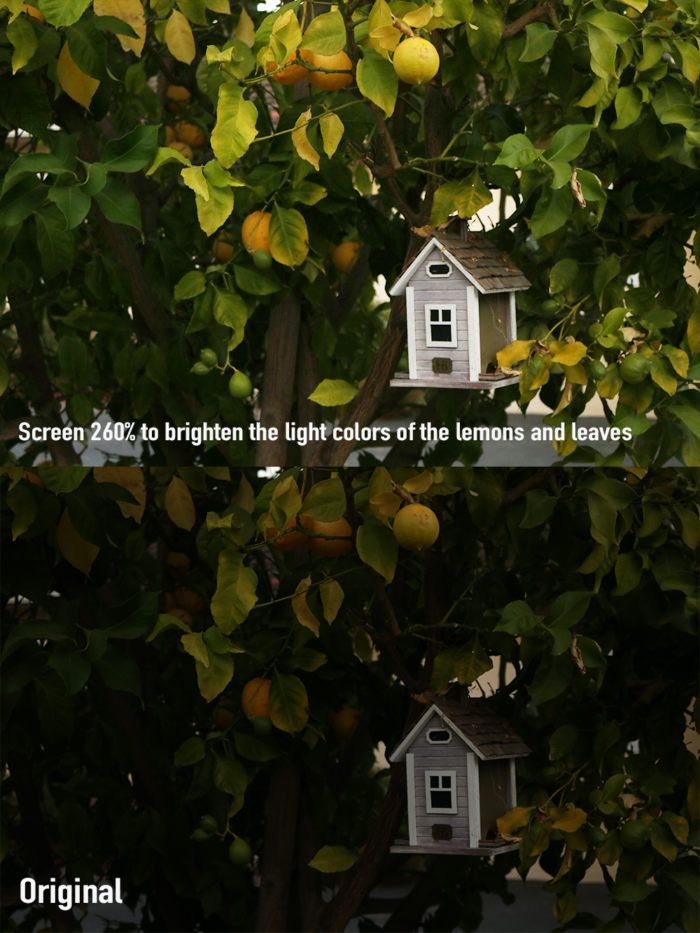
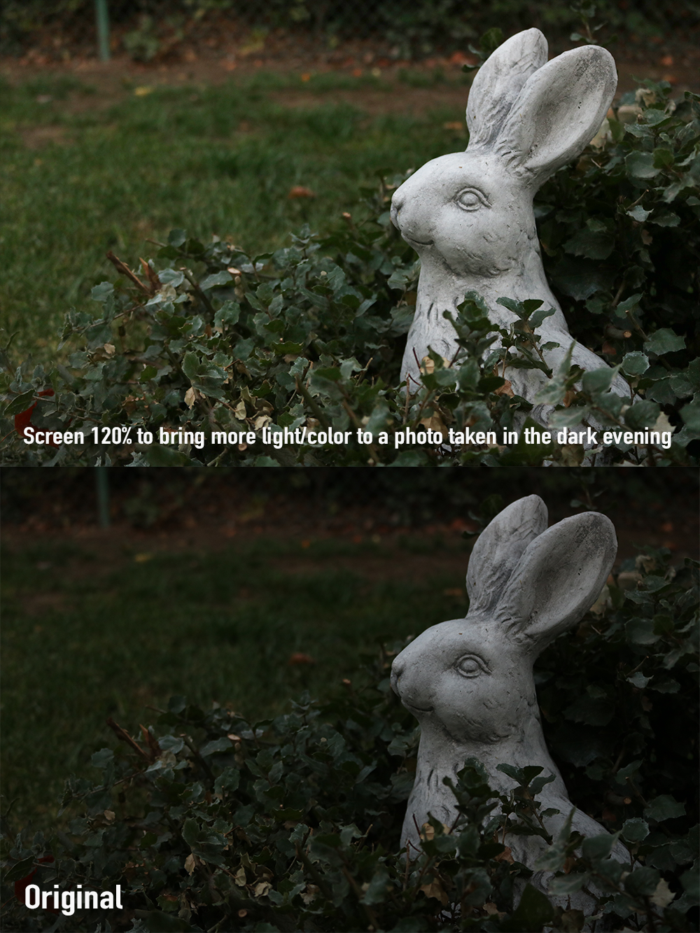
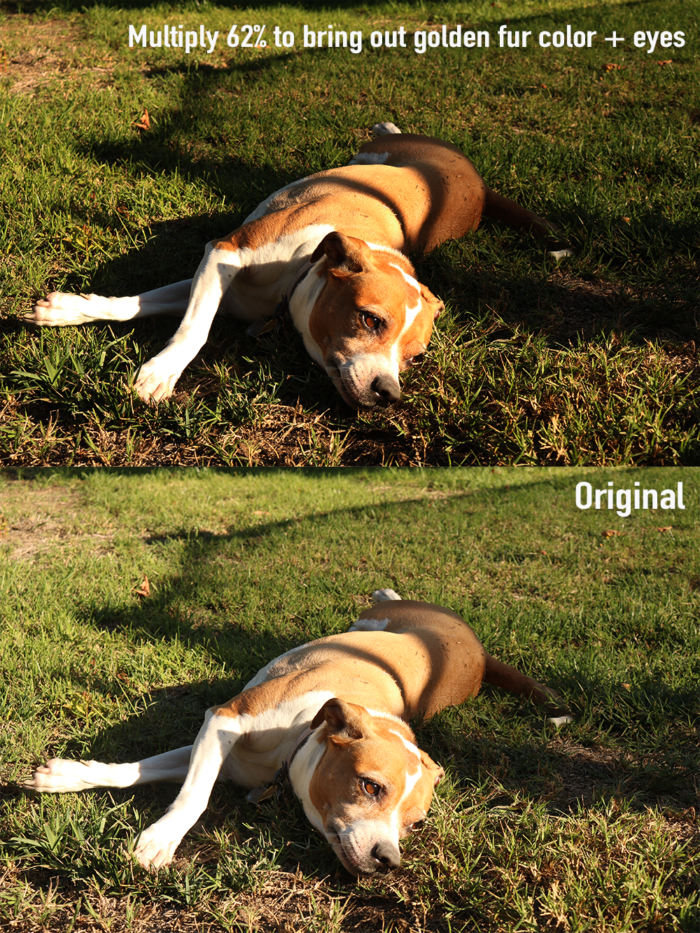
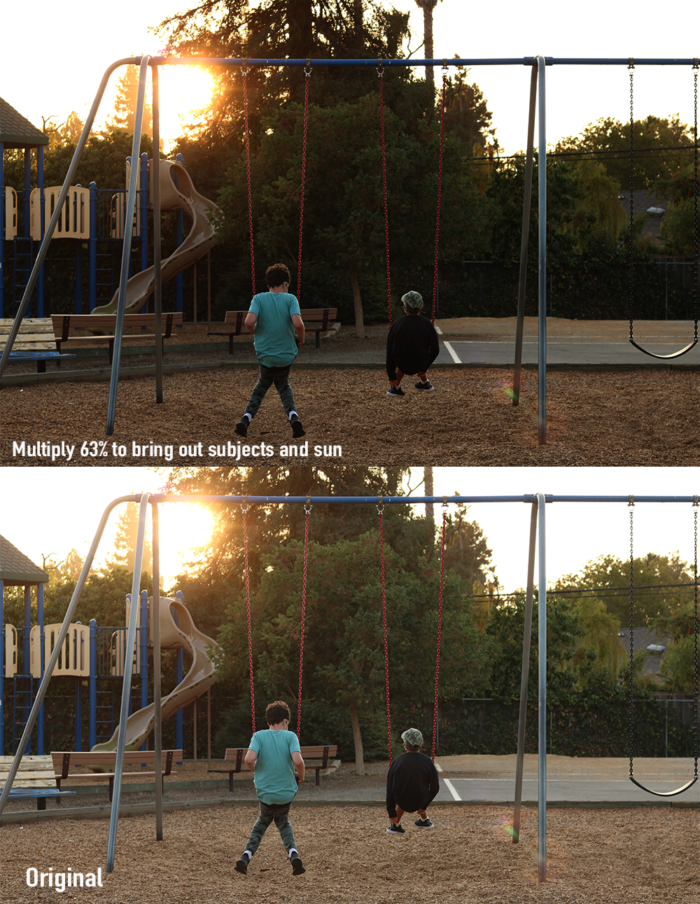
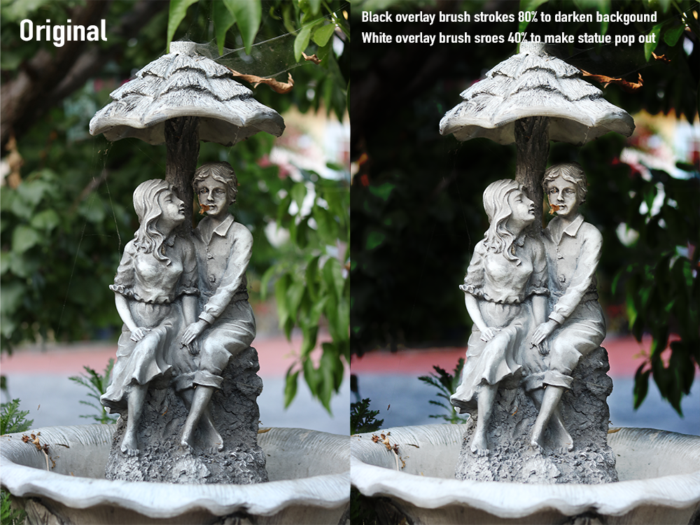
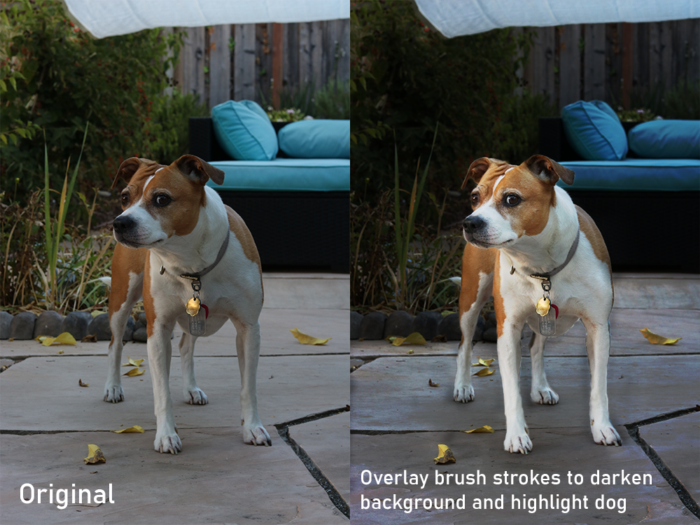
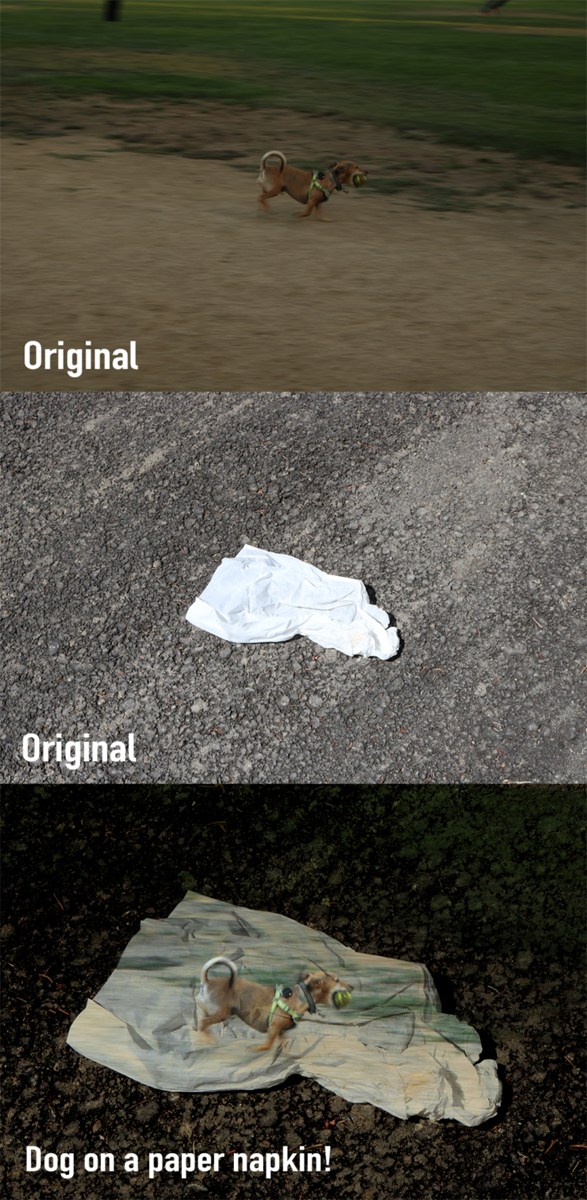
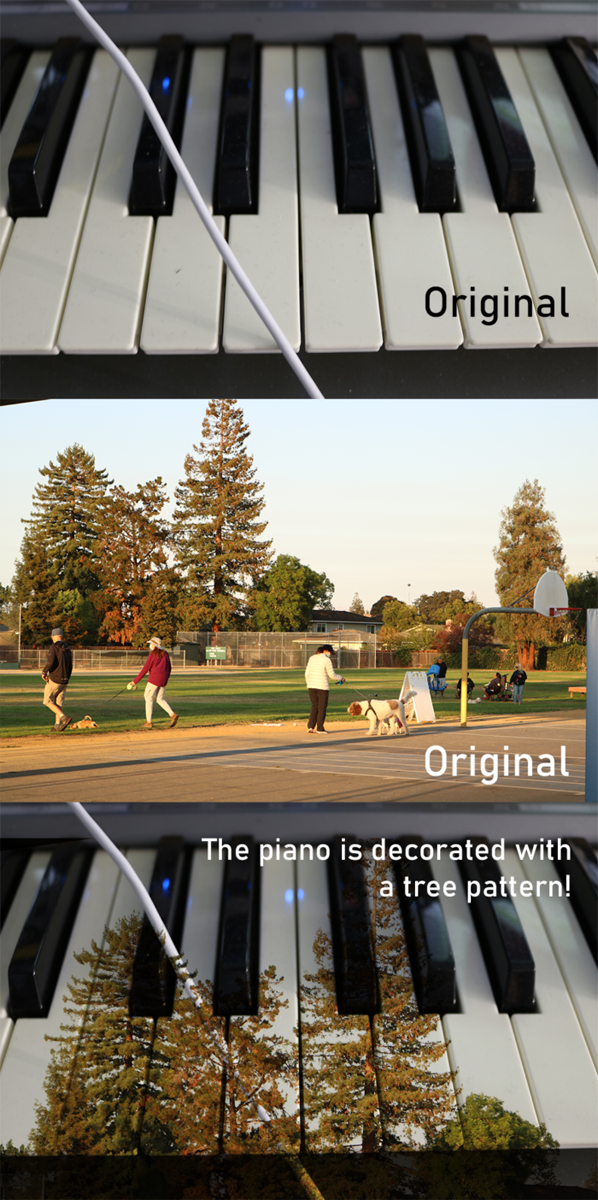
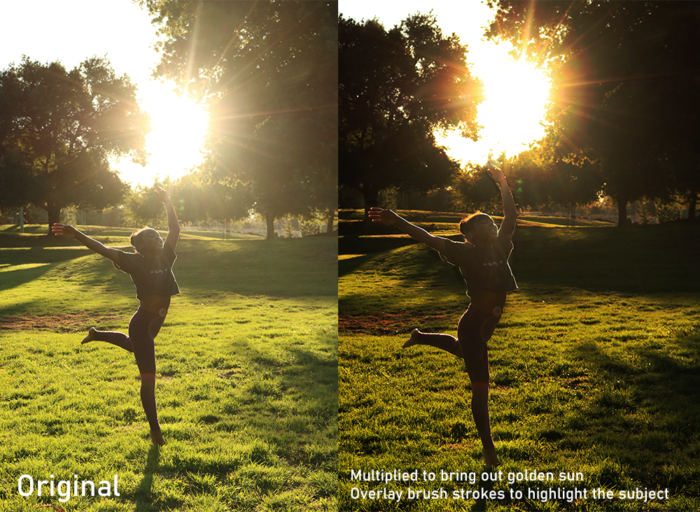
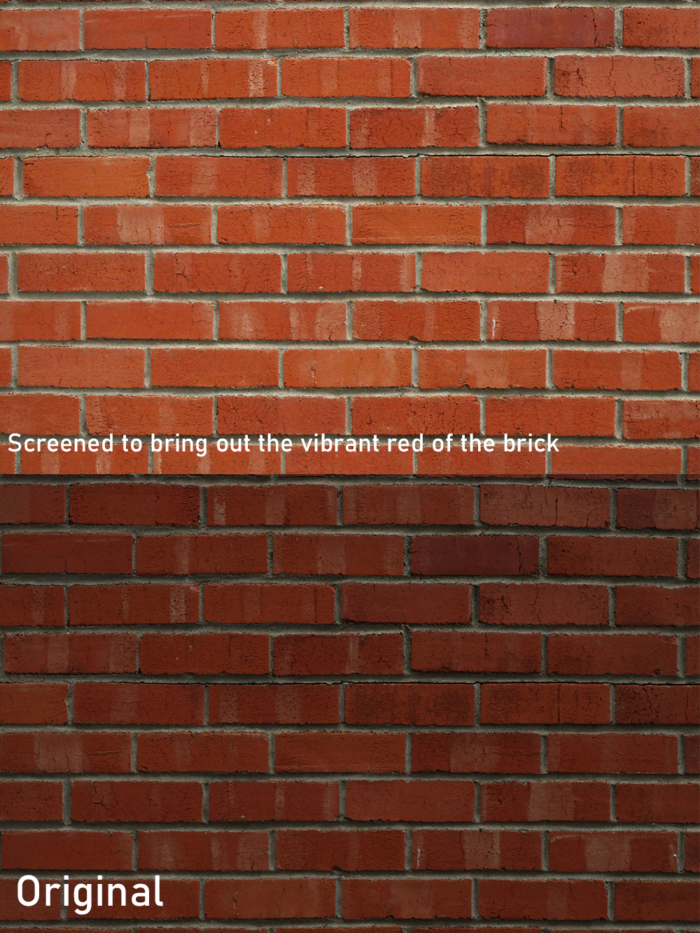
After learning the basics of Adobe Photoshop, we explored and learned how to use different blend modes. Blend modes are specific settings in Photoshop that can be used to adjust the lighting or colors of a photo. By using different blend modes, you can establish moods for your photos, highlight important subjects, or even combine photos together! They are some of the most important features to use in Photoshop when professionally editing photos.
I think using Photoshop Blend Modes is really useful and allows for a lot of flexibility in presenting photos outside of simply just taking them. They give you more opportunity to be creative and create intended moods/effects. I valued that any photo could be improved by using Photoshop Blend Modes and that when you juxtaposed an original and edited photo there was always a difference that was really appealing to the eye.


Animation
So far, I’ve really enjoyed my experience as an Animation student so far. I’ve been able to develop my digital art skills as well as discover new ways to communicate meaning through art. Additionally, being an Animation student has helped me to develop more time management skills in order to manage such large projects. I value having almost unlimited freedom in deciding how to tell my stories through a variety of animation techniques including flipbooks, stopmotion, and more. I also value that we are able to access professional applications such as DragonFrame and Adobe Photoshop in order to produce our animations.
Zoetrope
Our first project of the year was the Zoetrope Animation. In order to create this animation, we drew 16 frames of movement along a long strip of paper, and spun it in a zoetrope. A zoetrope is a an early form of animation technology shaped like a cylinder with vertical slits inside. By placing our strip of paper inside the zoetrope, we were able to see the animation move.
Phenakistoscope Wheel
Our next project was the Phenakistoscope Wheel. This animation was drawn on a piece of paper in the shape of a circle that had short slits at the edges. We drew sequential movement on the edges of the circle as well as on the inner circle. In order to view the full animation, the wheel was spun around using Adobe Photoshop‘s Timeline feature.
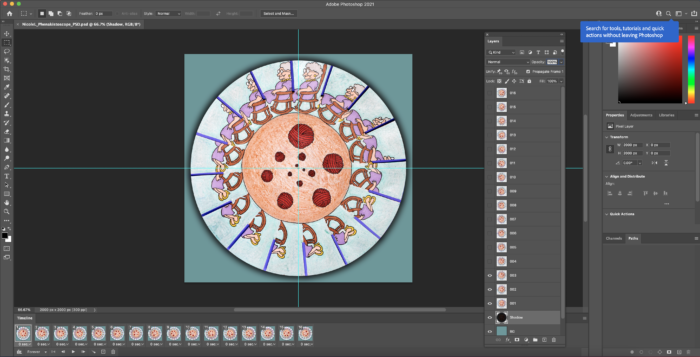
In order to animate one singular image of our Phenakistoscope drawing, we used Photoshop‘s Timeline and Layers feature. The image of the wheel was duplicated 16 times into 16 layers. One by one, we rotated each layer by a little bit so the following frame would be at the top. To put all the layers into one smooth video, the layers were inserted in chronological order into each frame in the Timeline at the bottom of the screen.
flipbooks
Our next project was the flipbook! This animation was created by drawing 90 frames of movement on 90 small pieces of paper. Our drawings were drawn on the right-hand side of the paper so that the animation could be clearly viewed when we flipped through the small book. In order to bring the animation to life, we learned how to use DragonFrame in order to take photos of every frame in our flipbook and animate it into one video.
Our second flipbook was the Exquisite Corpse Flipbook Animation. This animation combined 60 frames of animation from each Animation Student in order to create one long animation. In order to create smooth transitions, each animation began with the same shape that the animation before them ended with and ended with the same shape the following animation started with. Similar to our first flipbook, we used DragonFrame to bring all frames into one video.
Direct Technique Animations
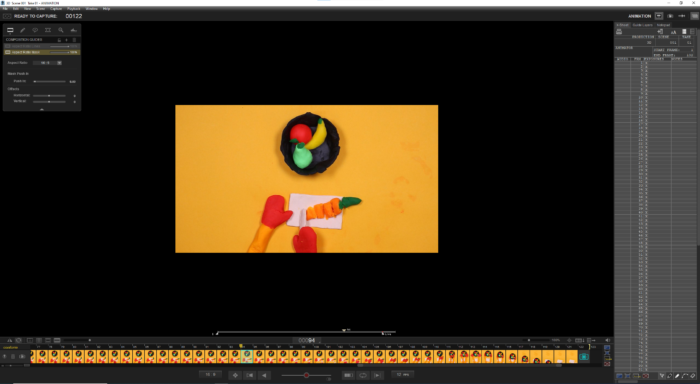
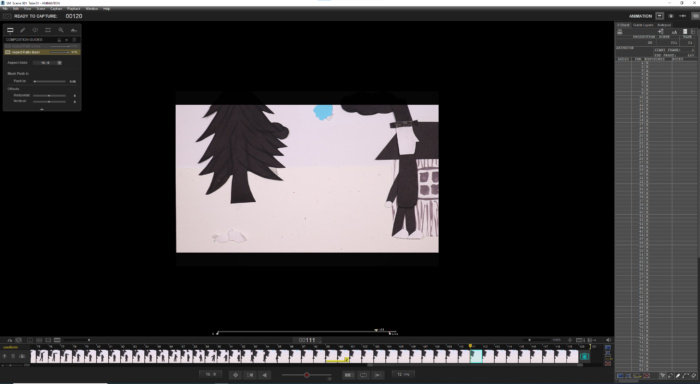
Transitioning out of animating hand-drawn art, we created our Stop Motion Paper Cutout Animation. In order to create this animation, we relied on DragonFrame and our DSLR Cameras to capture live feed. The two pieces of equipment helped us to capture 90 different images(frames) which, together, created a short animation. Using paper cutouts, we were able to adjust movements of the paper in real time and determine how much adjustment was needed using the Onion Skin feature in DragonFrame.
Our second Direct Technique Animation was the Stop Motion Object Animation. This was almost identical to the Paper Cutout Animation in which we used the same setup of DragonFrame and DSLR Cameras. However, rather than capturing and animating 2D paper cutouts, we were able to dive into the 3D world and use physical, dimensional objects. We were able to use a variety of objects such as clay, figurines, and more.