Introduction
The Zenith is our last big project at Freestyle Academy. It is a chance to use everything we have learned, developed, and obtained to create something. An opportunity to combine all of the incredible resources at Freestyle and put everything together to create an artwork of our choice and design. Many of us are going into college or other experiences and may shift towards different career paths. At the very least, there will never again be a Freestyle for us. So the Zenith is a project to put everything into so that we don’t leave anything behind.
For my Zenith project, I wanted to create one big, complete 3D animation. This meant I would brainstorm and draft a story, design an aesthetic, model my character and surroundings, animate all different properties, render everything, produce my own original sound, and edit everything together to the best of my ability. I wanted to do all the different aspects about making a short video so that I could put everything I learned into one project and see how far my creative vision could take me.
As a 3D animation, my Zenith was the culmination of everything I had learned in my Animation class so far, especially Autodesk Maya. I supplemented this with some research into Maya lighting while planning my story. I also put my video editing and sound production skills I had learned in Digital Media to use. Finally, for the actual story building process and how I told the story along the way, I used a lot of core concepts I had learned in English. It really was everything coming together to create this work.
Along the way, my most significant challenge was time. To complete my vision, I eventually had to render over 5,000 frames. Not only was the modeling, lighting, camerawork and animation very consuming, but each frame took over two minutes for the computer to render. As a result, from the get go I knew I would have to allot additional time for this project. Every morning I would come to freestyle early, and at the end of the day I would set up renders on multiple computers so they could finish overnight. Despite this extra time, I barely finished on time, and I was still collecting renders the day before my Zenith presentation. Honestly though, this process taught me a lot of time management skills. I am glad I put so much time and dedication into this project, and I wouldn’t have it any other way.
Story Development
The first thing I had to do was figure out the story I wanted to tell. I had a lot of ideas already floating in my head, and I chose the final concept based on how effectively I would be able to convey the important ideas with animation. I chose my idea of a former boxer who is experiencing severe trauma after being knocked out in the ring. To tell his story, I decided to start my animation with shots of him entering a boxing ring. These shots would accelerate in speed and intensity as he gets closer and closer to the ring, until the chaos peaks. Then I would cut to shots of him in the real world, lost and confused, wandering aimlessly through a city. Eventually, he would enter back into his dream, and as we reached the start of the fight he was entering we would discover the source of his torment: he was knocked out.
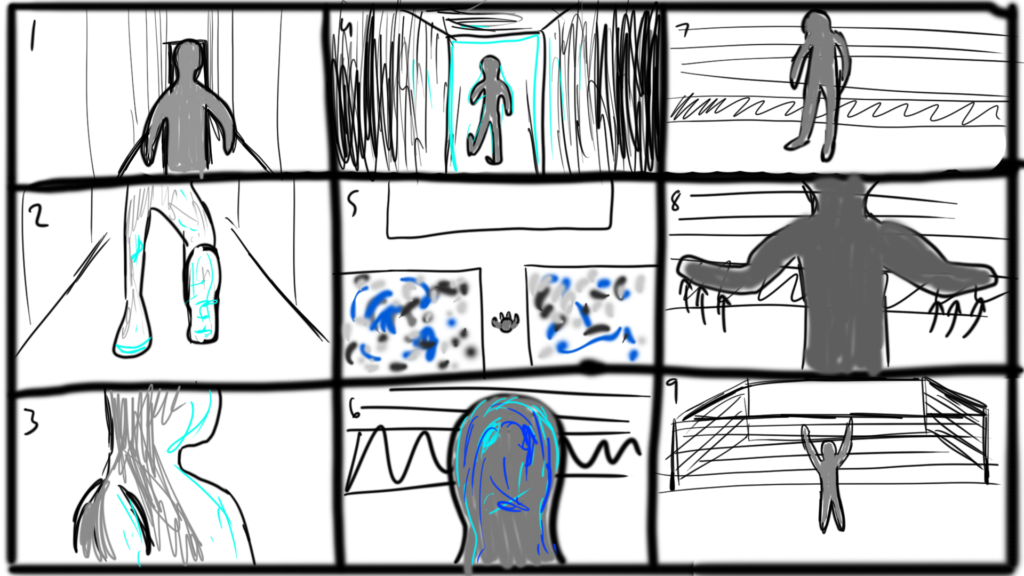
This was my storyboard for the first scene. Once I got going I kind of just continued creating the story in my head, and kept all the ideas in there.
Aesthetic/Design
Another important part of the planning process was choosing a visual style for my animation. I wanted my work do be really aesthetically pleasing and beautiful, while conveying the emotions essential to my story. As I began to play around with some lights I came up with a color scheme: blues, purples, and yellow within the dream, and black and white in real life. These colors made the dream chaotic and made the real life part seem solemn and enhance the feeling of being lost. Next, I circled back to my character plan, which was a simple gray man with a reflective body and no facial details. Originally, I planned to animate clothes on his body in 2D afterwards, but I dropped this idea in favor of a cleaner aesthetic. I designed my character to be really shiny and reflective so even though he had no expressions, his lighting and posture conveyed thorough emotions.
Modeling
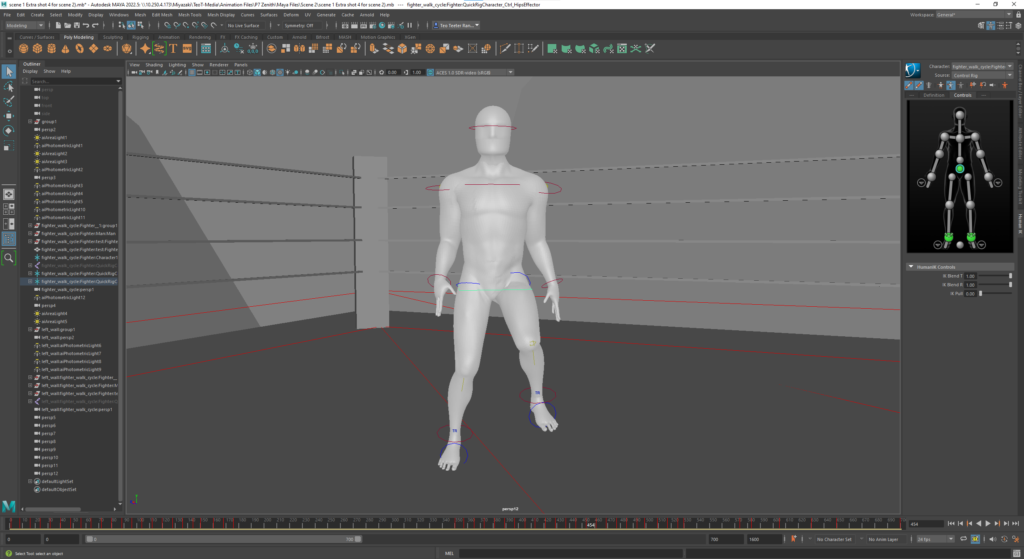
Once I had some structure for my ideas, it was time to model everything. For my character, I took a free 3D character model of the internet of a muscular man. In ZBrush, I removed his head, and modeled my simpler head in Maya. I sewed these together using Vertex Mode in Maya, so that the seam between my head and the character model was smooth without any shadows. Next I created a really shiny, reflective shiny Blinn node with a silver coloring and assigned it to my character. Then I rigged him, which I had to do several times so the arm movement and walked looked natural.

After modeling my character, I designed a tunnel, stadium, and boxing ring in Maya with simple shapes. I scaled everything to maintain consistent proportions, and then started modeling my scenes in the city. I modeled an alleyway and then found some garbage can and dumpster models for free on on TurboSquid and added these to my alley. Then I added building models from my narrative animation, and assigned these a shiny silver texture to fit my black and white aesthetic. Since the focus of this project was the lighting, I did not worry too much about the texturing of the models, and kept everything pretty simple to fit the visual style. This was helpful because it meant I could do this quickly and have a lot of time to spend on the animation, which I ended up needing.
Animation
The animation was by far the most time-consuming part of the process. (Surprise surprise). The animation process involved 3 parts: my characters movements and interactions with the environment; movement and rotation of the lights; and camerawork.
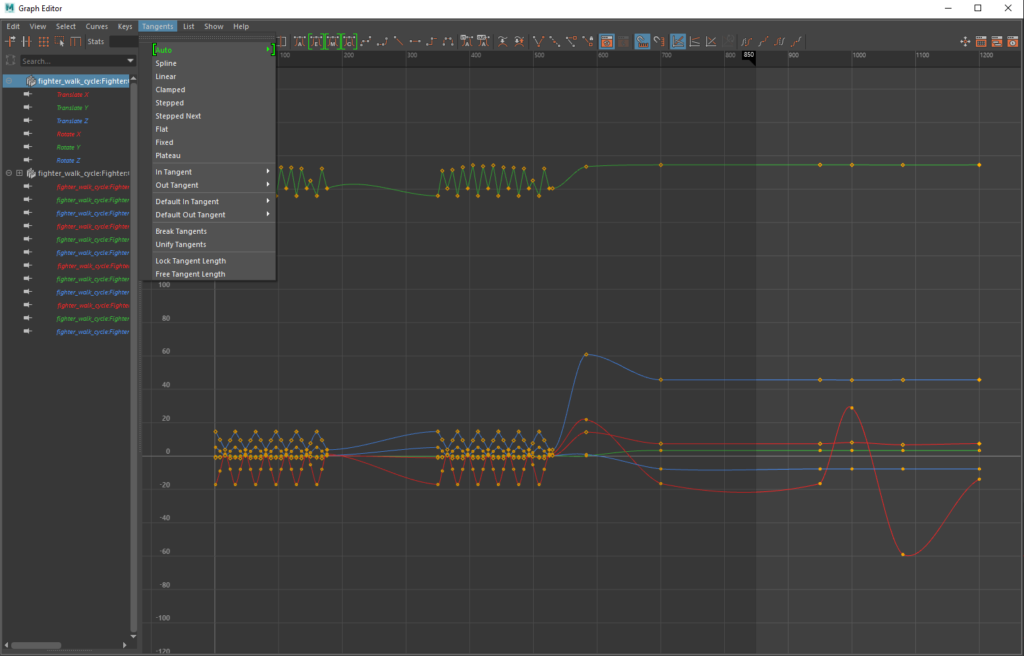
The animation of my character was the hardest part, because I had to manually key frame all of his movements. In order to save time, I recycled animations from scene to scene. The dream sequences all use the same walk cycle animation, which is meant to have a more purposeful and determined feel. Similarly, all of the walking in his real experience is the same animation, this time meant to convey a drunken, resigned, and confused emotion. All of the additional animations took a long time, such as when he turns around and when he falls down. Because of how extensive the time required to do these parts was, most of the animation only uses the walk cycles.
In order to make what would be repetitive shots a lot more interesting, I incorporated a lot of camera movement. To begin with, every single shot uses a different camera angle meant to create an interesting perspective or visual. Next, I added a lot of simple camera movements to make everything more immersive. A lot of these are just following the character, rotating around the scene, or just slowly going closer of further from the subject. However, these simple motions create a lot of emotion and are essential for the storytelling. I also found that sharp cuts between shots are a lot smoother if there is camera movement on either side.
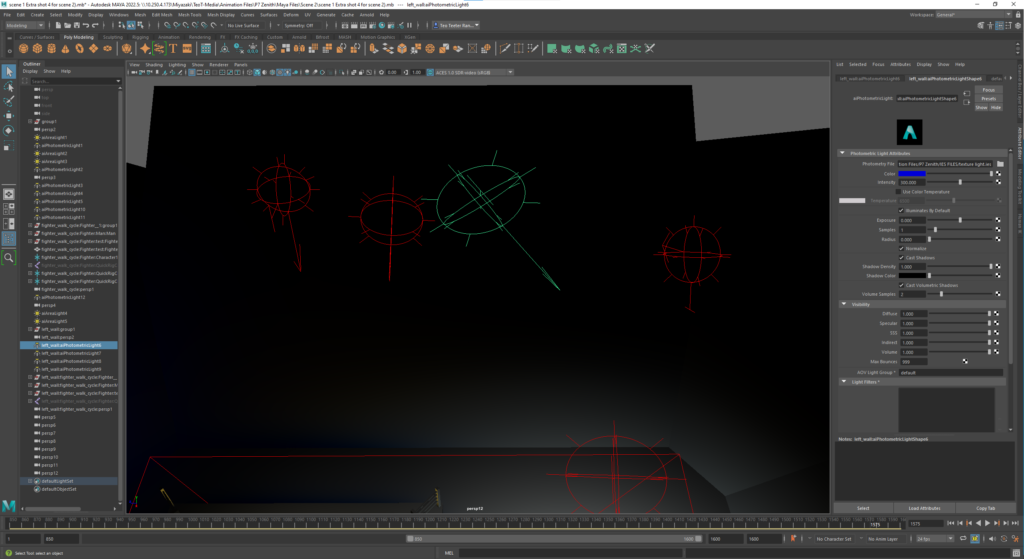
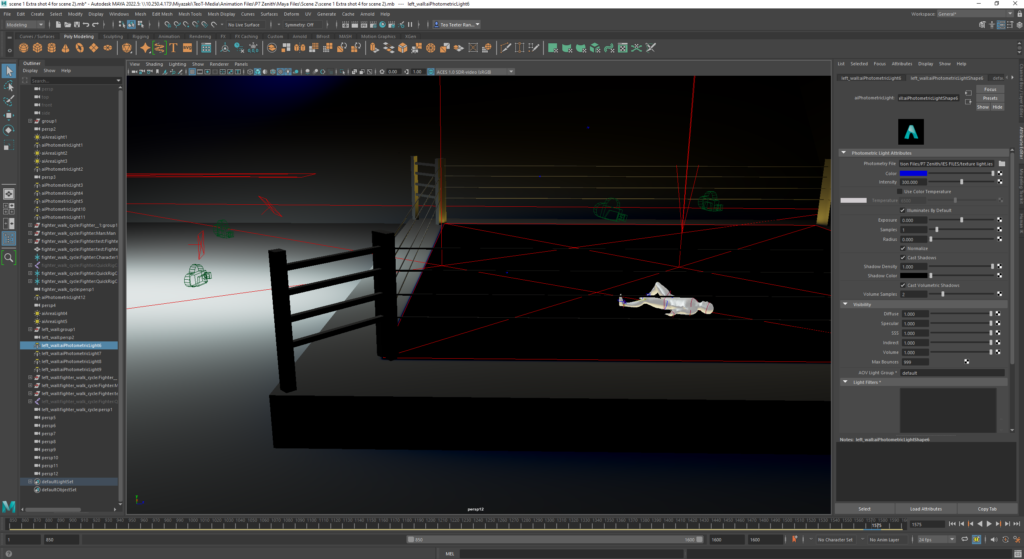
Finally, it was time for the focus of this project: lighting. I used a combination of area lights and photometric lights to create my visual. In addition, I animated all of the photometric lights to create different effects. In the dream sequences, these lights are shaking chaotically to evoke feelings of panic. In the real life, I used these in a more controlled way for flashing effects and high contrast shots. Unfortunately, to get what I wanted I had to spend so much time on lighting. Small differences in light placement and camera angles completely changed the shot, and since I was animating the camera I had to make sure the lights were in the right place for an aesthetic shot in all the different camera shots. This meant a ton of trial and error, where I would set up the camera and lights and then render the scene at various points to see how it looked, and then make small adjustments and render again.
Editing
Once I finished animating and started collecting my renders I began editing everything together. I did all of this in Adobe AfterEffects. I mostly used abrupt cuts and used most of my raw renders, putting them together and cutting off some frames to make smoother transitions. I also did some fade interpolations on parts I wanted to be slow and gradual. Finally, on some of the dream sequence shots I messed with the time stretch, exposure, and radial blur effects to create the visual and intensity I desired. Overall, my editing was pretty simple because my renders were mostly complete but it was fun to put everything together and work on all the transitions.
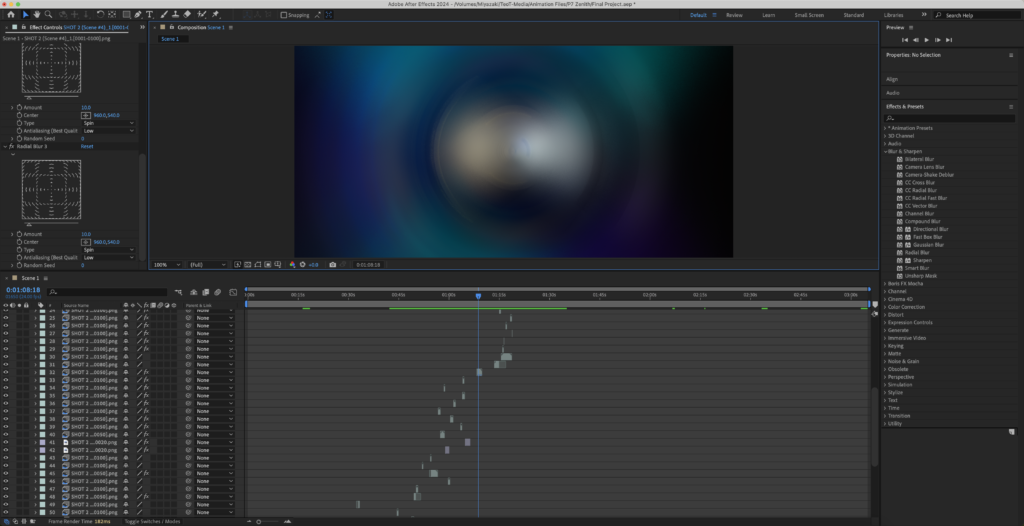
Adobe AfterEffects Interface for my project
Sound
Sound is 30-70% of a good film, depending on who you ask. I knew when I started working on this project that I was going to need to produce the sound for it, and it was something I was really excited about. For all of the production, I used Pro Tools Studio. I did most of my sound using the Vacuum MIDI tool. Using the Vacuum, I created different noises, and then recorded these using a MIDI Keyboard. Then I edited the notes to be more precise and match the timing of my video that I had edited in AfterEffects. I also added some EQ’s, Reverb, and Cut-Offs to clean up and alter the sound. Overall, I wanted a noise that was deep and haunting, while still being pleasant and somewhat musical. To this end, I mostly worked with bass and variations of white noise. Working on the sound might have been my favorite part and I was really happy with how it came out and added to my animation.
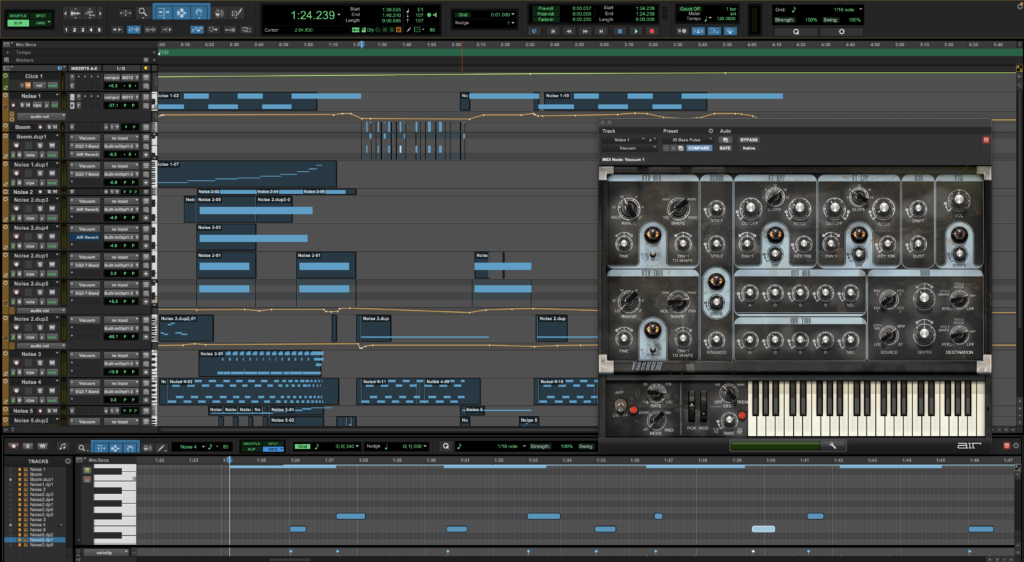
Pro Tools Interface for my project with Vacuum instrument and editing window open
Final Project
This is my final Zenith Project: Knock Out. I am really proud of what I accomplished and feel that everything really came together the way I wanted it too. It was a really profound experience to dedicate myself so completely to a creative project, and I am really glad that I did. This is definitely my favorite artwork that I’ve made as an artist so far, and I am excited to make my next favorite one in the future. I am so grateful for Freestyle Academy and all the amazing teachers, especially Mr. Cho, who have made this possible. It was so much fun to make and even more to be able to appreciate and enjoy the completed work.